This article has been excerpted from book "The Complete Visual C# Programmer's Guide" from the Authors of C# Corner.
Visual Studio .NET provides you the ability to deploy your applications easily. If you click File->Add Project->New Project, that brings up the template dialog in which you can create a deployment project. As you can see in Figure 26.5, you can choose from a few different types of deployment options.
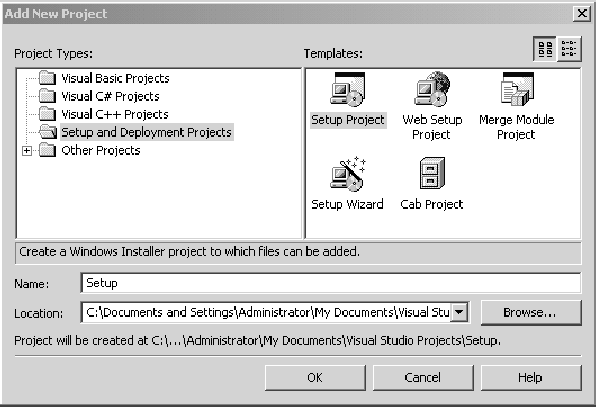
Figure 26.5: Deployment Project Wizard
Packages in Visual Studio .NET
You have two options for packaging your software in Visual Studio .NET: cabinet files and Windows Installer files.
Cabinet Files
Cabinet files (or .cab files) are compressed files of your existing files. A few restrictions apply to using .cab files. First of all, your .cab file can contain only one assembly, so a .cab is good if you are distributing a single DLL component or single executable program. Also a .cab file must have the same name as the assembly it is packaging. For example, our SmileyFace.dll cabinet file would have to be named SmileyFace.cab.
Microsoft Windows Installer Files
Microsoft Windows Installer files (or .msi files) are probably the preferred method of installation. The Windows Installer is the standard installer used for Microsoft Windows 2000, Me, and XP (as well as 98 and even 95). Windows Installer not only installs the application, but it keeps a record of everything it installs including file and registry information. You can also use Windows Installer to repair an application since Installer has a record of what it needs and does a check on what it is missing.
Merge Modules
Merge modules (or .msm files) are used in conjunction with .msi files to install components. The merge module contains all of the file and registry information needed to install your component and can be shared with different .msi files that also need to install the component. Merge modules are useful because they handle the versioning problem each time you create a new .msm file for later versions of your component. In general, you would create a merge module for installing a component that may be used for several different applications.
Setup Project
The setup project allows you to create an .msi file that will install all the necessary files onto a system for running your application. Once you've created your project, you'll need to add files to the project. If you right-click on the setup project and choose Add->File, you can add the files you need to deploy. See Figure 26.6.
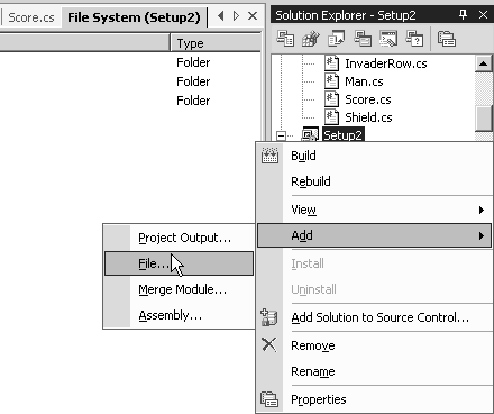
Figure 26.6: Adding Files to the Deployment Project
You also need to bring up the Configuration Manager (under Build->Configuration Manager) to tell it to compile your setup project by checking the Build button. See Figure 26.7.
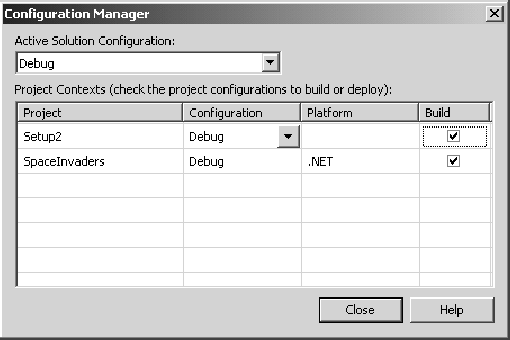
Figure 26.7: Configuration Manager for Setup Project
Once you have added the files you want to deploy (executable files and other assemblies, graphics files, readme files, Help files, even source code if you wish), choose Build Solution from the Build menu. This will create up to five files: Setup.exe, Setup2.msi, setup.ini, InstMsiA.exe, and InstMsiW.exe. These files are everything you need to deploy your application on another system. The files include the distributable runtime and all other dependencies. In other words, we can take the files created by the deployment build, burn them on a CD, bring them to a computer that doesn't have the .NET Framework installed, and run setup.exe to install the application with all the necessary files.
Using the Setup Wizard
The Setup Wizard steps you through creating a deployment package for all the permutations of deployment file options: .cab file, merge module, Windows setup, and Web setup. It makes the setup process even easier than shown in the previous example because it tells you exactly what to do. Figure 26.8 shows the screen from the Setup Wizard with all the deployment options.
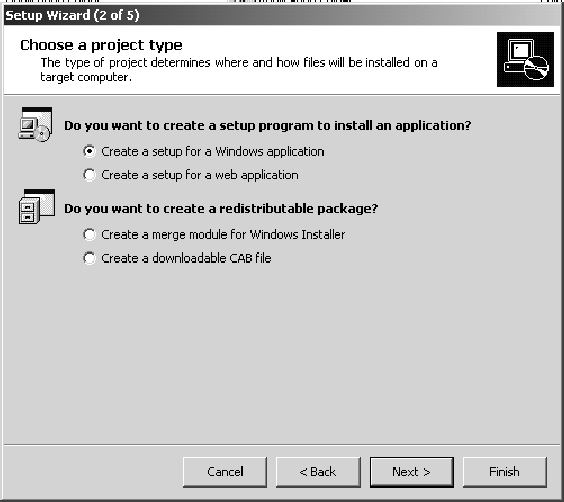
Figure 26.8: Setup Wizard for Choosing Project Type
The next screen (see Figure 26.9) allows us to include outputs from existing projects. This includes primary output such as the executable file or the component, documentation, source code, debug information files, Help files, localized assemblies, and even other setup files referenced in this project.
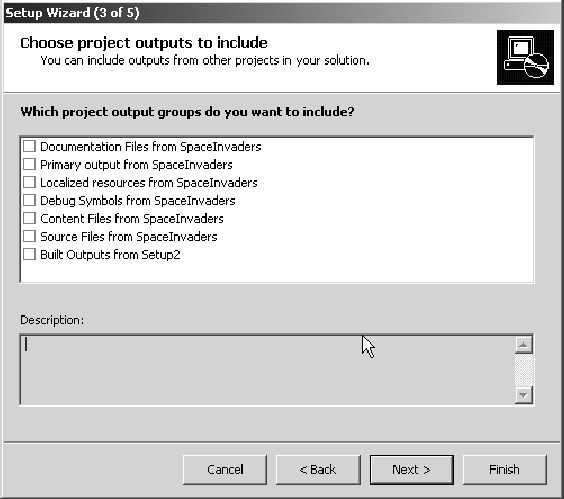
Figure 26.9: Setup Wizard for Choosing Project Output
Finally, we need to choose any additional miscellaneous files we are interested in for this project such as a readme file, graphic and sound files, or HTML files (see Figure 26.10). Don't worry if you forget to add files here, because you can always add them later in the Solution Explorer by rightclicking on the setup project and choosing Add->File.
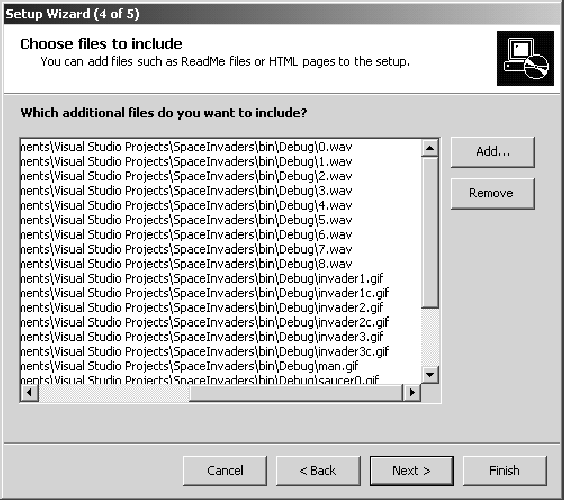
Figure 26.10: Setup Wizard for Choosing Additional Files
When you finish with the wizard, it creates a setup file in a separate setup directory. The setup directory contains the setup.exe and the .msi file to install. When you run setup.exe for the first time, the screen in Figure 26.11 appears with the name of the setup project shown in the title.
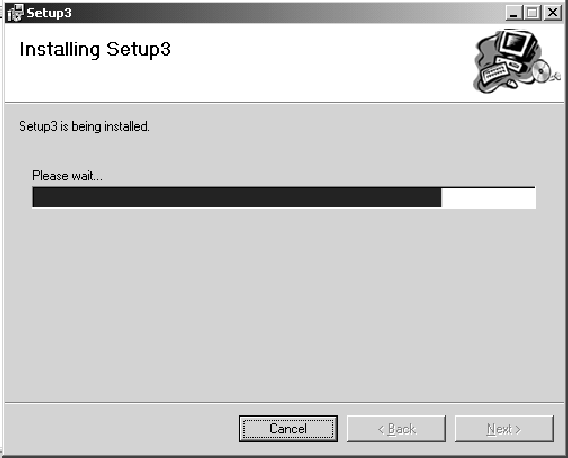
Figure 26.11: Setup Screen When Running Installation
Setup will install the project into the directory c:\program files\<name of your company>\SetupName\.
The File System View
The File System view shows you where your files will be installed. You can use this view to set up additional setup options, such as putting your program in the Start menu or on the desktop.
Putting Your File in the Start Menu
To place the program in the Start menu, first bring up the File System view by double-clicking a project output in the setup project in the Solution Explorer. See Figure 26.12.
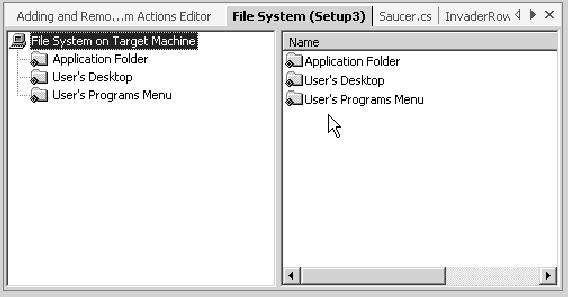
Figure 26.12: File System View in the Deployment Project
Now go into the User's Programs menu and right-click in the left-hand pane on the User's Programs menu to add a folder to the Programs menu. Name the folder after the name of your application. See Figure 26.13.
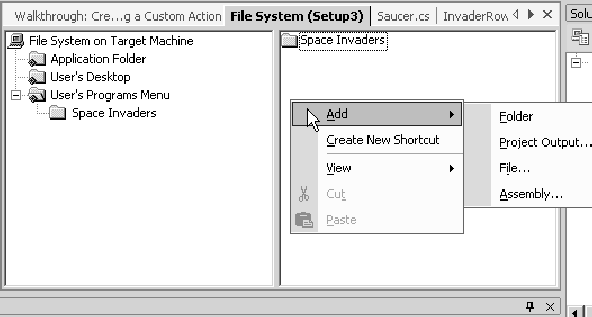
Figure 26.13: Adding a Folder to the Start Menu
Now we need to add a shortcut to the application inside the folder. Right-click in the right-hand pane and choose Create New Shortcut. See Figure 26.14.
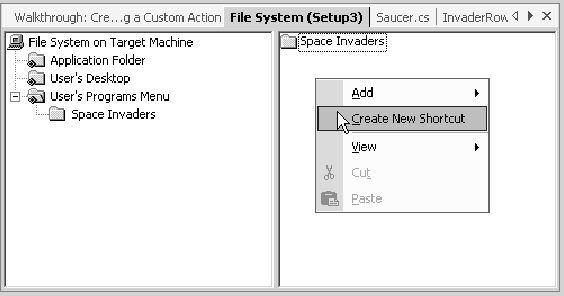
Figure 26.14: Creating the Shortcut in the Application Folder
This brings up the Select Item in Project dialog. Click all the way down into the project folder you just created. See Figure 26.15.
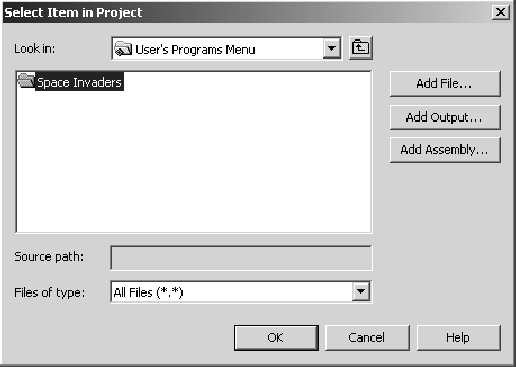
Figure 26.15: Adding a Shortcut in the User's Programs Folder
Double-click the Application folder to find the shortcut for the application. See Figure 26.16.
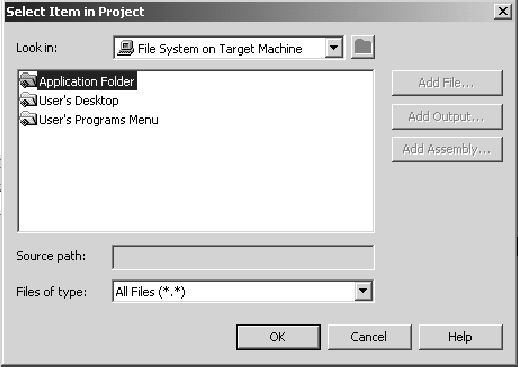
Figure 26.16: Adding a Shortcut from the Application Folder
Look for the application you want to install a shortcut for and click on the Add File button. See Figure 26.17.
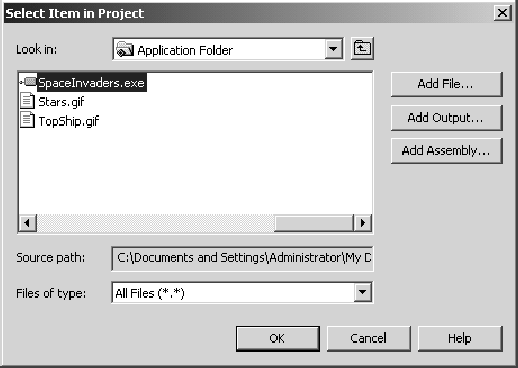
Figure 26.17: Finding the File for the Shortcut
When you are finished, the File System pane should look like the screenshot in Figure 26.18.
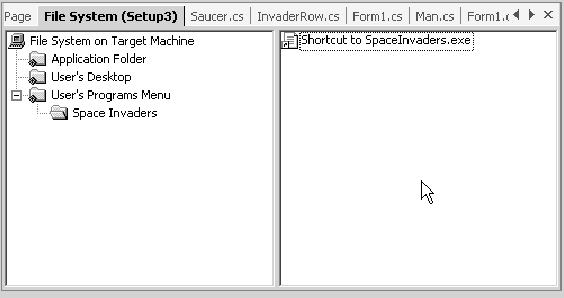
Figure 26.18: Shortcut in File System Window
In most cases you want to add to the Program menu the application's executable file as well as a readme file or any Help files and documentation associated with the application. After the deployment project has been compiled and setup has been run, the application will appear in the Programs menu as shown in Figure 26.19.

Figure 26.19: Application Appearing in the Start Menu
Conclusion
Hope this article would have helped you in understanding Deploying from Visual Studio .NET. See other articles on the website on .NET and C#.
 |
The Complete Visual C# Programmer's Guide covers most of the major components that make up C# and the .net environment. The book is geared toward the intermediate programmer, but contains enough material to satisfy the advanced developer. |