Localization is the process of enabling an application for particular country, region or group by adding local specific component and by translating strings displayed in UI to local language. Localizing application expands the reach of application to more number of people and group. For each local or culture you wish to target, you will need separate set of resources that match that specific local or culture.
There are few things your application should be able to adopt:
-
Language, alphabets and numerals.
-
Culture, postal code, currency, phone number, title, measures, name, time zone, date time, number format, etc.
The culture is presented by string that has language and region denoted. Like French includes below.
fr-BE French - Belgium
fr-CA French - Canada
fr-FR French - France
fr-LU French - Luxembourg
fr-MC French - Monaco
fr-CH French - Switzerland
Above is small description about localization, next we will see step by step approach to implement Localization in Silverlight. I am going to use English and Hindi resources as an example for this article.
-
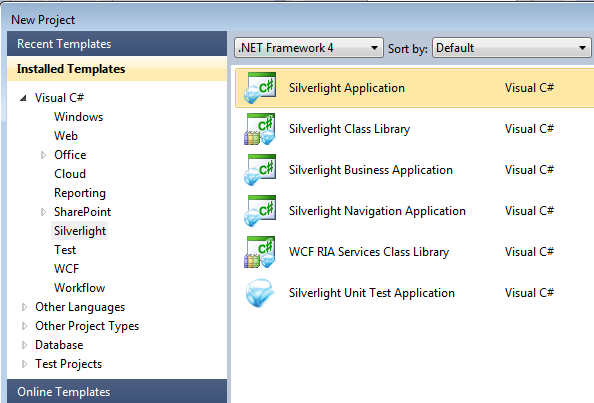
Create Silverlight ApplicationCreate Silverlight Application.

-
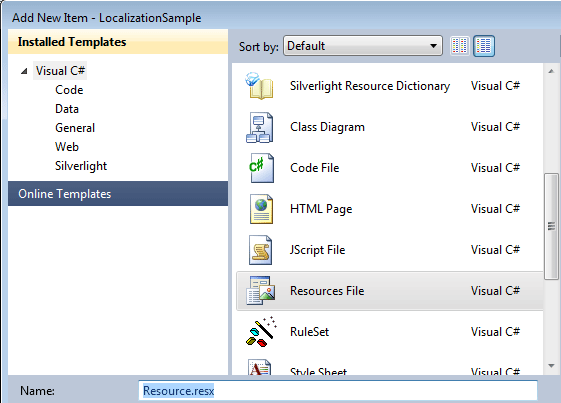
Add Resource fileTo add resource file right click on Silverlight project, select Add > New Item.

In Add New Item dialog box select "Resource File" template, give resource name "Resource.resx" and click on Add button.
-
Add resource stringTo add resource string in resource file, open resource file and type "CountryName" in Name column, "India" in value column and "Name of my country" in comments column. And set "Access Modifier" to public.

-
Add another resource
Add another resource file for Hindi based resources. Give the resource file name "Resource.hi-IN.resx". Note that the resource file name should be in "Resource.<local>.resx" format. Add resource string like we did in step #3.

-
Add resource key in MainPage.xaml
Register resource in MainPage.xaml to use localized resource string as static resource.
<Grid.Resources>
<local:Resource x:Key="ResourceString"></local:Resource>
</Grid.Resources>Bind resource key in TextBlock to display localized string in UI.
<StackPanel HorizontalAlignment="Center" Margin="10,10,10,10">
<TextBlock Text="{Binding CountryName, Source={StaticResource ResourceString}}"/>
</StackPanel>
At this point if you run this application you will get XamlParse exception.

The above exception is thrown due to a known issue of access modifier in resource class constructor. We did set the Access Modifier to "Public" but the resource class constructor is still "internal". To change this to "public", open Resource.Designer.cs and modify the constructor access modifier to "public". Every time you open resource designer and make some change, you have to again modify it to "public".
public Resource()
You may create resource wrapper class to avoid modifying constructor access modifier again and again.
-
Add supported culture in project file
To switch application between English and Hindi, you have to specify supported culture in Silverlight project file. In order to do this you have to unload Silverlight project from solution. Right click on Silverlight project and select "Unload Project". Again right click on the same project and select Edit project. Add below line of code inside "PropertyGroup" element.
<SupportedCultures>en-US;hi-IN</SupportedCultures>
Right click again on the Silverlight project and select "Reload Project".
-
Target culture in aspx page
To specify target local in your aspx page, open the aspx file and add below line of code inside Silverlight object.
<param name="uiculture" value="en-US"/>Run the application, you will see below in output.

Now change uiculture to "hi-IN" and run the application again. You can see output where the country name is displayed in Hindi.
<param name="uiculture" value="hi-IN"/>

In this article we have seen step by step implementation of localization in Silverlight. Please download attached sample application to see actual implementation.