Starting out
This is the first lesson in the book "What your mother forgot to tell you about C#" or "Learning C# the easy way".
Since this will be your first experience with C# there will be extensive instructions. In the later lessons these instructions will become pretty terse but you can always refer back here to refresh your memory. To use the book C# must be installed. If you followed the instructions in ReadmeFirst.doc C# will be installed on your computer.
This is the most important lesson in the book. It serves to introduce you to C#. Study it carefully since it will become the foundation upon which your progress in C# will be based. In later lessons much of what is touched on here will become clearer.
The goal of this article is to teach and explain C# in such a way so that when you have finished it you will be able to program in C#.
Open C#Tips.doc now. Having this file open makes it easy to look at when it is called for in a lesson.
Preliminaries for those who do not have dual screens.
Multiple Windows
In order to work with the C# code and the Word doc that has the instructions for the lesson at the same time two windows are required.
-
C# code and
-
Lesson Instructions.
The toolbar which is at the top of every window is used to maximize or restore a given window.
Toolbar Toolbar


Minimize 5 5 Maximize Minimize 5 5 Restore
Windows that are not maximized can be sized by "hooking onto" their edges. This allows viewing a portion of each window at the same time. Place the cursor in the title bar and drag a window to a different position. Experiment with these techniques until they become second nature.
Depressing Alt-Tab switches between windows.
Cut, Copy and Paste
These 4 keys, Z, X, C and V are used with the Ctrl key depressed. They are probably the most important keys available to you. They put text into the Windows clipboard where it remains until other text is placed there.
You must learn how to use them. Throughout the book you will be copying text from the lesson's Word Doc to the code section of the C# Program.
Their function is:
-
Z - undo - reverses the changes just made.
-
X - cut - removes selected text from current location and stores in clipboard.
-
C - copy - copies selected text from current location and stores in clipboard.
-
V - paste - pastes text stored in clipboard to the current location.
Text is selected when it is highlighted. To highlight text drag the cursor over the text.
 All the doc files for the book are in the LearningC#-Book folder.
Do the lessons in numerical order since each lesson builds on what was in the previous lesson. The instructions for this lesson are below.
Opening C#
To open C# use the Start button All Program. Scroll until you see
 Double-clicking will start C#.
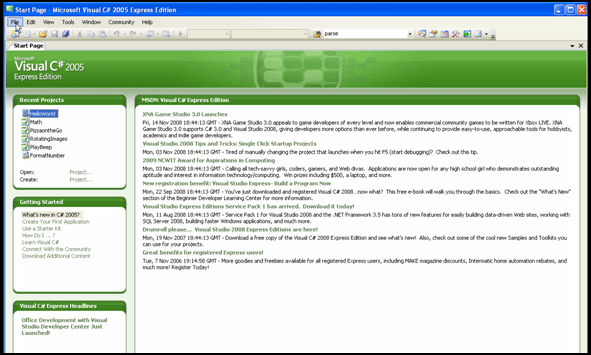
When C# loads you will see something like this. The Recent Projects will probably be empty since you have not yet created any Projects.
Click the File menu where the is located in the Picture below. Select New Project.
The New Project screen appears. In Visual Studio installed templates select Windows Application.
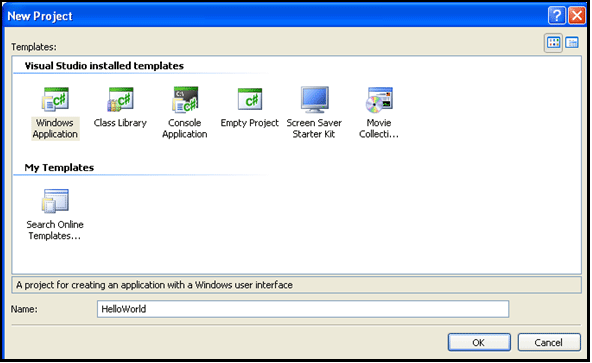
In Name: enter HelloWorld. No spaces are allowed but capital letters are. Click [OK]. After a short wait the screen below appears.
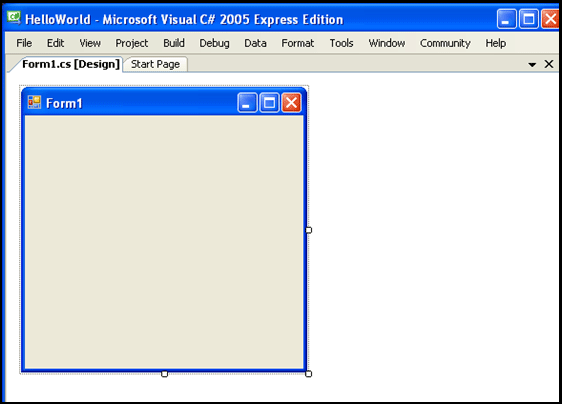
Before you go any further you must save your new project. It should be saved in the Lesson 1 Hello World\Student folder.
To start the save process click here......

The Close Solution screen appears. Click [Save]. You can also Discard or Cancel.
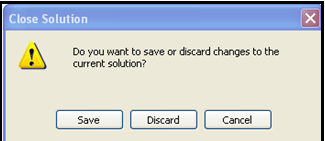
When you click [Save] the Save Project screen appears. Name: HelloWorld. If the name is not there or is misspelled enter HelloWorld.

[Browse] to the LearningC# -Book\Lesson 1 HelloWorld\Student folder.
Place a  in "Create directory for solution" and press [Enter]. The project will be saved in the Student folder.
Click [Save].
C# will close. You will be back in Windows.
 All your projects should be saved in the Student folder for the lesson you working on. The Location shown above is on the author's computer.
Now is a good time to take a  .
.
You will need to save a backup copy of your code.
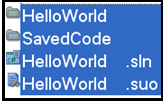
For this purpose create a new sub-folder which you name SavedCode. Create it while HelloWorld.sln is selected as shown below.

Copy the project files to this folder by following these three steps.
-
In the Student folder select everything by dragging your cursor over all the
files and folders. This is shown in the All selected column below.
-
When all are selected depress the ctrl key and click on the SavedCode folder.
Put the cursor in one selected file. Depress the right mouse button.
-
Move the cursor to the SavedCode folder. Release the right mouse button
selecting Copy here.
|
1.All selected |
2.Deselect SavedCode |
3.Copy to SavedCode |
|
|

|

|
The result is that the solution files shown in blue to the Deselect SavedCode column have been copied to the SavedCode folder. Get all of them or C# won't work.
To make sure the copy was successful go to the SavedCode folder and run HelloWorld.sln. If it runs you know the code in the SavedCode folder is a good copy.
 The purpose of this folder is to save good code so that when the code in a solution gets so clobbered that nothing happens and it is lost for good. You go to the solution in the SavedCode folder and copy it to the root folder of the Lesson.
Open HelloWorld.sln in the root folder. Not the one in the SavedCode folder.

With HelloWorld.sln open
Setup the C# interface and
Setup online Help.
Setup the C# interface.
Pull down the View menu. Select Toolbars and  .
.
This is the most commonly used Toolbar.

The toolbar is located at the top right. The toolbar......

In the Toolbar double-click the Solution Explorer button.

Solution Explorer 5 5Properties
5Toolbox.
Solution Explorer will now be visible. Click the  button to expand the display
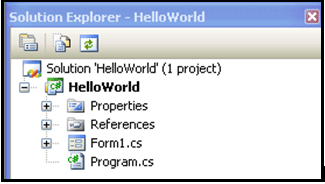
Expanded display
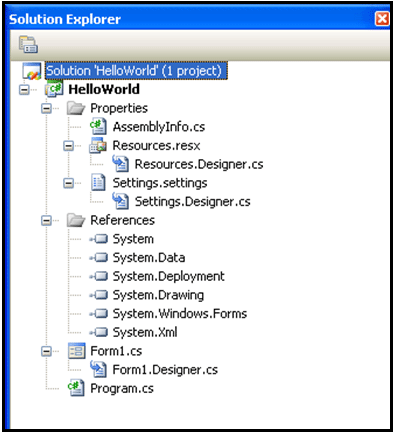
Explore all of the items to see their contents.
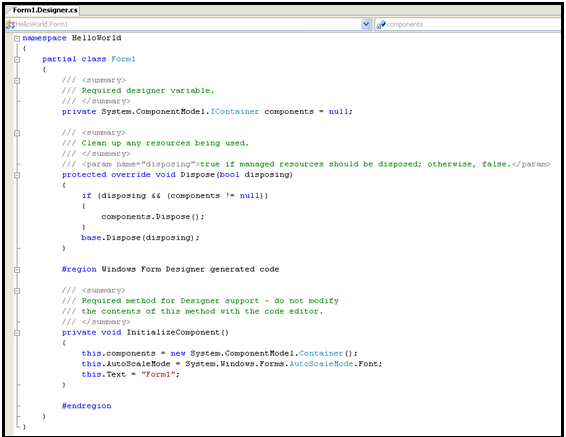
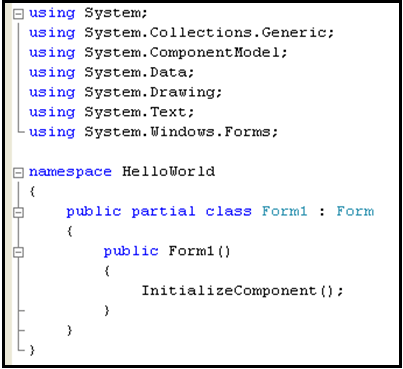
You should be aware of Form1.Designer.cs. It contains code generated by the compiler. Do not change anything in the Designer.cs. Your project may no longer build.
Picture of Form1.Designer.cs.
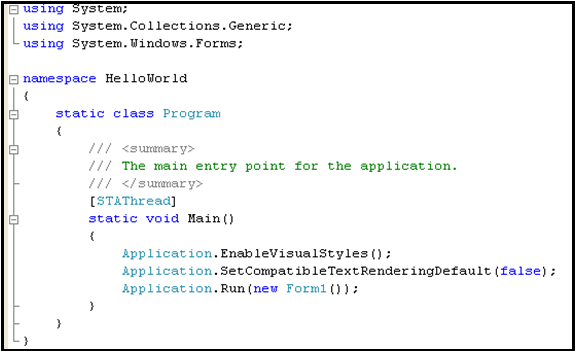
Program.cs contains code generated by the compiler. Do not change anything here because your project may no longer compile.
Picture of Program.cs.
Picture of References showings the Using System files.
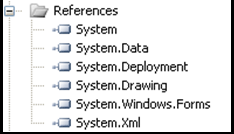
For more open C#Tips.doc and study System Files.
Solution Explorer is your main interface with C#.
Right-clicking on Form1.cs displays these selections. View Code and View Designer are discussed below.

View Designer. This is where controls are inserted. It is the graphical interface.
View Code. This is where code is inserted and edited.
For more open C#Tips.doc and study System Files.
There not much here yet. But as you move on through the project there will be more.
Before you can do anything you have to run build. To do this double-click Build in the menu. Or press the [F6] key, known as the Build key.
This appears
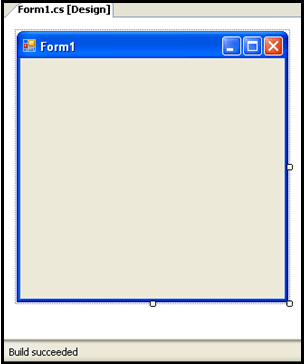
The status bar at the bottom of the screen reports Build succeeded. There will always be helpful information here so be aware of the status bar.
 Build creates the executable file ProgramName.exe. The exe file can be run on any computer even though that computer does not have C# installed. It is located in the two folders shown below. Copy it anywhere you want.
-
HelloWorld \bin\Debug folder and
-
HelloWorld \Bin\Release folder.
 Build also saves the solution. When you change or add code run Build to make certain that your project is error free.
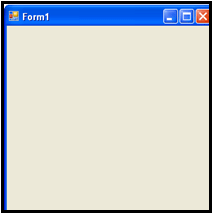
After you have completed the build run debug by pressing the F5 Key. This runs the program. Form1 will appear. There not much here yet but at least you know the project runs. Close the Form1 by clicking the close button
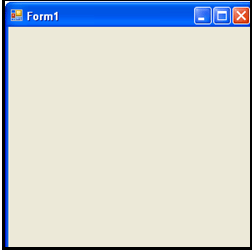
After running debug close the project.
Now is a good time to take  and save the code in the SavedCode folder.
Before reopening the project open  C#Tips.doc. Study Properties, Properties - Modes and Events. There is a lot in these subjects so study them carefully.
Reopen the project.
In Solution Explorer and double-click on Form1.cs which opens the Design View window.
In the Toolbar 
click the Toolbox button 5
The toolbox is used to place controls on the form.
At the top of the Toolbox click All Windows Forms. The toolbox will look like this.
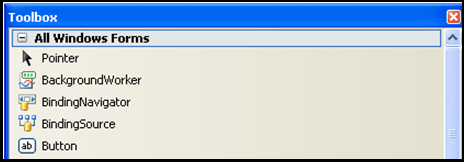
 Everything in the toolbox is a control. Open
 C#Tips.doc and study Form Controls.
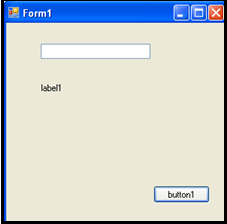
From the Toolbox drag a Button, a TextBox and a Label to the form and locate as shown below. When these controls have been dragged to the form close the Toolbox by clicking here....
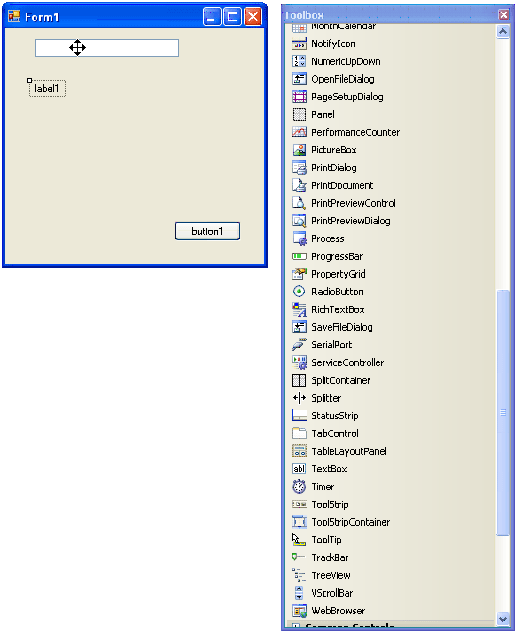
Use the move button to move the controls around the form placing them as shown above. While moving the controls alignment bars appear allowing you to align the controls. The Textbox and label are aligned using these bars. Drag the right edge of the Textbox to make it wider.
Dragging the cursor over multiple controls selects them and then they can be moved as a unit.
More below.
Do a Build-Debug. The project runs and looks like this. click here to close.
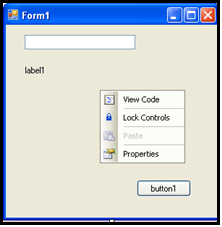
When the project is closed right-click on the form and select Properties.
The Properties window appears.
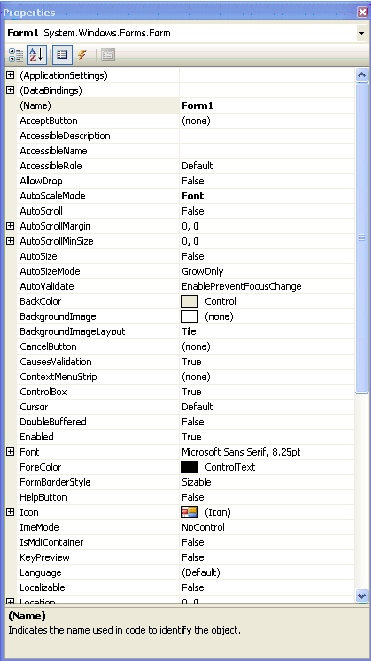
Click the Item for which you want to set properties. Make the settings shown below.
Properties (the *'s are used as reference for comments which are below).
|
Item |
Text |
Name |
Backcolor |
Font |
Icon** |
|
Form 1 |
Hello World * |
Default |
SpringGreen |
default |
Happyface |
|
textBox1 |
(leave empty) |
Default |
Default |
Below*** |
|
|
Label1 |
Click on the form. |
Default |
Default |
Default |
|
|
button1 |
E&xit **** |
btnExit |
Default |
Default |
|
**** The use of & in E&xit is a standard technique which allows the user to run the
control by depressing Alt-x.
*a space is OK. Default means no change is required.
**To select Happyface icon click here.....

This screen appears. Browse to the Images folder of the book. The available icon files will be shown.
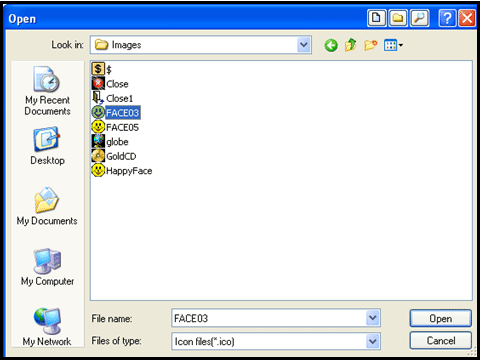
Select  and click [Open].
The title bar of the form reflects the change.

*** For textBox1 select the font Imprint MT Shadow, 15.75pt bold
To set the font do the following
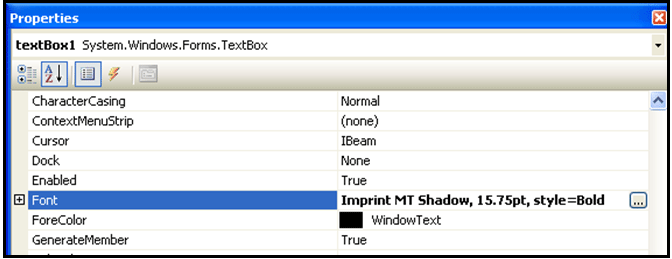
Select Font. Click here
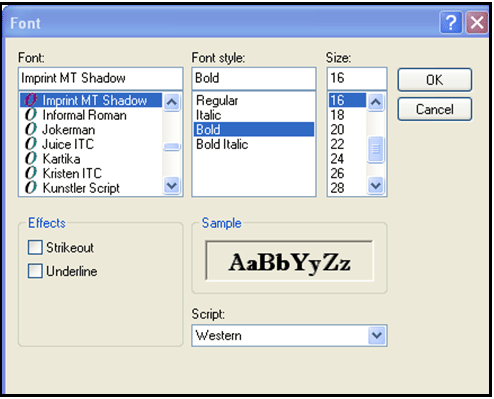
This appears. Scroll down to Imprint MT Shadow. Make selections shown below
then click [OK].
Properties reports 
The height of the textbox is automatically increased to handle the new font.
Set the Size Width of the textbox to 136.

Next change the Backcolor of Form1. In Properties BackColor click the down arrow.

In the Web tab scroll down to SpringGreen and press [Enter].
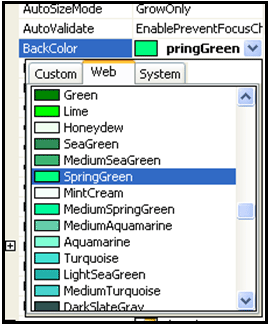
 As soon as a property is changed it will be reflected on the form.
When you are finished with properties the form will look like this.
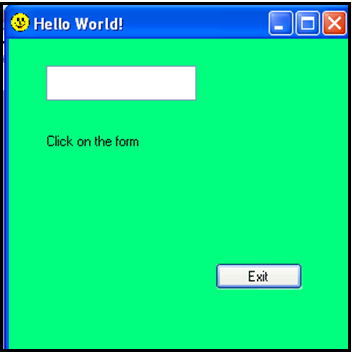
Create a click event for the button. Do this by double-clicking btnExit.
The event will immediately show up in the Code and Text Editing window. A picture of this is below.
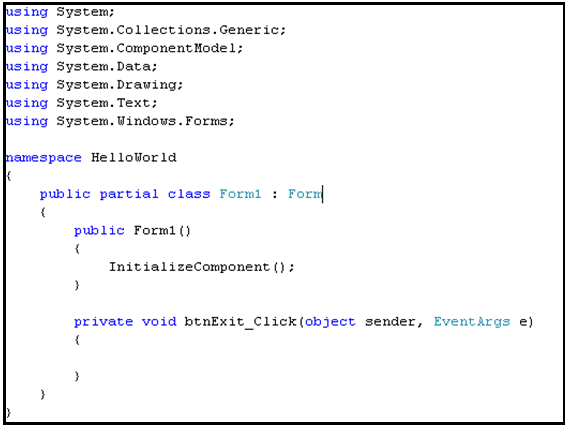
In the Code and Text Editing window place the cursor in the btnExit_Click event between the curley braces refers to the symbols { }.
Enter a c . As soon as you enter the c the Intellisense feature kicks in offering suggestions for completing the entry. Scroll down to Close.
Intellisense
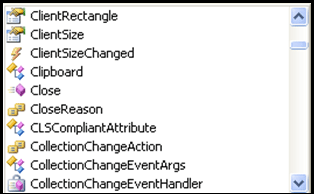
Press Enter and the entry Close is inserted into the code. Complete the Close entry
by adding ();. This is shown in the picture below.

Close(); is a line of code. Notice the terminating ; Every line of code must have a terminating ; or an error will occur.
Open Intellisense.doc. Also open
  C#Tips.doc look for Intellisense.
Intellisense is one of the features that make C# so outstanding. Spend some time to learn more about it.
Do a Build-Debug and the program runs displaying the Hello World project. Close the project by using alt-x which should work. If it doesn't work go back and check the code.
Now is a good time to take a  and save the code in the SavedCode folder.
Before reopening the project open C#Tips.doc. Study Properties, Properties - Modes and Events. These subjects were covered above but it makes sense to review them again.
Reopen the project. In View Designer open Properties.
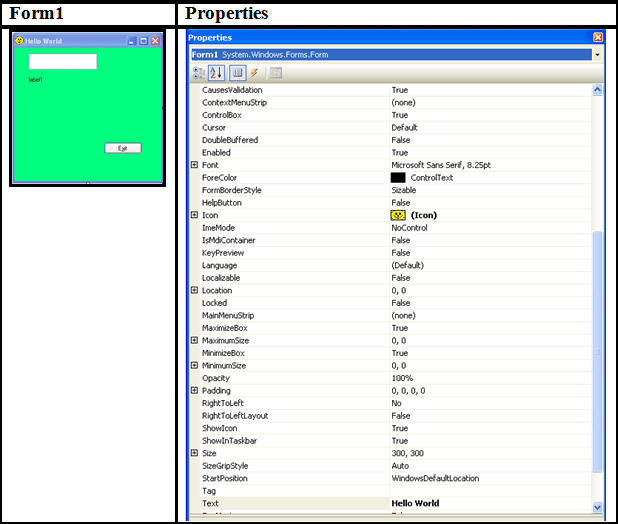
Form1 Properties
Create a Form1_Click event. Properties must be in the Events mode.

Clicking the Events button puts Properties in the Events mode.
The example below is for the Form1_Click event. With Properties in the Events mode the event is created by clicking to the right of the Form1 Click item.
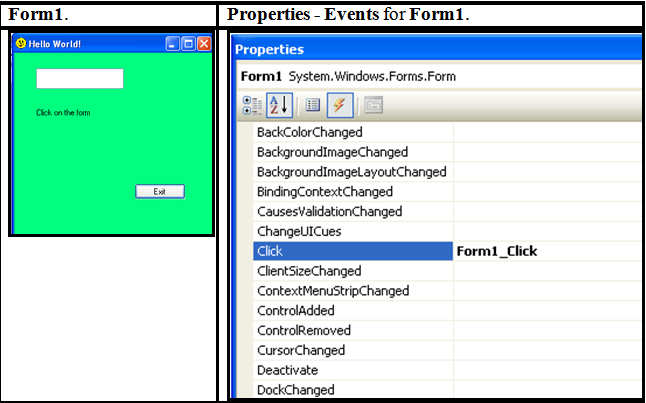
Form1. Properties - Events for Form1.
The Form1_Click event is immediately added to the code section.
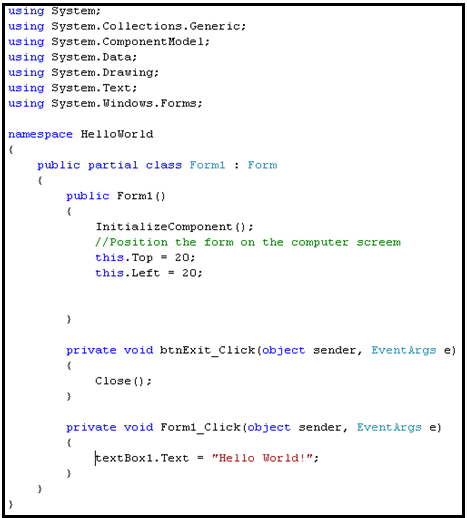
Insert the code below into the Form1_Click event between the curley braces.
private void Form1_Click(object sender, EventArgs e)
{
textBox1.Text = "Hello World!";
}
Add this code below the InitializeComponent (); statement.
//Position the form on the computer screem
this.Top = 20;
this.Left = 20;
label1.Text = "Click the Form !";
Do a Build-Debug to make certain that the code was properly inserted.
The Completed project
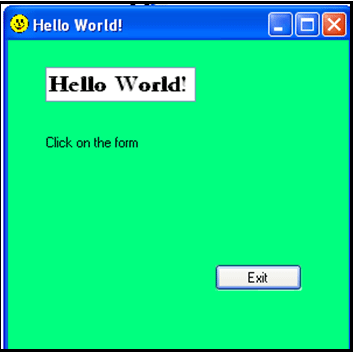
The project is complete. Now is a good time to take a  . A lot has been thrown at you in this lesson. Take some time to absorb it.
Maybe deleting everything in the Student folder and starting over again would be a good way to absorb this lesson.
Since this is your first exposure to C# it will become your foundation for learning C#.
In particular open C#Tips.doc and study it. Other files to study are
C#Intellisense.doc and C#URLs.doc.
Now move on to Lesson 2 GDI. With all of the work and energy you put into this lesson the rest of the book will be much easier. After all you are just now creeping. C# is not a cup of tea. It is a very complex language which could easily take a couple of years for you to gain a comprehensive understanding of all that is there.
This book is intended to be an introduction and to offer you a good starting point for learning C#.
Picture of the Code for the completed project is below.
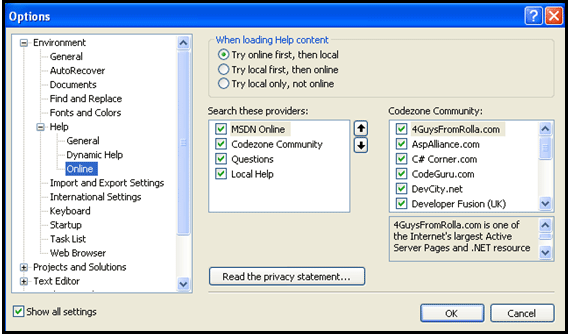
The last thing in this lesson is setting up online Help. This allows you to get online help which is updated by Microsoft and is always current.
Setup online Help.
While in C# drop-down the Tools menu select Options.
Make selections as shown below.
 Show all settings
Toggle these settings 
 .
.
This lesson is now complete! Quite a struggle but it gets easier the more you learn.