Today, I am going to show you guys, "How to you Embedded Fonts" in your Silverlight2 applications.
Silverlight2 has a very rich library for creating RIA (Rich Internet Applications) but has less features and functionalities compared to its father WPF(Windows Presentation Foundation). This is so because, Silverlight is a browser plugin which gets downloaded to the client machine, the first time a user access any web page having Silverlight content. So for making the download experience smooth, the Silverlight plugin/player has been packed with the minimum and most required features and functionalities, so that its size is less, and it can be downloaded to the client computer ASAP. Once, the plugin has been installed, the user can access the Silverlight pages without any interruption. Currently the Silverlight2 plugin has a download size of 4.6MB.
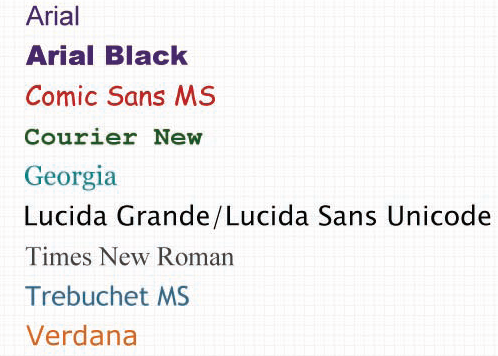
This is the reason why, Silverlight2 is not provided with a wide variety of Fonts. By Default, a Silverlight2 application supports and provides 9 fonts, mentioned below:

So for using Fonts other than than the ones specified above, we would need to embed it into our application assembly as a "Resource".
We can use the embedded font either using "Code" or "Markup".
For either of the way, first we need to add the desired font into our Silverlight2 application project. I am using a freely available font named "A Cut Above the Rest". You can easily find it and several other free fonts on the following website - http://www.urbanfonts.com/free-fonts.htm
To add the font file to your project, perform the below steps:
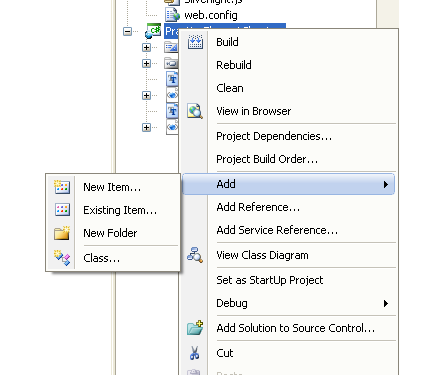
- Right Click your Silverlight application project, and choose "Add", then "Add Existing Item" menu Item. Then select the font file(with .TTF extension) to be used.

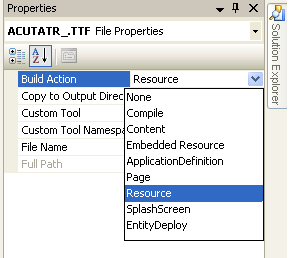
- After the font file gets added to your project, Right-click on the file and click Properties. On the properties window, set the "Build Action" property to "Resource". Setting this property will embed your newly added font file to your application assembly as a binary resource, which can later be used for the usage.

So, now we are done and ready to use our newly added font "A Cut Above the Rest". Below example uses XAML Markup to set the new font "A Cut above the Rest" to a TextBlock element.