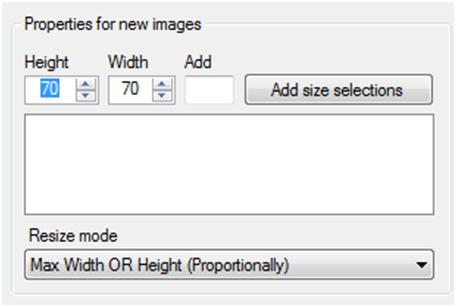
Down to the left corner you have the ability to add "size selections" and the program will loop thru all of the added variants here. This little option makes it possible to create different sizes of the same image in one go. Here you can add the extra char to the filename, as well.

When you've selected the files you want to use, decide how you would like to change your images by adding the size selections by clicking the add button. Here is a short explanation of the different resize modes:
Exact width and height
This option just creates a new bitmap with the size given, not taking any proportions into consideration.
Exact width
This mode gives the image a fixed width and calculates the proportional height.
if (format == ResizeFormat.Max_Width)
{
// We just do images smaller, so we just resize if
// the original image is larger that the new size
if (f_width > Width)
Width = (int)((float)(Height) * dim);
}
Exact height
This mode gives the image a fixed height and calculates the proportional width.
else if (format == ResizeFormat.Max_Height)
{
// We just do images smaller, so we just resize if
// the original image is larger that the new size
if (f_height > Height)
Height = (int)((float)(Width) / dim);
}
Max width OR height
This mode checks the size of the original image and determents if it's a landscape or portrait image, then it calculates the suitable height or width based upon that.
else if (format == ResizeFormat.Max_Width_OR_Height)
{
// We just do images smaller, so we just resize if
// the original image is larger that the new sized
if (f_width > Width && f_height > Height)
{
//Portrait images, persist max height, calculate width
if (f_height > f_width)
Width = (int)((float)(Height) * dim);
// Landscape image, persist max width, calculate height
else
Height = (int)((float)(Width) / dim)
}
}
This option is forcing you to give a square size of the image in, (50x50, 100x100, etc.), and the event ValueChanged of the NumericUpAndDown control keeps track of the selections made forcing it to be equal to the height or the width given.
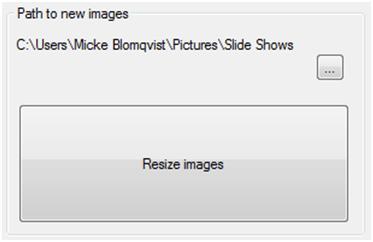
Okay, then there is the location of where the new files are created and the actual "resize button".

The program saves the last selected files directory as the save directory for the new images, but you can easily change it. When the new files are created, there is one directory for each size selection created in that "save directory" to make it easier to keep track of the resized images.
The creation of the new image and quality settings.
After we have calculated the proportional height or width depending on our format selection described above, we have a new height and width. From that we use these dimensions to create a new bitmap whitch is the base for our new image:
System.Drawing.Bitmap bitmap = new System.Drawing.Bitmap(Width, Height);
Then we create the graphics object from the bitmap with:
System.Drawing.Graphics graphic = System.Drawing.Graphics.FromImage(bitmap)
Now we set quality properties on the graphics object before we use it to draw the original on to our new bitmap:
graphic.InterpolationMode = Drawing2D.InterpolationMode.HighQualityBicubic;
graphic.SmoothingMode = Drawing2D.SmoothingMode.HighQuality;
graphic.PixelOffsetMode = Drawing2D.PixelOffsetMode.HighQuality;
graphic.CompositingQuality = Drawing2D.CompositingQuality.HighQuality;graphic.DrawImage(OriginalImage, 0, 0, Width, Height);
I'm not an expert on graphics, so this is perhaps a part of the application which can be improved. Please post your comments so I can upgrade to code and upload it again.
That's it!
Conclusion: The power of C# makes it simple and straightforward to work with images and by it's richness of classes you can actually create a very well working application with a minimum of code.