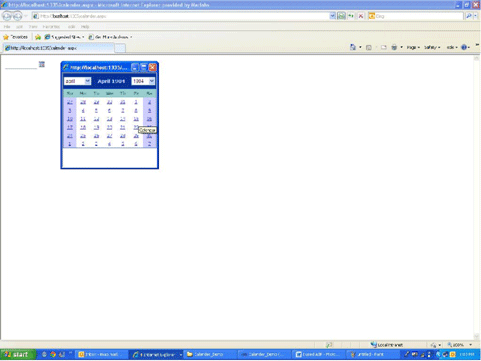
Recently a project of mine used an ASP.NET calendar control to allow the user to enter their date of birth, but I discovered that a calendar control is good for selecting date from the current, next, or previous month, but obviously the date of birth would need many navigations of months. It is not feasible.
The following will demonstrate how to make the Calendar control more flexible in terms of its navigation through the addition of two drop-down lists.
First create a User Control so that a customized calendar control can be used on any .aspx page.
I have attached a simple project which guides you to the use of a customized calendar control to enter Date Of Birth (DOB).
Customizing Calendar Control
1. First add the Asp.Net Calendar control with some styles applied.
<asp:Calendar ID="calDate" runat="server"
BackColor="White" BorderColor="#3366CC" CellPadding="1" DayNameFormat="Shortest"
Font-Names="Verdana" Font-Size="8pt" ForeColor="#003399" Height="200px"
Width="250px" ondayrender="calDate_DayRender">
<SelectedDayStyle BackColor="#009999" Font-Bold="True" ForeColor="#CCFF99" />
<TodayDayStyle BackColor="#99CCCC" ForeColor="White" />
<SelectorStyle BackColor="#99CCCC" ForeColor="#336666" />
<WeekendDayStyle BackColor="#CCCCFF" />
<OtherMonthDayStyle ForeColor="#999999" />
<NextPrevStyle Font-Size="8pt" ForeColor="#CCCCFF" />
<DayHeaderStyle BackColor="#99CCCC" ForeColor="#336666" Height="1px" />
<TitleStyle BackColor="#003399" BorderColor="#3366CC" BorderWidth="1px" Font-Bold="True"
Font-Size="10pt" ForeColor="#CCCCFF" Height="25px" />
</asp:Calendar>
2. Dropdown Lists for month and year collection.
For month dropdown hardcode the data in design page only, for year dropdown in code behind bind the data.
<asp:DropDownList ID="Ddyear" runat="server" AutoPostBack="True"
onselectedindexchanged="DdyearSelectedIndexChanged">
</asp:DropDownList>
<asp:DropDownList ID="Ddmonth" runat="server" AutoPostBack="True"
onselectedindexchanged="DdmonthSelectedIndexChanged">
<asp:ListItem Value="00">*Month*</asp:ListItem>
<asp:ListItem Value="01">Jan</asp:ListItem>
<asp:ListItem Value="02">Feb</asp:ListItem>
<asp:ListItem Value="03">March</asp:ListItem>
<asp:ListItem Value="04">april</asp:ListItem>
<asp:ListItem Value="05">May</asp:ListItem>
<asp:ListItem Value="06">June</asp:ListItem>
<asp:ListItem Value="07">July</asp:ListItem>
<asp:ListItem Value="08">August</asp:ListItem>
<asp:ListItem Value="09">Sept</asp:ListItem>
<asp:ListItem Value="10">Oct</asp:ListItem>
<asp:ListItem Value="11">Nov</asp:ListItem>
<asp:ListItem Value="12">Dec</asp:ListItem>
</asp:DropDownList>

3. For year dropdown data is bound on page load:
protected void Page_Load(object sender, EventArgs
e)
{ if
(IsPostBack) return;
else
{ var al
= new ArrayList();
al.Add("*Year*"); for (var i = 1900; i <=2011; i++)
{ al.Add(i);
}
Ddyear.DataSource = al;
Ddyear.DataBind();
}
}
4. These dropdown lists will be added to the calendar header by overriding the Render method.
The previous month navigation icon (i.e. '<' left side of calendar header) is replaced by a month dropdownlist.

Next the month navigation icon (i.e. '>' right side of calendar header) is replaced by a year dropdownlist.

In the middle of the calendar header the selected month name and year will be displayed (ex: March 1989)
#region Regular expressions
  private static Regex
regPrevMonth = new Regex(
@"(?<PrevMonth><a.*?><</a>)",
RegexOptions.IgnoreCase
| RegexOptions.Singleline
| RegexOptions.CultureInvariant
| RegexOptions.IgnorePatternWhitespace
| RegexOptions.Compiled
);
  private static Regex
regNextMonth = new Regex(
@"(?<NextMonth><a.*?>></a>)",
RegexOptions.IgnoreCase
| RegexOptions.Singleline
| RegexOptions.CultureInvariant
| RegexOptions.IgnorePatternWhitespace
| RegexOptions.Compiled
);
#endregion
protected override void Render(HtmlTextWriter writer)
{ // turn user
control to html code
      string
output = CalControl1.RenderToString(calDate);
      MatchEvaluator
mevm = new MatchEvaluator(AppendMonth);
      output = regPrevMonth.Replace(output,
mevm);
      MatchEvaluator
mevb = new MatchEvaluator(AppendYear);
      output = regNextMonth.Replace(output,
mevb);
      // output the
modified code
writer.Write(output);
}
  public static string
RenderToString(Control c)
{ bool
previousVisibility = c.Visible;
      c.Visible = true;
// make visible if not
      // get html
code for control
      System.IO.StringWriter
sw = new System.IO.StringWriter();
      HtmlTextWriter
localWriter = new HtmlTextWriter(sw);
c.RenderControl(localWriter);
      string
output = sw.ToString();
      // restore
visibility
c.Visible = previousVisibility;
      return
output;
}
  private string AppendMonth(Match
m)
{ return CalControl1.RenderToString(Ddmonth) + " " ;
}
  private string AppendYear(Match
m)
{ return " "
+ CalControl1.RenderToString(Ddyear);
}
5. Initially calendar shows current date, and then it displays whichever date you select.
The code to set current date to show at first time is as below
public DateTime? SelectedDate
{
get
{
// null date stored or not set
if (ViewState["SelectedDate"] == null)
{
return null;
}
return (DateTime)ViewState["SelectedDate"];
}
set
{
ViewState["SelectedDate"] = value;
if (value != null)
{
calDate.SelectedDate = (DateTime)value;
calDate.VisibleDate = (DateTime)value;
}
else
{
calDate.SelectedDate = new DateTime(0);
calDate.VisibleDate = DateTime.Now.Date;
}
}
}
6. Finally we need code for event handlers for Calendar DayRender, DdmonthSelectedIndexChanged and DdyearSelectedIndexChanged as follows.
protected void calDate_DayRender(object sender, DayRenderEventArgs e)
{
HyperLink hlnk = new HyperLink();
hlnk.Text = ((LiteralControl)e.Cell.Controls[0]).Text;
hlnk.Attributes.Add("href", "javascript:SetDate('" +
e.Day.Date.ToString("dd/MM/yyyy") + "')");
e.Cell.Controls.Clear();
e.Cell.Controls.Add(hlnk);
}
protected void DdyearSelectedIndexChanged(object sender, EventArgs e)
{
var syear = DateTime.Now.Year;
var smonth = DateTime.Now.Month;
if (Ddmonth.SelectedValue != "00")
{
smonth = Convert.ToInt32(Ddmonth.SelectedValue);
}
if (Ddyear.SelectedValue!="*Year*")
{
syear = Convert.ToInt32(Ddyear.SelectedValue);
}
var date = smonth + "/" + DateTime.Now.Day + "/" +syear;
var dateTime = Convert.ToDateTime(date);
calDate.VisibleDate = dateTime;
}
protected void DdmonthSelectedIndexChanged(object sender, EventArgs e)
{
var smonth = DateTime.Now.Month;
var year = DateTime.Now.Year;
if (Ddyear.SelectedValue != "*Year*")
{
year = Convert.ToInt32(Ddyear.SelectedValue);
}
if (Ddmonth.SelectedValue != "00")
{
smonth = Convert.ToInt32(Ddmonth.SelectedValue);
}
var sdate = smonth + "/" + DateTime.Now.Day + "/" + year;
calDate.VisibleDate = Convert.ToDateTime(sdate);
}
The above code completes Customizing calendar control. Now we will look at a simple example of how to use this control to enter a DOB. (The complete source code is available for downloading.)

1) In the first Page (ex calendar.aspx) create a Textbox for the DOB and one image button or anchor tag to open a calendar in popup onclick of it. Pass a TexBox id to the popup to assign a selected date to the TexBox.
<asp:textbox id="tbMyDate" runat="server" Width="80px"></asp:textbox>
  <a href="" onclick="return PopupPicker('tbMyDate')"><img src="Images/Calendar_scheduleHS.png" alt="Picture"
border="0"></a>
JavaScript to open popup:
function PopupPicker(ctl) { var PopupWindow = null;
PopupWindow = window.open('PopupCalendar.aspx?Ctl=' + ctl, 'PopupWindow', 'width=10,height=250,resizable=yes'); PopupWindow.focus();
return false;
    };

2) In the "PopupCalendar.aspx" page we need to register a user control that has a customized calendar. And we need to handle the "SetDate()" JavaScript function which calls on selecting a date from a calendar. It assigns the selected date to the DOB TextBox
and closes the popup. See the calDate_DayRender method definition.

<%@ Register src="CalControl1.ascx" tagname="CalControl1" tagprefix="uc2" %>
<uc2:CalControl1 ID="CalControl11" runat="server" />
function SetDate(dateValue) { ctl = window.location.search.substr(1).substring(4);
thisForm = window.opener.document.forms[0].elements[ctl].value = dateVae;
self.close();
}
