Description:
In this article I will describe how to manage state for a particular user using isolation storage.
Content:
In ASP.Net, Silverlight has no concept of a session. To store session information we have to store the data in isolation storage. Suppose after login you have to display your log in name through several pages. SO the best way to store the data for displaying it is isolation storage and then you can retrieve it later.
Now in this example below I will enter a user name and when I press submit it will store it in the isolation storage and also display it in the label by getting the value from the isolation storage.
Step 1:
Create a new Silver light Application name "isolationwrittingfile".
Step 2:
Now in the page.xaml paste the code below:
<UserControl x:Class="isolationwritting_file.MainPage"
xmlns="http://schemas.microsoft.com/winfx/2006/xaml/presentation"
xmlns:x="http://schemas.microsoft.com/winfx/2006/xaml"
xmlns:d="http://schemas.microsoft.com/expression/blend/2008"
xmlns:mc="http://schemas.openxmlformats.org/markup-compatibility/2006"
mc:Ignorable="d"
d:DesignHeight="300" d:DesignWidth="400" xmlns:sdk="http://schemas.microsoft.com/winfx/2006/xaml/presentation/sdk">
<Grid x:Name="LayoutRoot" Background="White">
<TextBox Height="23" HorizontalAlignment="Left" Margin="152,37,0,0" Name="textBox1" VerticalAlignment="Top" Width="120" Text="" />
<sdk:Label Height="28" HorizontalAlignment="Left" Margin="26,37,0,0" Name="label1" VerticalAlignment="Top" Width="120" Content="UserName" />
<sdk:Label Height="28" HorizontalAlignment="Left" Margin="26,105,0,0" Name="label2" VerticalAlignment="Top" Width="120" />
<Button Content="Submit" Height="23" HorizontalAlignment="Left" Margin="278,37,0,0" Name="button1" VerticalAlignment="Top" Width="75" Click="button1_Click" />
</Grid>
</UserControl>
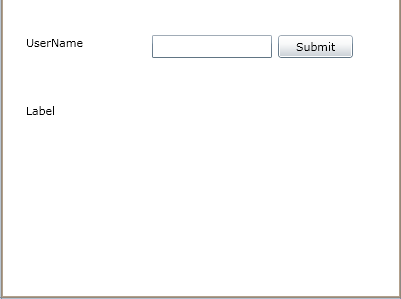
It will look like Figure 1:

Figure 1:
Step 3:
Now in the Page.xaml.cs paste the code below:
using System;
using System.Collections.Generic;
using System.Linq;
using System.Net;
using System.Windows;
using System.Windows.Controls;
using System.Windows.Documents;
using System.Windows.Input;
using System.Windows.Media;
using System.Windows.Media.Animation;
using System.Windows.Shapes;
using System.IO.IsolatedStorage;
using System.IO;
namespace isolationwritting_file
{
public partial class MainPage : UserControl
{
public MainPage()
{
InitializeComponent();
//SaveData("Hello There", "MyData.txt");
//string test = LoadData("MyData.txt");
//textBox1.Text = test.ToString();
}
private void SaveData(string data, string fileName)
{
using (IsolatedStorageFile isf = IsolatedStorageFile.GetUserStoreForApplication())
{
using (IsolatedStorageFileStream isfs = new IsolatedStorageFileStream(fileName, FileMode.Create, isf))
{
using (StreamWriter sw = new StreamWriter(isfs))
{ sw.Write(data); sw.Close(); }
}
}
}
private string LoadData(string fileName)
{ string data = String.Empty;
using (IsolatedStorageFile isf = IsolatedStorageFile.GetUserStoreForApplication())
{
using (IsolatedStorageFileStream isfs = new IsolatedStorageFileStream(fileName, FileMode.Open, isf))
{
using (StreamReader sr = new StreamReader(isfs))
{
string lineOfData = String.Empty;
while ((lineOfData = sr.ReadLine()) != null)
data += lineOfData;
}
}
}
return data;
}
private void button1_Click(object sender, RoutedEventArgs e)
{
SaveData(textBox1 .Text , "MyData.txt");
string test = LoadData("MyData.txt");
label2.Content = "Your UserName is" + test.ToString();
}
}
}
In the SaveData method under the button click I am passing the "textBox1 .Text" parameter and also the ""MyData.txt" file name which will be created in the isolation storage.
The Method "LoadData()" retrieves the value from the isolation storage.
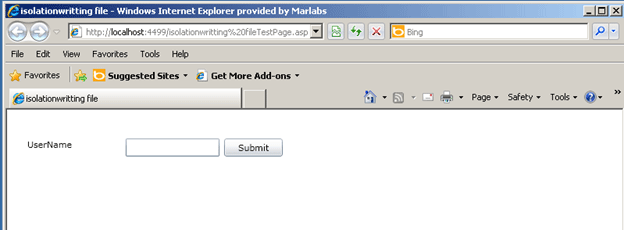
Now run the program; it will look like Figure 2:

Figure 2:
When you enter the user name and press submit button it will look like Figure 3:

Figure 3:
Conclusion: So in this article we have learned about using isolation storage for maintaining the state management in Silverlight.