Introduction
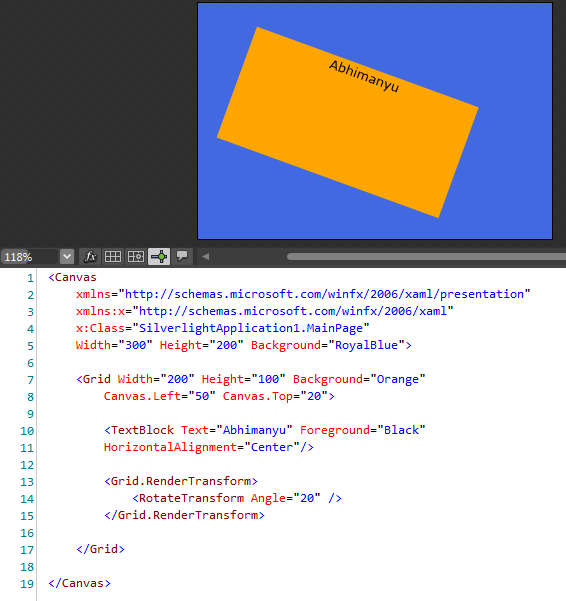
Transformation is one of the exciting features of Silverlight where we change the position or direction of the axes of an image, here parallel lines remain parallel. Transformation is a way to modify the appearance of an element. Without affecting the layout of element "RenderTransform" property lets us to transform the element. Look at the image given below:

In the above image, Canvas has one child:
- Grid: It has the following properties:
- Width/Height: Its height and width.
- Background: It's background color that is "Orange".
- Margins: It has margin 50 from left and 20 from top with respect to Canvas.
Now this Grid has one child:
- TextBlock: It has the following properties:
- Text: Text is "Abhimanyu".
- Foreground: It is black.
- HorizontalAlignment: It is "Center" to Grid.
Now we are applying the "RenderTransform" to "Grid" by 20 degrees. If we apply "RenderTransform" to "Grid", notice that the Grid's child (TextBlock here) is also rotated. So, remember transforms applied to an element will affect the children too.
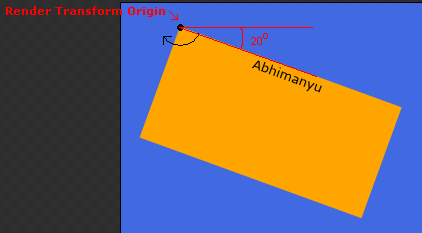
By default the "RotateTransform" angle is zero, but if we change this angle to any positive value then it will rotate as follows:

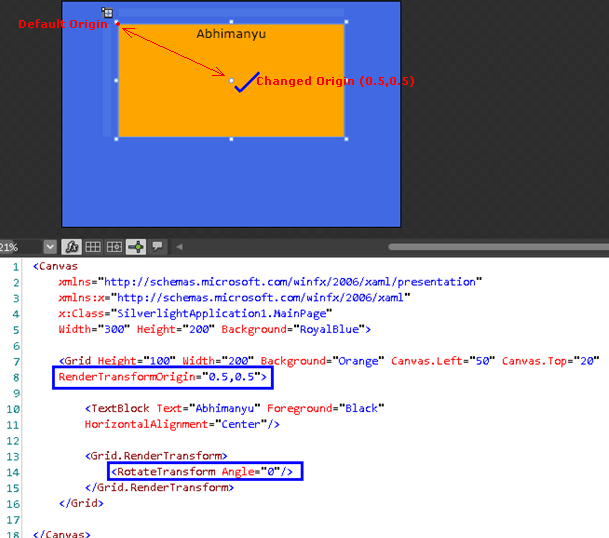
In the above screenshot, "RenderTransformOrigin" is also 0,0 by default; let's change it then look at the results. Look at the screenshot below, where we'll be demonstrating with all these.

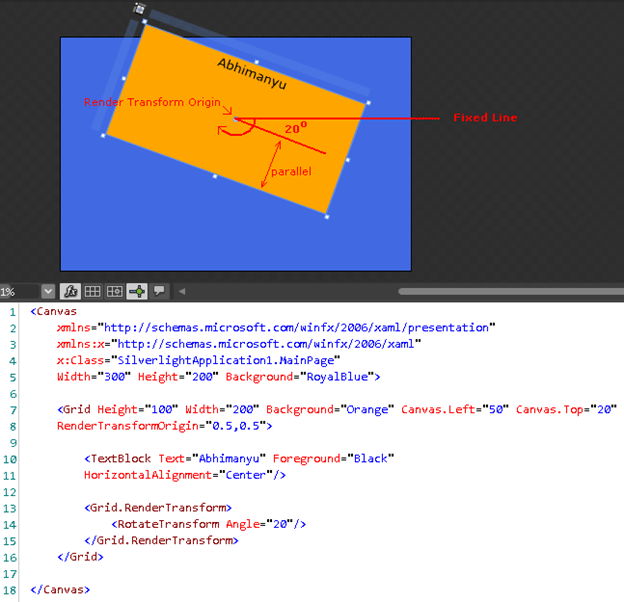
In the above screenshot, I kept "RotateTransform" angle by 0, so that you can understand "RenderTransformOrigin" well. "RenderTransformOrigin" means putting the rotation point on stage; I will be using 0.5, 0.5 meaning center of art. Now let's change the "RotateTransform" angle by some positive value like 20 degrees. Look at the screenshot below:

In the above screenshot, I am using "RenderTransformOrigin" by 0.5, 0.5 and the "RotateTransform" angle by 20 degree.
That's all about the basics of transformation; in the next article we will talk about it's types.
Be tuned for the next article.
HAVE A HAPPY CODING!!