In this article we are trying to create the blob in the real storage account we created. As we are aware of the basics of blob and related classes in Windows Azure this article is emphasizing on the storage account related activities.
The core classes involved in Winows Azure blob activities were:
- CloudStorageAccount
- CloudBlobClient
- CloudBlobContainer
- CloudBlob
Connecting to the Storage Account
For connecting to the storage account, we need the correct Account Name and Key.
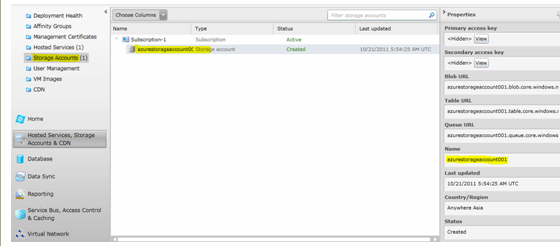
For obtaining the account name do the following:
- Sign in to Windows Azure Portal
- Click the Hosted Services group from left pane
- Click the Storage Accounts from left pane
- Select the account we created previously
- From the right pane you can get the Name of the account
For obtaining the key do the following:
- Click on the View button of Primary access key
- On the appearing dialog click the copy button and you are ready with the key
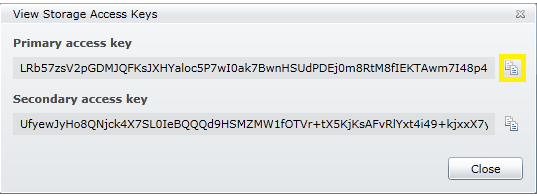
Note In the above dialog we can see Primary access key and Secondary access key. Both can be used for the account authentication purpose. The secondary access key is used for making the application available during change in primary access key. You can read about it here
Modify the Account Access Code
We have to modify the account specification code as given below.
StorageCredentialsAccountAndKey accountAndKey = new StorageCredentialsAccountAndKey("account", "primarykey");
CloudStorageAccount account = new CloudStorageAccount(accountAndKey, true);
Use your account name and the key in the account and primarykey texts.
Now the code is ready for connecting to the online storage account
Execute the Code
Now you can execute the code and view the result in browser as shown below.

If you can see the file name you have uploaded, then the online connection to storage account is success.
Using the Server Explorer for viewing Blobs
Visual Studio provides a convenient way to see the blobs we have uploaded. For viewing them use the View > Server Explorer command.
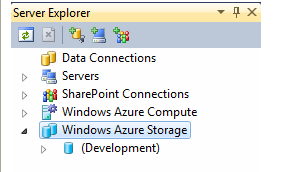
In the above dialog, right click on Windows Azure Storage tree item.

In the above dialong, click on the Add New Storage Account menu item.
Specify the account credentials in the appearing dialog.
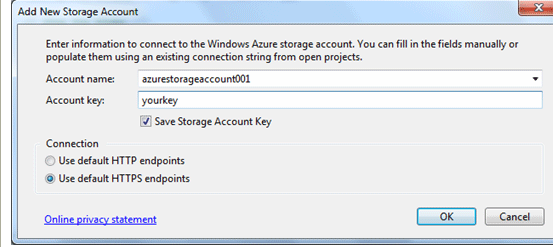
Click the Ok button to continue.
A new tree item with your Account Name will be created and expanding that you can access your blob and container. Click on the container and a new view is opened showing the list of files in the container.
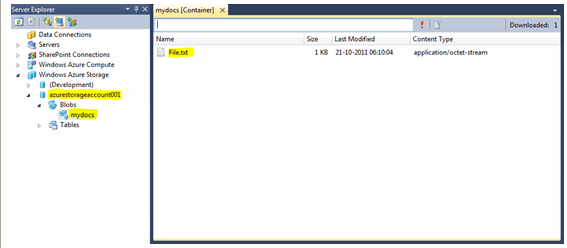
In the above window you can see the File.txt blob item you have created. This confirms the creation of blob in online storage account.
Summary
In this article we have seen how to connect to the online storage account and create blobs. The Server Explorer helps in viewing the blobs created.