

Introduction
React WebCam is a 3rd party plugin for operating a webcam in React Projects
Open a command prompt. Create a directory for the SPFx solution.
md spfx-React-Webcam
Navigate to the above-created directory.
cd spfx-React-Webcam
Run the Yeoman SharePoint Generator to create the solution.
yo @microsoft/sharepoint
Solution Name
Hit Enter for a default name, (spfx-React-Webcam in this case), or type in any other name for your solution.
Selected choice - Hit Enter
Target for the component
Here, we can select the target environment where we are planning to deploy the client web part, i.e., SharePoint Online or SharePoint OnPremise (SharePoint 2016 onwards).
Selected choice - SharePoint Online only (latest)
Place of files
We may choose to use the same folder or create a subfolder for our solution.
Selected choice - Same folder
Deployment option
Selecting Y will allow the app to be deployed instantly to all sites and be accessible everywhere.
Selected choice - N (install on each site explicitly)
Permissions to access web APIs
Choose if the components in the solution require permissions to access web APIs that are unique and not shared with other components in the tenant.
Selected choice - N (solution contains unique permissions)
Type of client-side component to create
We can choose to create a client-side web part or an extension. Choose the web part option.
Selected choice - WebPart
Web part name
Hit Enter to select the default name or type in any other name.
Selected choice - SpfxReactWebcam
Web part description
Hit Enter to select the default description or type in any other value.
Framework to use
Select any JavaScript framework to develop the component. Available choices are - No JavaScript Framework, React, and Knockout.
Selected choice - React
Yeoman generator will perform a scaffolding process to generate the solution. The scaffolding process will take a significant amount of time.
Once the scaffolding process is completed, lock down the version of project dependencies by running the below command:
npm shrinkwrap
In the command prompt, type below command to open the solution in the code editor of your choice.
code .
NPM Packages Used,
On the command prompt, run below command.
- npm i @pnp/logging @pnp/common @pnp/odata @pnp/sp --save
for Pollyfills
- npm install --save @pnp/polyfill-ie11
- npm install react-webcam
Code Piece for Intialize Webcam
- import Webcam from "react-webcam";
- <Webcam
- audio={false}
- height={550}
- ref={webcamRef}
- screenshotFormat="image/jpeg"
- width={550}
- videoConstraints={videoConstraints}
- />
in SpfxReactWebcam.tsx
- import * as React from 'react';
- /*import styles from './SpfxReactWebcam.module.scss';*/
- import { ISpfxReactWebcamProps } from './ISpfxReactWebcamProps';
- import { escape } from '@microsoft/sp-lodash-subset';
- import {WebcamCapture} from './reactwebcam';
- export default class SpfxReactWebcam extends React.Component<ISpfxReactWebcamProps, {}> {
- public render(): React.ReactElement<ISpfxReactWebcamProps> {
- return (
- <div>
- <WebcamCapture/>
- </div>
- );
- }
- }
- import * as React from "react";
- import Webcam from "react-webcam";
- import { sp } from "@pnp/sp";
- const videoConstraints = {
- width: 1280,
- height: 720,
- facingMode: "user"
- };
- export const WebcamCapture = () => {
- const [datacol, setdatacol] = React.useState();
- const webcamRef = React.useRef(null);
- const capture = React.useCallback(
- () => {
- setdatacol(webcamRef.current.getScreenshot());
- },
- [webcamRef]
- );
- const remove = React.useCallback(
- () => {
- setdatacol("");
- },
- []
- );
- let Save= ()=>{
- var myblob= b64ToBlob(datacol);
- sp.web.getFolderByServerRelativeUrl("/sites/SPCapabilityTeam/MadhanNC/PnpLibrary/").files.add("Madhan.jpg", myblob as Blob, true).then(output => {
- });
- /*
- import { sp } from '@pnp/sp';
- (async () => {
- const folder = sp.web.getFolderByServerRelativeUrl('/sites/site/Shared Documents');
- const { file, data } = await folder.files.add('new-one.txt', 'data');
- const item = await file.getItem(`Id&_hash=${new Date().toISOString()}`); // force no-cashed response
- await item.update({ Title: new Date().toISOString() });
- })().catch(console.warn);
- web.getFolderByServerRelativeUrl("/sites/dev/Shared Documents/test/").files.add("abcd.txt", file, true).then(f => {
- f.file.listItemAllFields.get(new ODataDefaultParser(), {
- headers: {
- "Cache-Control": "no-cache",
- }
- }).then(function (item) {
- item.update({
- Title: "Updated Title",
- Description: "Updated desc"
- });
- });
- });
- });
- */
- };
- return (
- <>
- <Webcam
- audio={false}
- height={550}
- ref={webcamRef}
- screenshotFormat="image/jpeg"
- width={550}
- videoConstraints={videoConstraints}
- />
- <div> {datacol ? <img src={datacol} /> : null} </div>
- <button onClick={capture}>Capture photo</button>
- <button onClick={remove}>remove photo</button>
- <button onClick={Save}>Save photo</button>
- </>
- );
- };
- export const b64ToBlob = (base64: string, type: string = 'application/octet-stream'): Blob => {
- const byteArray = Uint8Array.from(
- window.atob(base64.replace("data:image/jpeg;base64,",""))
- .split('')
- .map((char) => char.charCodeAt(0))
- );
- return new Blob([byteArray], { type });
- };
- export const b64ToArrayBuffer = (base64: string): ArrayBuffer => {
- const binaryString = window.atob(base64.replace("data:image/jpeg;base64,",""));
- const len = binaryString.length;
- const bytes = new Uint8Array(len);
- for (let i = 0; i < len; i++) {
- bytes[i] = binaryString.charCodeAt(i);
- }
- return bytes.buffer;
- };
To upload a file to the sharepoint document library, we either need to convert it to blob, or arraybuffer. I've mentioned both methods above
The code for uploading an image:
- var myblob= b64ToBlob(datacol);
- sp.web.getFolderByServerRelativeUrl("/sites/SPCapabilityTeam/MadhanNC/PnpLibrary/").files.add("Madhan.jpg", myblob as Blob, true).then(output => { });
- var myarraybuffer= b64ToArrayBuffer(datacol);
- sp.web.getFolderByServerRelativeUrl("/sites/SPCapabilityTeam/MadhanNC/PnpLibrary/").files.add("Madhan.jpg", myarraybuffer as ArrayBuffer, true).then(output => { });
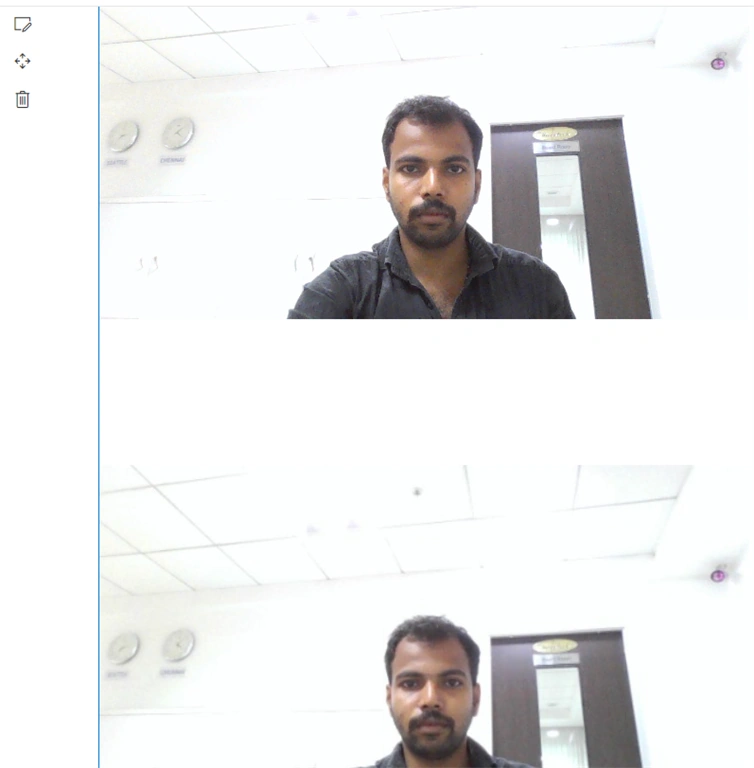
Here, the first image is a live image and the second one is a captured image.
I hope that this helps someone. Happy Coding :)
Alexandre FerreiraPosted Nov 29, 2021, 7:30 PM
WebCam OK, but IP Cam is the problem, do you have any solution? (rtps streaming, online ip cam)