

Step 1
Go to File > New > Project > ASP.NET Web Application > Enter Application name > Click OK.
Step 2
Download CSS jquery.Jcrop.css and JS jquery.Jcrop.js from https://github.com/tapmodo/Jcrop also download jQuery.min.js from https://jquery.com/
Step 3
Right click on the project name > create a folder like CSS and JS. Add those, which you downloaded from the above Websites.
Step 4
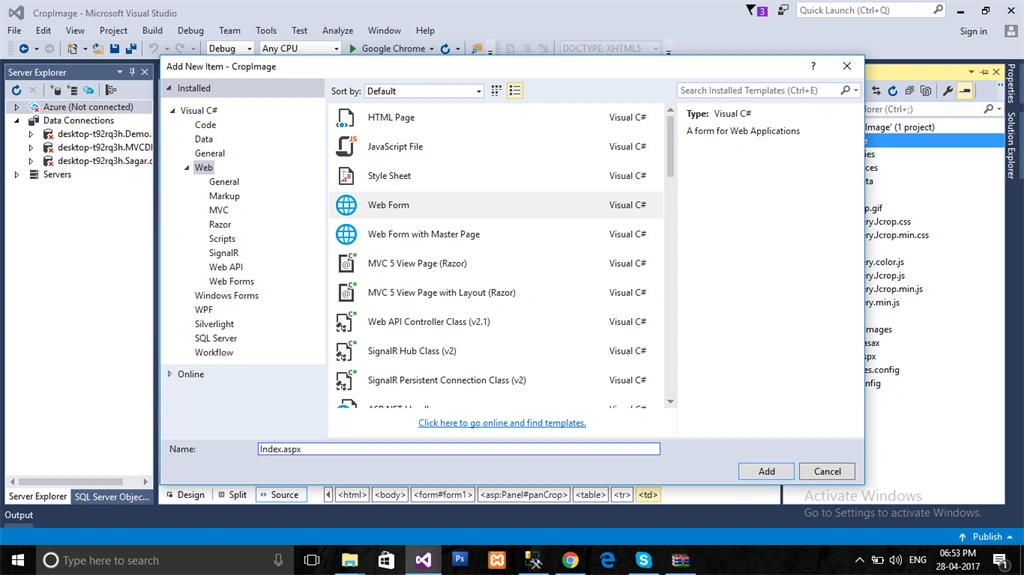
Right click on the project name from Solution Explorer > Add > New item > Select Web form> Enter page name > Add.
Step 5
Add the code given below in head section into index.aspx.
- <link href="css/jquery.Jcrop.css" rel="stylesheet" />
- <script src="js/jquery.min.js"></script>
- <script src="js/jquery.Jcrop.js"></script>
- <script type="text/javascript">
- $(document).ready(function() {
- $('#<%=imgUpload.ClientID%>').Jcrop({
- onSelect: SelectCropArea
- });
- });
- function SelectCropArea(c) {
- $('#<%=X.ClientID%>').val(parseInt(c.x));
- $('#<%=Y.ClientID%>').val(parseInt(c.y));
- $('#<%=W.ClientID%>').val(parseInt(c.w));
- $('#<%=H.ClientID%>').val(parseInt(c.h));
- }
- </script>
Step 6
Similarly, add the code given below in body section into index.aspx.
- <form id="form1" runat="server">
- <h3>Image Upload, Crop & Save using ASP.NET & Jquery</h3>
- <table>
- <tr>
- <td> Select Image File : </td>
- <td>
- <asp:FileUpload ID="FU1" runat="server" /> </td>
- <td>
- <asp:Button ID="btnUpload" runat="server" Text="Upload" OnClick="btnUpload_Click" /> </td>
- </tr>
- <tr>
- <td colspan="3">
- <asp:Label ID="lblMsg" runat="server" ForeColor="Red" /> </td>
- </tr>
- </table>
- <asp:Panel ID="panCrop" runat="server" Visible="false">
- <table width="50%">
- <tr>
- <td>
- <asp:Image ID="imgUpload" runat="server" Width="100%" /> </td>
- </tr>
- <tr>
- <td>
- <asp:Button ID="btnCrop" runat="server" Text="Crop & Save" OnClick="btnCrop_Click" /> </td>
- </tr>
- <tr>
- <td>
- <asp:HiddenField ID="X" runat="server" />
- <asp:HiddenField ID="Y" runat="server" />
- <asp:HiddenField ID="W" runat="server" />
- <asp:HiddenField ID="H" runat="server" /> </td>
- </tr>
- </table>
- </asp:Panel>
- </form>
Step 7
Add a folder to save the uploaded images.
Right click on the project name from Solution Explorer > Add > New Folder > Rename the folder like UploadImages.
Step 8
Write the code given below in btnUpload_Click event to upload an image.
- protected void btnUpload_Click(object sender, EventArgs e) {
- // Upload Original Image Here
- string uploadFileName = "";
- string uploadFilePath = "";
- if (FU1.HasFile) {
- string ext = Path.GetExtension(FU1.FileName).ToLower();
- if (ext == ".jpg" || ext == ".jpeg" || ext == ".gif" || ext == ".png") {
- uploadFileName = Guid.NewGuid().ToString() + ext;
- uploadFilePath = Path.Combine(Server.MapPath("~/UploadImages"), uploadFileName);
- try {
- FU1.SaveAs(uploadFilePath);
- imgUpload.ImageUrl = "~/UploadImages/" + uploadFileName;
- panCrop.Visible = true;
- } catch (Exception) {
- lblMsg.Text = "Error! Please try again.";
- }
- } else {
- lblMsg.Text = "Selected file type not allowed!";
- }
- } else {
- lblMsg.Text = "Please select file first!";
- }
- }
Step 9
Write the code in btnCrop_Click event to crop & save cropped image.
- // Crop Image Here & Save
- string fileName = Path.GetFileName(imgUpload.ImageUrl);
- string filePath = Path.Combine(Server.MapPath("~/UploadImages"), fileName);
- string cropFileName = "";
- string cropFilePath = "";
- if (File.Exists(filePath)) {
- System.Drawing.Image orgImg = System.Drawing.Image.FromFile(filePath);
- Rectangle CropArea = new Rectangle(Convert.ToInt32(X.Value), Convert.ToInt32(Y.Value), Convert.ToInt32(W.Value), Convert.ToInt32(H.Value));
- try {
- Bitmap bitMap = new Bitmap(CropArea.Width, CropArea.Height);
- using(Graphics g = Graphics.FromImage(bitMap)) {
- g.DrawImage(orgImg, new Rectangle(0, 0, bitMap.Width, bitMap.Height), CropArea, GraphicsUnit.Pixel);
- }
- cropFileName = "crop_" + fileName;
- cropFilePath = Path.Combine(Server.MapPath("~/UploadImages"), cropFileName);
- bitMap.Save(cropFilePath);
- Response.Redirect("~/UploadImages/" + cropFileName, false);
- } catch (Exception ex) {
- throw;
- }
- }
Step 10
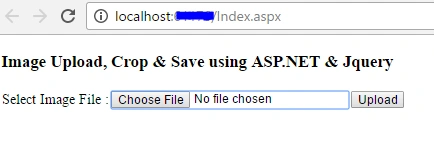
Click Choose file, select an image and click Upload button, followed by the image, which will appear on the screen, as shown below.


siva krishnaPosted Mar 17, 2023, 4:46 AM
It's good. But it's not working if original image is saved to Cloud like Azure Storage. System.Drawing is working if image is uploaded to application local folders. Any solution is helpful
Ashik IqbalPosted Dec 18, 2022, 5:52 AM
Rotation issue for mobile devices, please help.
Waleed AliPosted Nov 4, 2022, 4:11 PM
Great work, thank you very much. but you need to fix ratio problems because image will resized based on container size ! I fix it by editing SelectCropArea function function SelectCropArea(c) { var zoomRatio = $("#imgUpload").width() / $('#<%=imgUpload.ClientID%>')[0].naturalWidth $('#<%=X.ClientID%>').val(parseInt(c.x / zoomRatio)); $('#<%=Y.ClientID%>').val(parseInt(c.y / zoomRatio)); $('#<%=W.ClientID%>').val(parseInt(c.w / zoomRatio)); $('#<%=H.ClientID%>').val(parseInt(c.h / zoomRatio)); }
Shaheen BitcoinPosted Apr 28, 2021, 8:14 AM
Changes in cordinates after cropping
karthi kumarPosted Oct 15, 2020, 5:23 AM
Super i will try
Geraldo SantosPosted Jul 12, 2019, 3:57 PM
Se a imagem for grande, a imagem cortada est? ficando errada.
Hardik VaghasiyaPosted Feb 23, 2018, 5:23 AM
I have crop some part of web screen in asp c#, if any one can solution ????
Mark WatsonPosted Nov 23, 2017, 9:55 AM
DOSEN'T WORK AT ALL !!!
Athirsta RajaPosted Jul 24, 2017, 12:05 AM
I want to crop part of webpage which user enter. pls give an idea for this or send mail to [email protected]
Satyaprakash SamantarayPosted May 10, 2017, 7:03 AM
Nice one...................................... Keep writing