

Create MVC Application
- Go to File → New → Project.
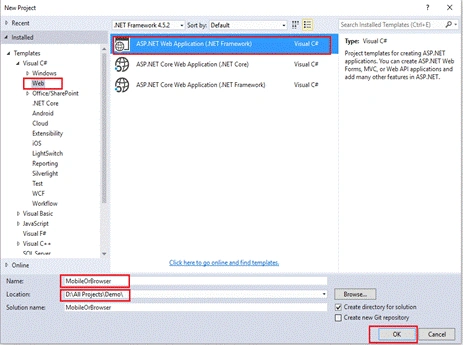
- Choose Web → ASP.NET Web Application (.NET Framework).
Give the name as you like. I gave the name MobileOrBrowser. Give your project location, followed by clicking OK button. It will open a new Window.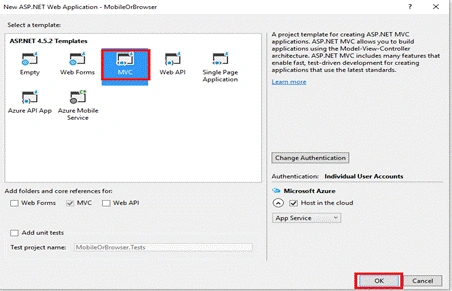
- Choose MVC, followed by clicking the OK button.
It will open a new Window, if you want to host your project on Azure. There is a need to fill the required information related to Azure subscription. For now, just click Cancel button.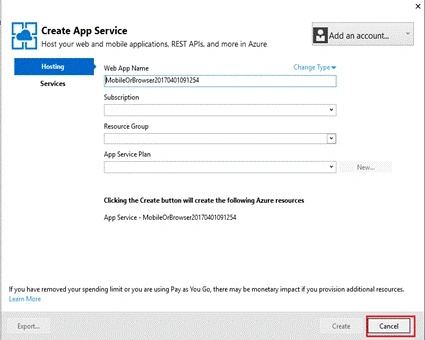
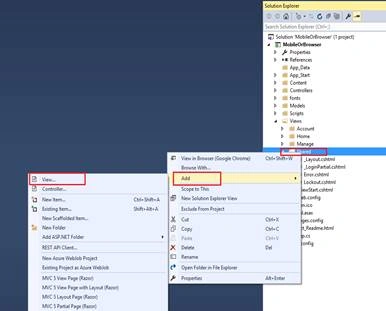
- Open Views → Shared→cshtml. By default, this page has a few lines of code.
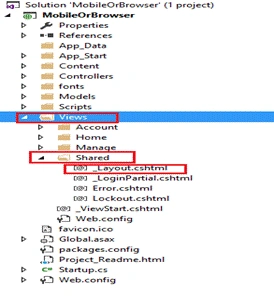
Let’s add another layout.
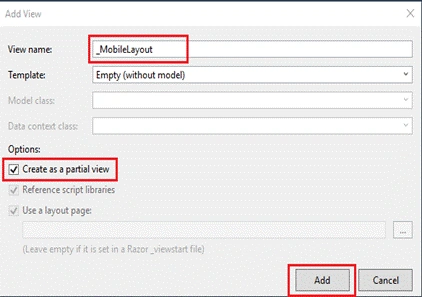
We name it _MobileLayout and check the check-box, which is required to be created for a partial view, followed by clicking Add button.
I copied what was in the _Layout.cshtml by default and pasted it into _MobileLayout.cshtml, thereby making some changes.
In _ViewStart.cshtml, we need to add few lines of code to identify if the site is running on Device mode or the Browser.
- @ {
- if (!Request.Browser.IsMobileDevice) {
- Layout = "~/Views/Shared/_Layout.cshtml";
- } else {
- Layout = "~/Views/Shared/_MobileLayout.cshtml";
- }
- }
For now, we are using default routing, so we need to add few lines of differentiating index view content.
- @ {
- if (!Request.Browser.IsMobileDevice) { < div class = "jumbotron" > < h1 > Browser View < /h1> < p class = "lead" > This is browser view. < /p> < /div>
- } else { < div class = "jumbotron" > < h1 > Mobile View < /h1> < p class = "lead" > This is mobile view. < /p> < /div>
- }
- }
Now, run the Application by clicking F5.
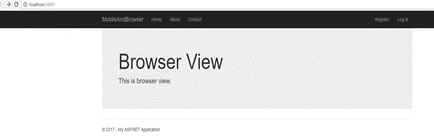
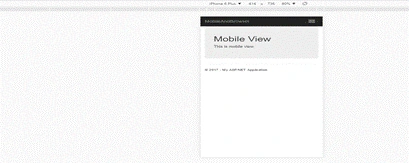
When you press F12 and refresh you page, then we have model view.
Ajay SharmaPosted Apr 19, 2017, 3:11 AM
Really very helpful for me
Rajesh KadamPosted Apr 19, 2017, 2:53 AM
You should also show the changes done in mobile layout.
Sandeep VermaPosted Apr 19, 2017, 2:48 AM
Good for developer