

Calendar Control in ASP.NET à
Hi!
Here i will show you step by step procedure how to create
Calendar Control in ASP.NET in visual studio 2005 / 2008
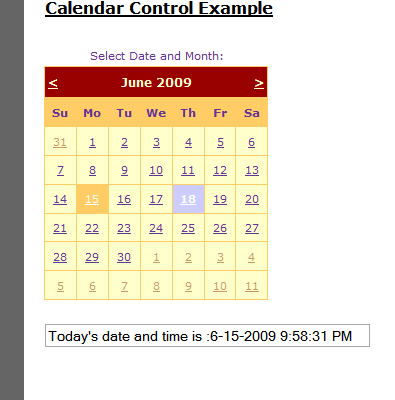
The use of Calendar Control in ASP.NET is very useful by which we can get dates from user…
__________________________________________________
Here I am using Visual Studio 2008 but there is no condition you can use Visual Studio 2005 also.
So follow these steps to create State Implementation
The Steps are:
1- Start -> All Programs -> Visual Studio 2005 or Visual Studio 2008
Now The Visual Studio will Open
2- Now go to File Menu -> New -> Web Site
When you will click on the New Web Site a new form will open
3- Under Visual Studio Installed Template-> Choose ASP.NET WEB SITE -> Choose File System from the location combo box -> Set the path by the browse button - > Choose the language from the Language ComboBox (Visual C# , Visual Basic , J #)
Choose Visual C#
4 - Click on the OK Button:-
Now you will see a new form
This is the Source Code window and in this page you will se this code…
First you have to learn XML and HTML to work with ASP .NET_
I have used <!– text –> to make the text as comment this is the way to make comment in this code …
<%@ Page Language=”C#” AutoEventWireup=”true” CodeFile=”Default.aspx.cs” Inherits=”_Default” %>
<!DOCTYPE html PUBLIC “-//W3C//DTD XHTML 1.0 Transitional//EN” “http://www.w3.org/TR/xhtml1/DTD/xhtml1-transitional.dtd”>
<html xmlns=”http://www.w3.org/1999/xhtml”>
<head runat=”server”>
<title>Type your webpage title here</title>
<!– Here you can specify your page title in between title tag
</head>
<body>
<form id=”form1? runat=”server”>
<div>
<!– In between div tags you can manage your web controls like buttons,
labels, picture
Box, ImageMap etc –>
</div>
</form>
</body>
</html>
See here is a tab named Design in the bottom of this page
5- Click on this tab and you will see a blank web page where you can drag any control from the toolbox (which is in the left side of this window)
6- Drag a Calendar Control and a Label Control in the design window or in the source window…
7-Now write this code on the top of the source window


Join the conversation! Your thoughts help the community grow.