

Introduction
This article demonstrates how to create Deep Link applications using C# and XML in Xamarin.Forms.
Let's take an email client as an example. When the user clicks the notification of an email she received, it opens a deep link that takes her to the email in the app. Last but not least, deep links also allow Google to index your app and link to specific sections of your app in searches. The deep link appears as a search result in Google and can take the user to a particular section of your app.
Let's start,
Step 1. Create a Xamarin. Forms app by going to File >> New >> Visual C# >> Cross Platform >> Cross-platform app (Xamarin. Native or Xamarin. Forms) and click OK. Project Name : DeepLinking
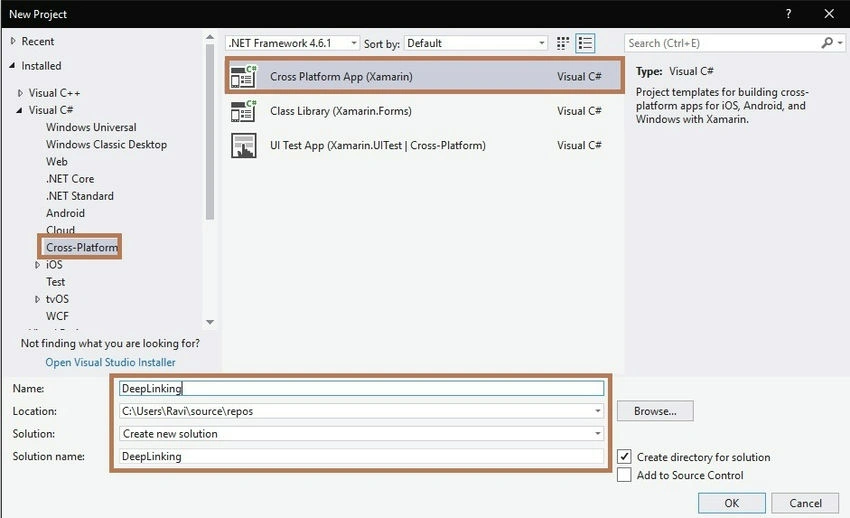
Now, select Blank App >> Xamarin.Forms >> .Portable Class Library and click OK.
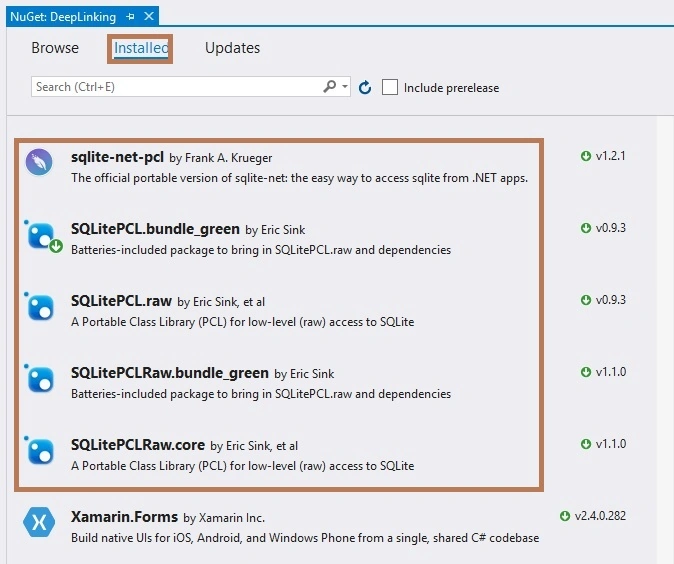
Step 2. After the project creation, add the following Nuget Packages for your projects. Open Solution Explorer >> right click on Solution Explorer and select "Manage NuGet packages for the solution".
Now, select the following NuGet packages and followed by select your project then click to Install it.
- SQLite-net-pcl
- SQLitePCL.bundle_green
- SQLitePCL.raw
- SQLitePCL.Raw.bundle_green
- SQLitePCLRaw.core.
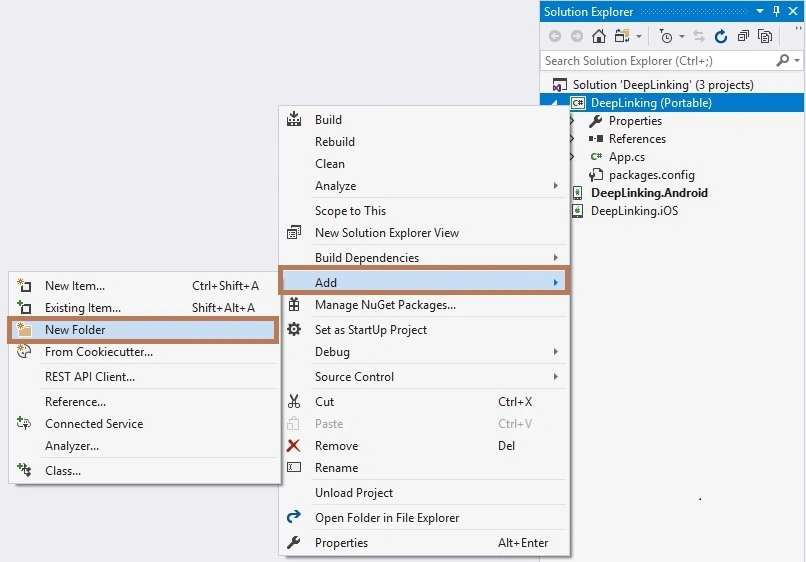
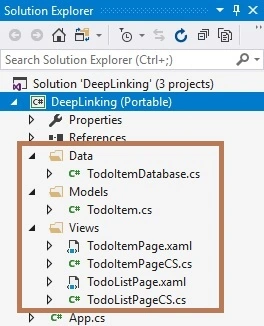
Step 3. Next, open Solution Explorer >> Project Name(Portable) >> Right-click to add >> New Folder. After that, open the New Folder (Folder Name: Data)
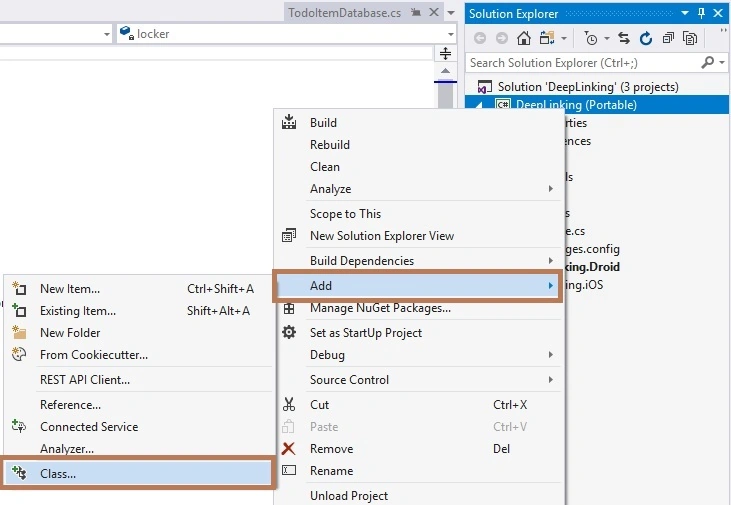
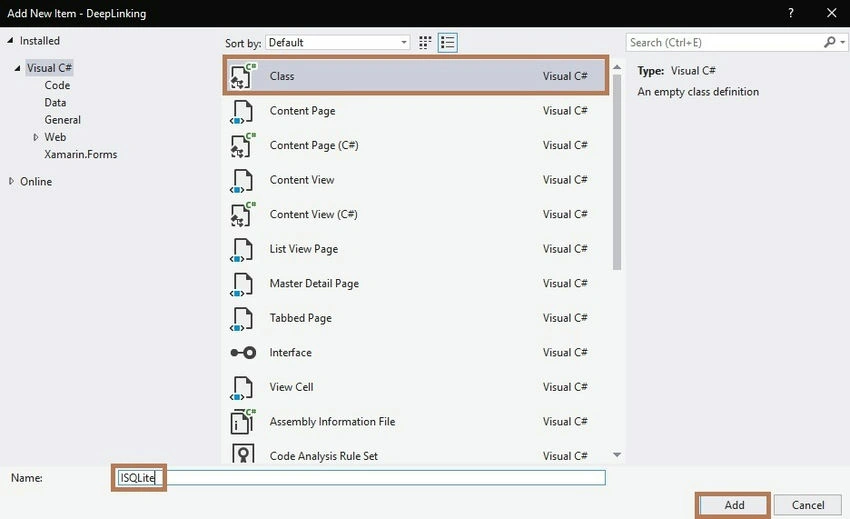
Next, open Solution Explorer >> Project Name(Portable) >> Data Folder >> Right-click to add >> Class. After that, open the Dialog Box Select Visual C# >> Class, and click ok (Class Name: TodoItemDatabase).
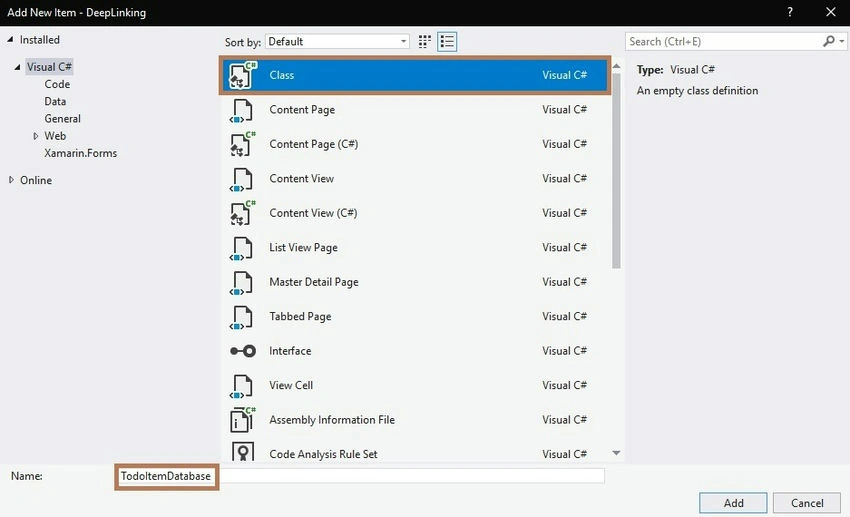
The select TodoItemDatabase.cs of this page. Just replace that with the following code.
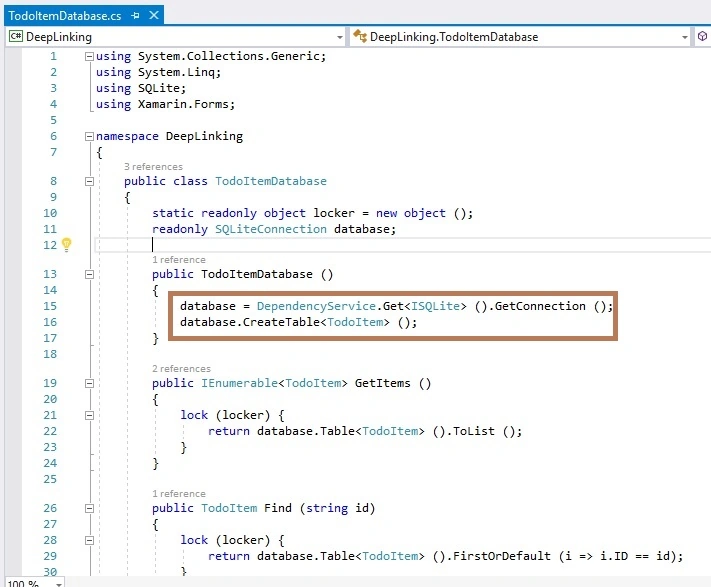
TodoItemDatabase.cs code
using System.Collections.Generic;
using System.Linq;
using SQLite;
using Xamarin.Forms;
namespace DeepLinking
{
    public class TodoItemDatabase
    {
        static readonly object locker = new object();
        readonly SQLiteConnection database;

        public TodoItemDatabase()
        {
            database = DependencyService.Get<ISQLite>().GetConnection();  // DB of the application
            database.CreateTable<TodoItem>();                              // Create table for the DB
        }
        public IEnumerable<TodoItem> GetItems()
        {
            lock (locker)
            {
                return database.Table<TodoItem>().ToList();
            }
        }
        public TodoItem Find(string id)
        {
            lock (locker)
            {
                return database.Table<TodoItem>().FirstOrDefault(i => i.ID == id);
            }
        }
        public int Insert(TodoItem item)
        {
            lock (locker)
            {
                return database.Insert(item);
            }
        }
        public int Update(TodoItem item)
        {
            lock (locker)
            {
                return database.Update(item);
            }
        }
        public int Delete(string id)
        {
            lock (locker)
            {
                return database.Delete<TodoItem>(id);
            }
        }
    }
}
Similarly, add New Folder Models, and Views
Step 4. Next, go to Solution Explorer >> Project Name (Portable) >> Models >> Right-click to add >> Class. After that, open the Dialog Box Select Visual C# >> Class, and click ok (Class Name: TodoItem.cs). Select TodoItem.cs of this page. Just replace that with the following code.
TodoItem.cs Code
using SQLite;
namespace DeepLinking
{
    public class TodoItem
    {
        [PrimaryKey]
        public string ID { get; set; }
        public string Name { get; set; }
        public string Notes { get; set; }
        public bool Done { get; set; }
    }
}
Step 5. Next, go to Solution Explorer >> Project Name (Portable) >> Views >> Right-click to add >> two Class and twp Design Page. After that, open the Dialog Box and Select Visual C# >> Class, Xamarin. Form and click ok.
(Class Name: TodoItemPage.xaml, TodoItemPageCS.cs, TodoListPage,xaml and TodoListPageCS.cs). To select the given page, just replace it with the following code.
TodoItemPage.xaml Code
Design for TodoItemPage.
<?xml version="1.0" encoding="UTF-8"?>
<ContentPage xmlns="http://xamarin.com/schemas/2014/forms" xmlns:x="http://schemas.microsoft.com/winfx/2009/xaml" x:Class="DeepLinking.TodoItemPage" Title="Todo Item">
    <StackLayout VerticalOptions="StartAndExpand">
        <Label Text="Name" />
        <Entry Text="{Binding Path=Name}" Placeholder="task name" />
        <Label Text="Notes" />
        <Entry Text="{Binding Path=Notes}" />
        <Label Text="Done" />
        <Switch IsToggled="{Binding Path=Done}" />
        <Button Text="Save" Clicked="OnSaveActivated" />
        <Button Text="Delete" Clicked="OnDeleteActivated" />
        <Button Text="Cancel" Clicked="OnCancelActivated" />
    </StackLayout>
</ContentPage>
TodoItemPage.xaml.cs Code
This code is used for the backend of the ItemPage.
using System;
using System.Net;
using Xamarin.Forms;
namespace DeepLinking
{
    public partial class TodoItemPage : ContentPage
    {
        IAppLinkEntry appLink;
        bool isNewItem;
        public TodoItemPage() : this(false)
        {
        }
        public TodoItemPage(bool isNew = false)
        {
            InitializeComponent();
            isNewItem = isNew;
        }
        protected override void OnAppearing()
        {
            appLink = GetAppLink(BindingContext as TodoItem);
            if (appLink != null)
            {
                appLink.IsLinkActive = true;
            }
        }
        protected override void OnDisappearing()
        {
            if (appLink != null)
            {
                appLink.IsLinkActive = false;
            }
        }
        async void OnSaveActivated(object sender, EventArgs e)
        {
            var todoItem = (TodoItem)BindingContext;

            if (isNewItem)
            {
                App.Database.Insert(todoItem);
            }
            else
            {
                App.Database.Update(todoItem);
            }
            appLink = GetAppLink(BindingContext as TodoItem);
            Application.Current.AppLinks.RegisterLink(appLink);

            await Navigation.PopAsync();
        }
        async void OnDeleteActivated(object sender, EventArgs e)
        {
            var todoItem = (TodoItem)BindingContext;
            App.Database.Delete(todoItem.ID);
            Application.Current.AppLinks.DeregisterLink(appLink);

            await Navigation.PopAsync();
        }
        async void OnCancelActivated(object sender, EventArgs e)
        {
            await Navigation.PopAsync();
        }
        AppLinkEntry GetAppLink(TodoItem item)
        {
            var pageType = GetType().ToString();
            var pageLink = new AppLinkEntry
            {
                Title = item.Name,
                Description = item.Notes,
                AppLinkUri = new Uri(string.Format("http://{0}/{1}?id={2}", App.AppName, pageType, WebUtility.UrlEncode(item.ID)), UriKind.RelativeOrAbsolute),
                IsLinkActive = true,
                Thumbnail = ImageSource.FromFile("monkey.png")
            };
            pageLink.KeyValues.Add("contentType", "TodoItemPage");
            pageLink.KeyValues.Add("appName", App.AppName);
            pageLink.KeyValues.Add("companyName", "Xamarin");
            return pageLink;
        }
    }
}
TodoIteamPageCS.cs code
This code is used to the switch by the ItemPage.
Join the conversation! Your thoughts help the community grow.