

Introduction
Xamarin.Forms code runs on multiple platforms - each of which has its own filesystem. This means that reading and writing files is most easily done using the native file APIs on each platform. Alternatively, embedded resources are a simpler solution to distribute data files with an app.
Custom Renderers
Xamarin.Forms user interfaces are rendered using the native controls of the target platform, allowing Xamarin.Forms applications to retain the appropriate look and feel for each platform. Custom Renderers let developers override this process to customize the appearance and behavior of Xamarin.Forms controls on each platform.
Prerequisites
- Visual Studio 2017 or later (Windows or Mac)
Setting up a Xamarin.Forms Project
Start by creating a new Xamarin.Forms project. You wíll learn more by going through the steps yourself.
Visual Studio 2019 has more options in the opening window. Clone or check out the code from any repository or, open a project or solution for your computer.
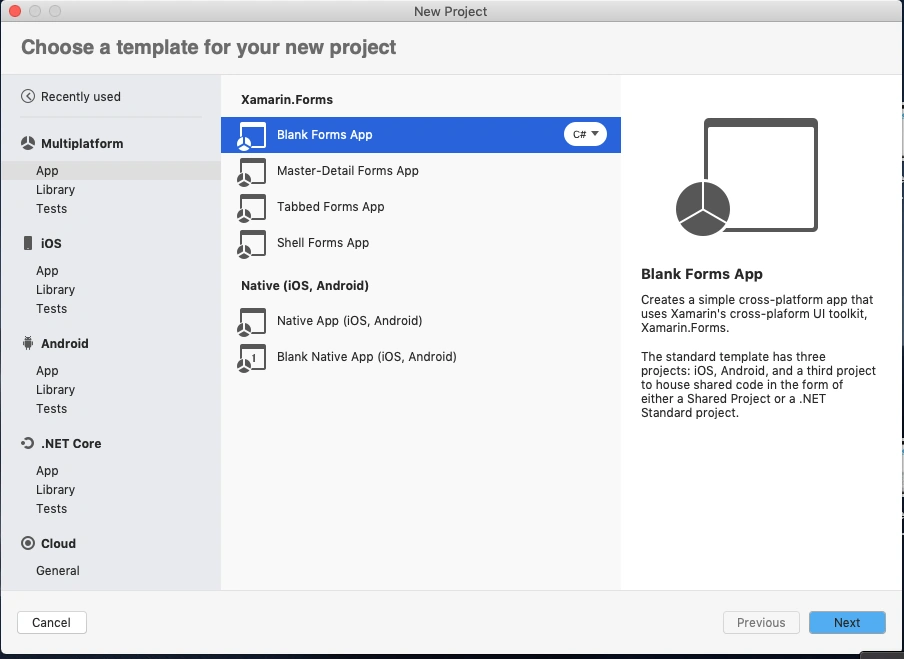
Now, you need to click "Create a new project".
Now, filter by Project Type: Mobile.
Choose the Mobile App (Xamarin. forms) project under C# and Mobile.
Name your app. You probably want your project and solution to use the same name as your app. Put it on your preferred location for projects and click "Create".
Now, select the blank app and target platforms - Android, iOS and Windows (UWP).
Subsequently, go to the solution. In there, you get all the files and sources of your project (.NET Standard). Now, select the XAML page and double-click to open the MainPage.Xaml page.
You now have a basic Xamarin.Forms app. Click the "Play" button to try it out.
Create a Custom Entry
Now, create an Inherit class form Entry for customizing the Entry control.
Now, write the following code.
CustomEntry.cs
- using System;
- using Xamarin.Forms;
- namespace XamarinCustomEntry.Controls
- {
- public class CustomEntry:Entry
- {
- public new event EventHandler Completed;
- public static readonly BindableProperty ReturnTypeProperty = BindableProperty.Create(
- nameof(ReturnType),
- typeof(ReturnType),
- typeof(CustomEntry),
- ReturnType.Done,
- BindingMode.OneWay
- );
- public ReturnType ReturnType
- {
- get { return (ReturnType)GetValue(ReturnTypeProperty); }
- set { SetValue(ReturnTypeProperty, value); }
- }
- public void InvokeCompleted()
- {
- if (this.Completed != null)
- this.Completed.Invoke(this, null);
- }
- }
- public enum ReturnType
- {
- Go,
- Next,
- Done,
- Send,
- Search
- }
- }
Android Implementation
In this step, create an inherit Class form, EntryRenderer for customizing the Entry control.
Now, write the code given below.
CustomEntryRenderer.cs
- using System;
- using System.Runtime.Remoting.Contexts;
- using Xamarin.Forms;
- using Xamarin.Forms.Platform.Android;
- using XamarinCustomEntry.Controls;
- using XamarinCustomEntry.Droid;
- using Android.Content;
- using Android.Widget;
- using Android.Views.InputMethods;
- [assembly: ExportRenderer(typeof(CustomEntry), typeof(CustomEntryRenderer))]
- namespace XamarinCustomEntry.Droid
- {
- public class CustomEntryRenderer : EntryRenderer
- {
- public CustomEntryRenderer(Android.Content.Context context) : base(context)
- {
- AutoPackage = false;
- }
- protected override void OnElementChanged(ElementChangedEventArgs<Entry> e)
- {
- base.OnElementChanged(e);
- CustomEntry entry = (CustomEntry)this.Element;
- if (this.Control != null)
- {
- if (entry != null)
- {
- SetReturnType(entry);
- // Editor Action is called when the return button is pressed
- Control.EditorAction += (object sender, TextView.EditorActionEventArgs args) =>
- {
- if (entry.ReturnType != Controls.ReturnType.Next)
- entry.Unfocus();
- // Call all the methods attached to base_entry event handler Completed
- entry.InvokeCompleted();
- };
- }
- }
- }
- private void SetReturnType(CustomEntry entry)
- {
- Controls.ReturnType type = entry.ReturnType;
- switch (type)
- {
- case Controls.ReturnType.Go:
- Control.ImeOptions = ImeAction.Go;
- Control.SetImeActionLabel("Go", ImeAction.Go);
- break;
- case Controls.ReturnType.Next:
- Control.ImeOptions = ImeAction.Next;
- Control.SetImeActionLabel("Next", ImeAction.Next);
- break;
- case Controls.ReturnType.Send:
- Control.ImeOptions = ImeAction.Send;
- Control.SetImeActionLabel("Send", ImeAction.Send);
- break;
- case Controls.ReturnType.Search:
- Control.ImeOptions = ImeAction.Search;
- Control.SetImeActionLabel("Search", ImeAction.Search);
- break;
- default:
- Control.ImeOptions = ImeAction.Done;
- Control.SetImeActionLabel("Done", ImeAction.Done);
- break;
- }
- }
- }
- }
iOS Implementation
In this step, create an inherit Class form, EntryRenderer, for customizing the Entry control.
Now, write the code given below.
CustomEntryRenderer.cs
- using System;
- using System.ComponentModel;
- using UIKit;
- using Xamarin.Forms;
- using Xamarin.Forms.Platform.iOS;
- using XamarinCustomEntry.Controls;
- using XamarinCustomEntry.iOS;
- [assembly: ExportRenderer(typeof(CustomEntry), typeof(CustomEntryRenderer))]
- namespace XamarinCustomEntry.iOS
- {
- public class CustomEntryRenderer: EntryRenderer
- {
- protected override void OnElementChanged(ElementChangedEventArgs<Entry> e)
- {
- base.OnElementChanged(e);
- CustomEntry entry = (CustomEntry)this.Element;
- if (this.Control != null)
- {
- if (entry != null)
- {
- SetReturnType(entry);
- Control.ShouldReturn += (UITextField tf) =>
- {
- entry.InvokeCompleted();
- return true;
- };
- }
- }
- }
- private void SetReturnType(CustomEntry entry)
- {
- Controls.ReturnType type = entry.ReturnType;
- switch (type)
- {
- case Controls.ReturnType.Go:
- Control.ReturnKeyType = UIReturnKeyType.Go;
- break;
- case Controls.ReturnType.Next:
- Control.ReturnKeyType = UIReturnKeyType.Next;
- break;
- case Controls.ReturnType.Send:
- Control.ReturnKeyType = UIReturnKeyType.Send;
- break;
- case Controls.ReturnType.Search:
- Control.ReturnKeyType = UIReturnKeyType.Search;
- break;
- case Controls.ReturnType.Done:
- Control.ReturnKeyType = UIReturnKeyType.Done;
- break;
- default:
- Control.ReturnKeyType = UIReturnKeyType.Default;
- break;
- }
- }
- }
- }
Setting up the User Interface
Go to MainPage.Xaml and write the following code.
MainPage.xaml
- <?xml version="1.0" encoding="utf-8"?>
- <ContentPage xmlns="http://xamarin.com/schemas/2014/forms"
- xmlns:x="http://schemas.microsoft.com/winfx/2009/xaml"
- xmlns:local="clr-namespace:XamarinCustomEntry"
- x:Class="XamarinCustomEntry.MainPage"
- xmlns:controls="clr-namespace:XamarinCustomEntry.Controls">
- <StackLayout>
- <Image Margin="0,100,0,0" Source="banner1.png"></Image>
- <controls:CustomEntry ReturnType="Search" Placeholder="Search"></controls:CustomEntry>
- <controls:CustomEntry ReturnType="Done" Placeholder="Done"></controls:CustomEntry>
- </StackLayout>
- </ContentPage>
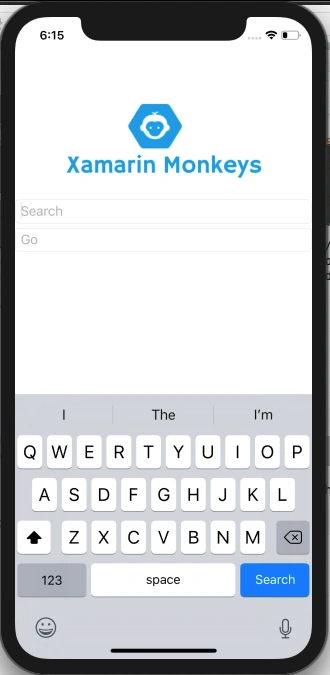
Click the "Play" button to try it out.
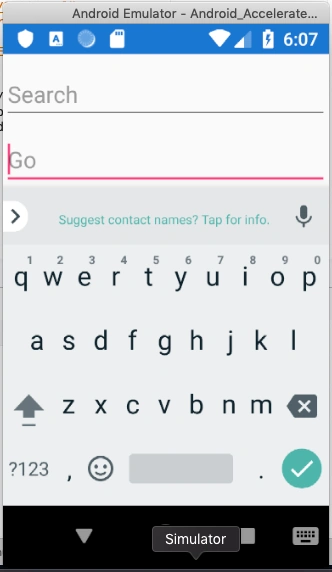
I hope you have understood how to change entry return button in Xamarin.Forms.
Thanks for reading. Please share your comments and feedback. Happy Coding :)
Join the conversation! Your thoughts help the community grow.