

WebServerBlink
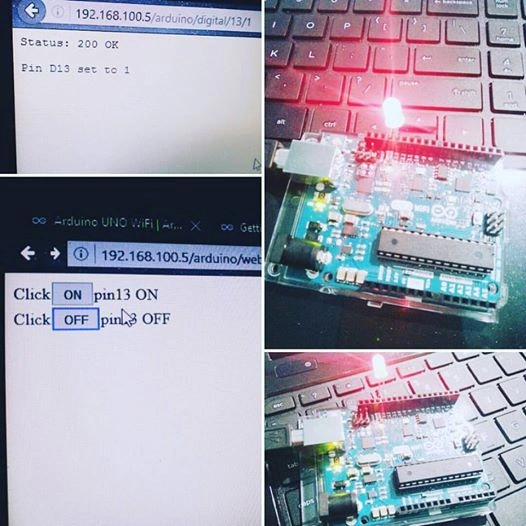
In this demonstrative example, it is shown how to make a simple web server using an Arduino UNO WiFi to command the switch ON/OFF of a LED.
1. Hardware
- Arduino UNO WiFi
- Led
- 220Ω Resistor
- wire
- Breadboard
2.Circuit
You can use the integrated L LED on pin 13 or use another one, in this case, connect the LED anode (usually the longer pin) in series to a 220Ω resistor and connect it to the board pin 13.
After connecting the cathode to GND, as shown in the picture.
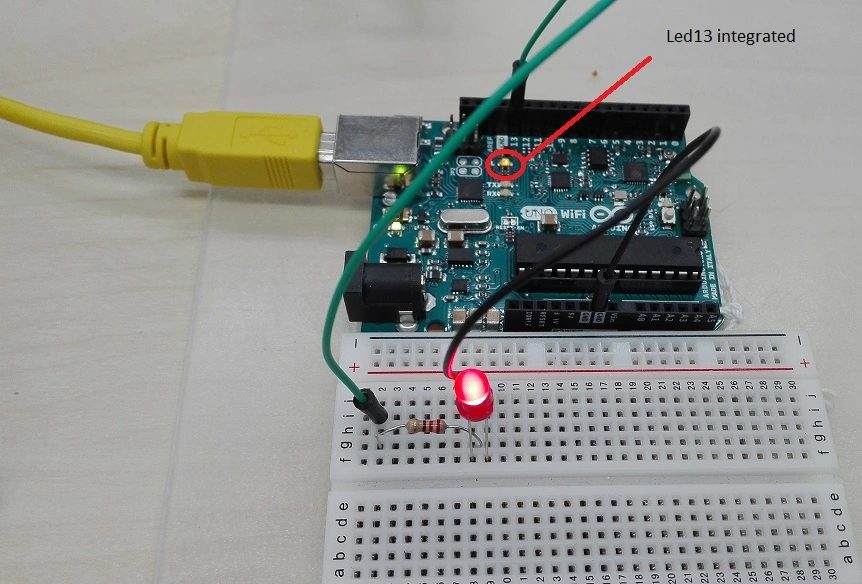
Now plug in the board to PC and upload the sketches below.
3.Code
Upload the below code and access via browser to http://<IP>/arduino/webserver/ orhttp://<hostname>.local/arduino/webserver/ to read the sensors values.
- #include <Wire.h>
- #include <ArduinoWiFi.h>
- /*
- on your borwser, you type http://<IP>/arduino/webserver/ or http://<hostname>.local/arduino/webserver/
- http://www.arduino.org/learning/tutorials/webserverblink
- */
- void setup() {
- pinMode(13,OUTPUT);
- Wifi.begin();
- Wifi.println("WebServer Server is up");
- }
- void loop() {
- while(Wifi.available()){
- process(Wifi);
- }
- delay(50);
- }
- void process(WifiData client) {
- // read the command
- String command = client.readStringUntil('/');
- // is "digital" command?
- if (command == "webserver") {
- WebServer(client);
- }
- if (command == "digital") {
- digitalCommand(client);
- }
- }
- void WebServer(WifiData client) {
- client.println("HTTP/1.1 200 OK");
- client.println("Content-Type: text/html");
- client.println();
- client.println("<html>");
- client.println("<head> </head>");
- client.print("<body>");
- client.print("Click<input type=button onClick=\"var w=window.open('/arduino/digital/13/1','_parent');w.close();\"value='ON'>pin13 ON<br>");
- client.print("Click<input type=button onClick=\"var w=window.open('/arduino/digital/13/0','_parent');w.close();\"value='OFF'>pin13 OFF<br>");
- client.print("</body>");
- client.println("</html>");
- client.print(DELIMITER); // very important to end the communication !!!
- }
- void digitalCommand(WifiData client) {
- int pin, value;
- // Read pin number
- pin = client.parseInt();
- // If the next character is a '/' it means we have an URL
- // with a value like: "/digital/13/1"
- if (client.read() == '/') {
- value = client.parseInt();
- digitalWrite(pin, value);
- }
- // Send feedback to client
- client.println("Status: 200 OK\n");
- client.print(F("Pin D"));
- client.print(pin);
- client.print(F(" set to "));
- client.print(value);
- client.print(EOL); //char terminator
- }
4.Output
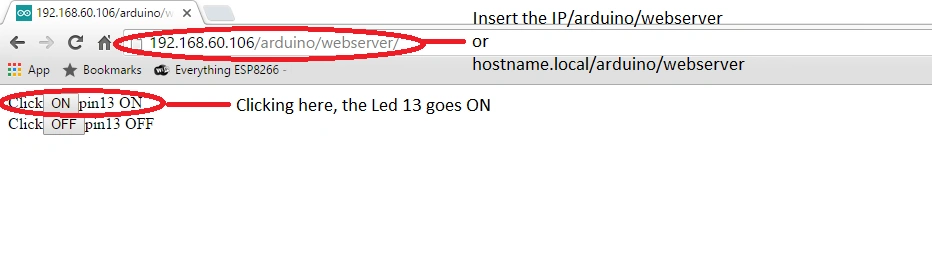
- Open a browser and type: http://<IP>/arduino/webserver/ or http://<hostname>.local/arduino/webserver/

- Click ON to go ON the LED 13:
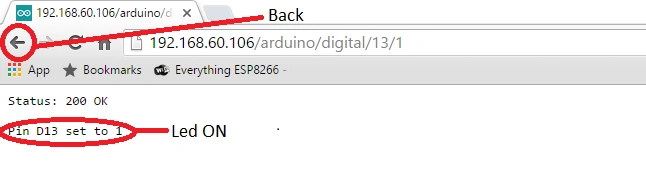
- Click OFF to go OFF the LED 13:
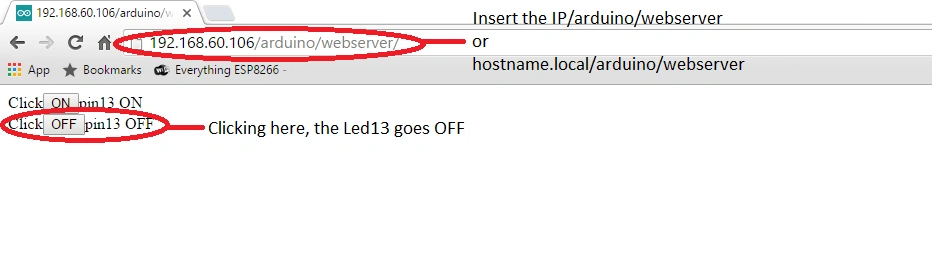
- You can command the LED also from the web panel, as shown in the below image:
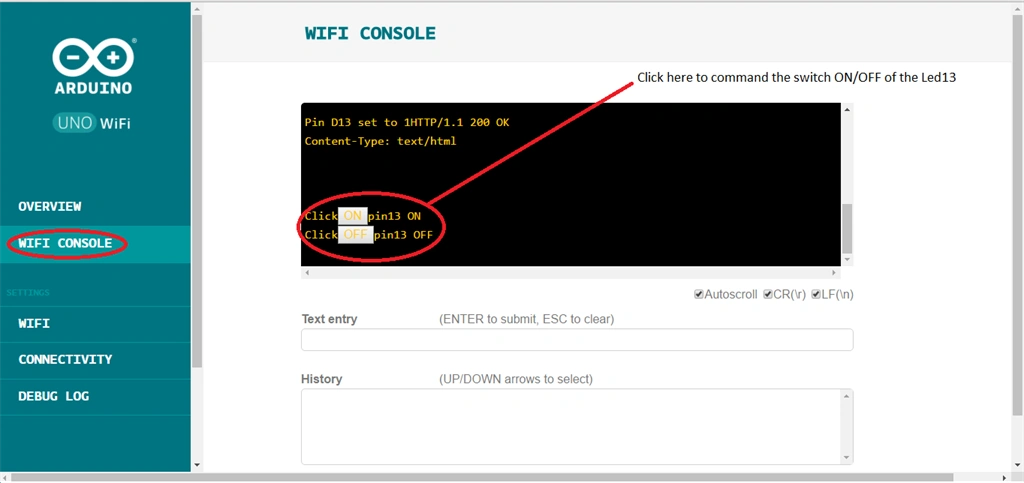
Note: Type the IP address or the hostname.local/ of your board on the browser so you will access to the Arduino UNO WiFi web panel.
Admir HodzicPosted Sep 23, 2021, 9:44 AM
Client.print(DELIMITER); /// very important to end the communication !!! What is DELIMITER
Vignesh ManiPosted May 22, 2016, 4:18 PM
Nice
Munesh SharmaPosted May 22, 2016, 10:56 AM
good one
Salman FarisPosted May 22, 2016, 9:51 AM
Thanks sir
Kuppurasu NagarajPosted May 22, 2016, 5:15 AM
Nice Sharing..
Prasanna MuraliPosted May 21, 2016, 11:34 PM
Nice one