

MSMQ is Microsoft Message Queuing developed by Microsoft and deployed in windows operating system. MSMQ Queue ensures that reliable messaging between a client and a Windows Communication Foundation (WCF) service. So first we need to enable this feature in our operating system.
How to enable MSMQ
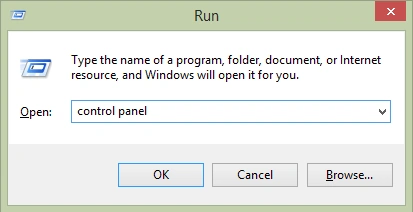
Press Window key + R, it will open Run window.
Enter ‘Control Panel’ and press ‘OK’ button, it will open control panel,
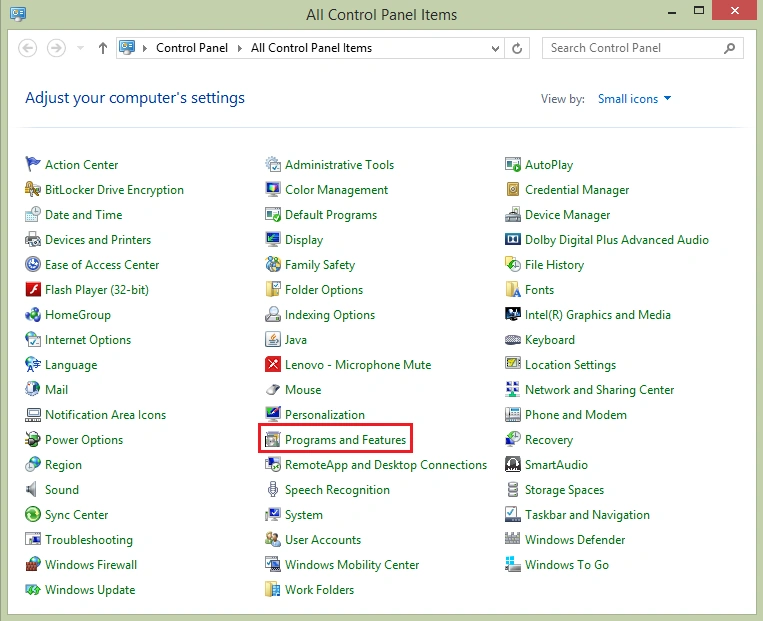
Click on ‘Programs and Features’,
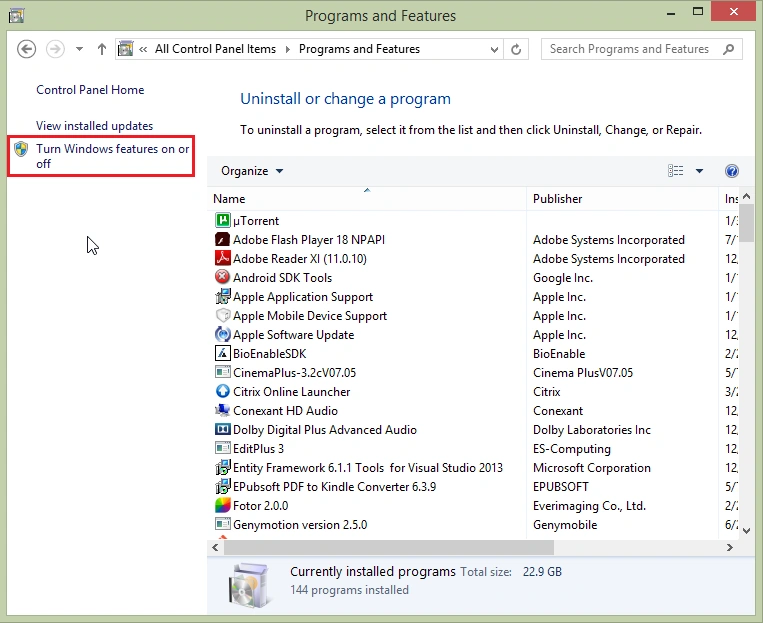
From the left panel click on ‘Turn Windows features on or off’,
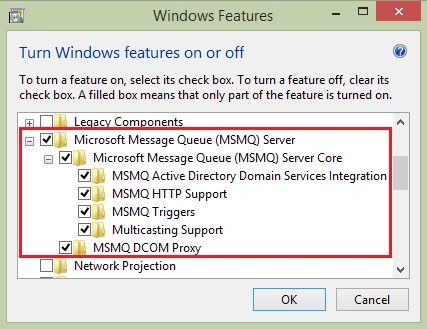
Select ‘Microsoft Message Queue (MSMQ) Server’ and all its child options.
Press ‘OK’ button, it will enable MSMQ for your operating system,
How to create a queue?
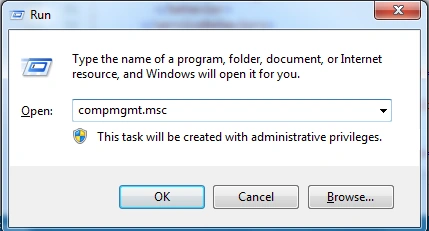
Press Window key + R, it will open Run window.
Enter ‘compmgmt.msc’ and press ‘OK’ button, it will open Computer Management window.
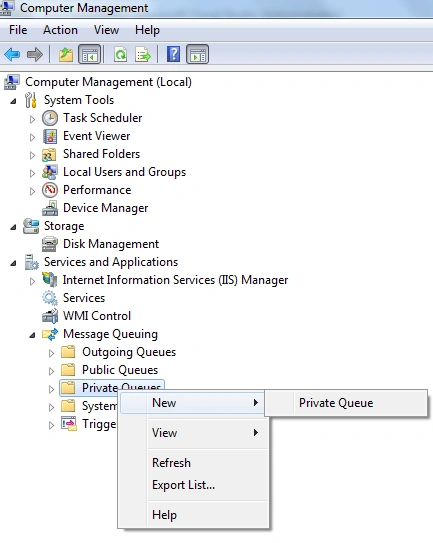
Under ‘Services and Applications’ expand ‘Message Queuing’.
Right click on ‘Private Queueus’, select ‘New’ and click on ‘Private Queue’.
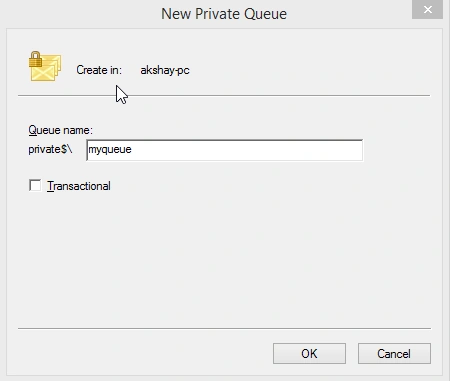
Enter queue name, here I have entered ‘myqueue’, which we will use in our application later.
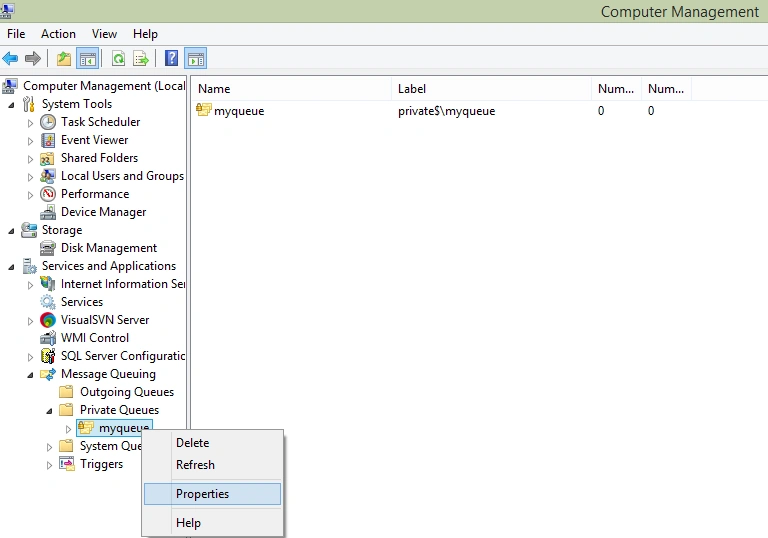
You can find preceding queue under Private Queues.
Select ‘Private Queues’ and you will have list of all queues with details like Name, Label, Number of Messages and Number of Journal Messages.
Right click on ‘myqueue’ and select ‘Properties’,
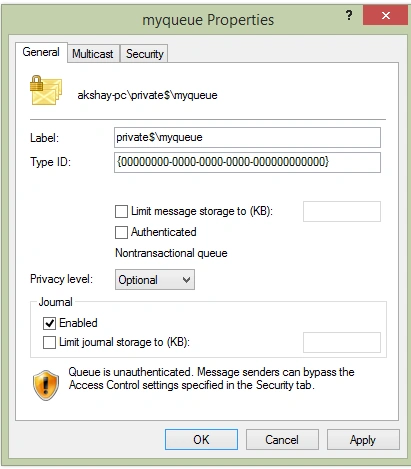
Check ‘Journal Enabled’ checkbox,
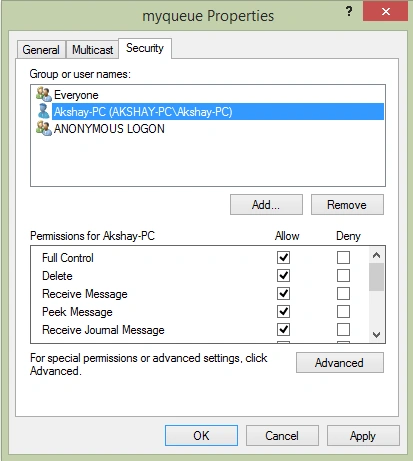
Select the user and allow full permission for this queue,
Verify Queue Service is started
After creating and setting permissions for the queue, we need to verify if queue service is running or not.
Press Window key + R, it will open Run window,
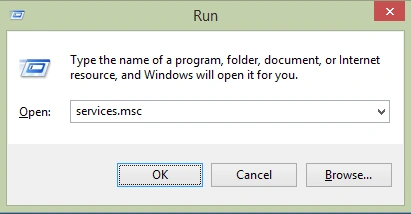
Enter ‘services.msc’ and press ‘OK’ button, it will open Services window.
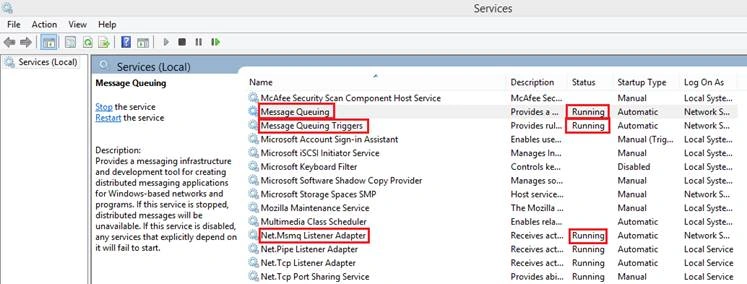
Change below services status to ‘Running’,
- Message Queuing
- Message Queuing Triggers
- Net.Msmq Listener Adapter
Now let us create Service Application
Create WCF Service Application
Open Visual Studio Editor,
Select ‘File’ menu, expand ‘New’ and click on ‘Projects’,
Select ‘WCF’ from left panel, select ‘WCF Service Application’,
Provide appropriate name, select the location and press ‘OK’ button,
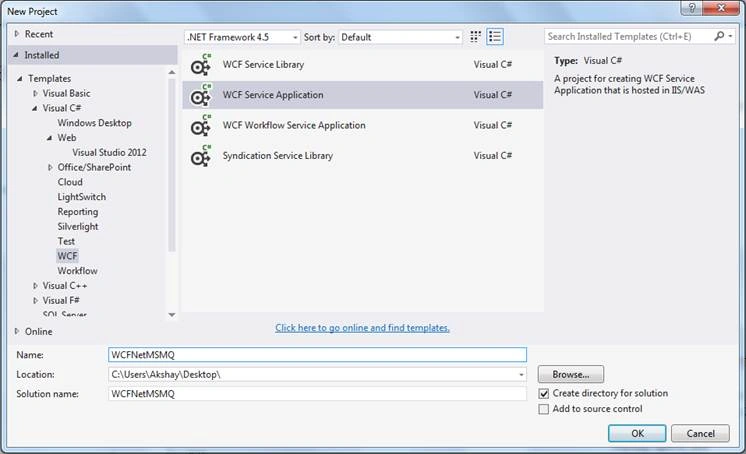
Right click on interface IService1 and rename it to IQueueService,
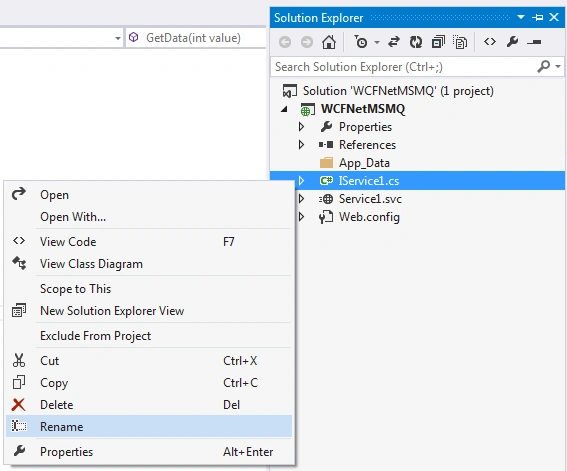
Right click on Service1.svc and rename it to ‘QueueService.svc’,
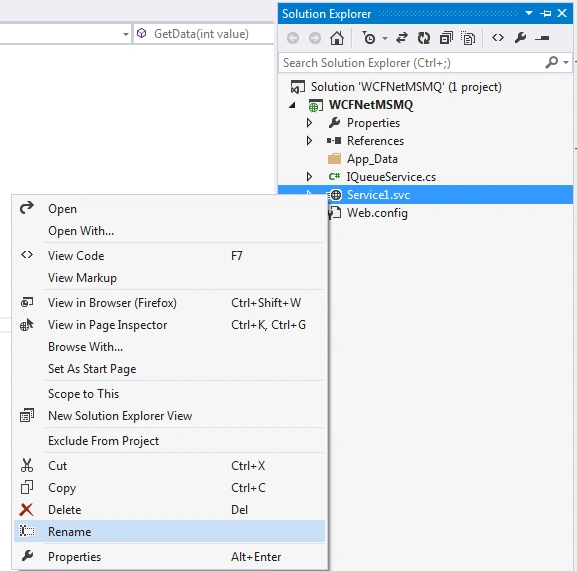
Right click on ‘QueueService.svc’ and click on ‘View Markup’,
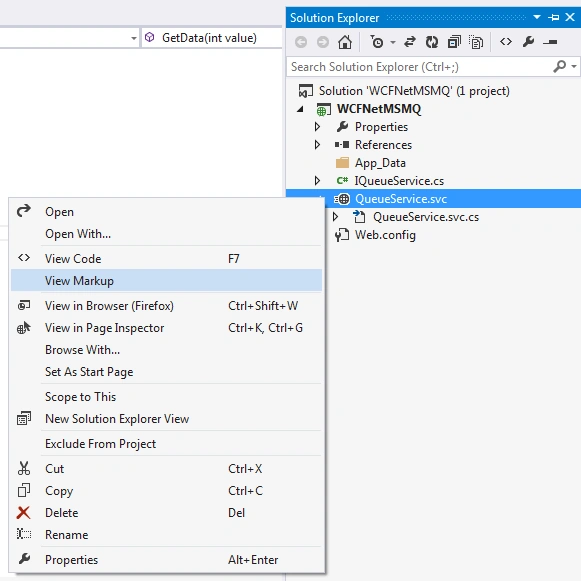
Change the name of service to ‘WCFNetMSMQ.QueueService’,
- <%@ ServiceHost Language="C#" Debug="true" Service="WCFNetMSMQ.QueueService" CodeBehind="QueueService.svc.cs" %>
Configure service and binding in the web.config under Service Model section. Under service we need to set endpoint with address, binding, contract and binding configuration,
- Address – set queue address with net.msmq, use queuename which we have created previously in the last.
- Binding – binding name which we will configure under bindings section.
- Contract – Provide the interface name
- <services>
- <service name="WCFNetMSMQ.QueueService">
- <endpoint address="net.msmq://localhost/private/myqueue"
- binding="netMsmqBinding"
- bindingConfiguration="MsmqBindingConfig"
- contract="WCFNetMSMQ.IQueueService" />
- </service>
- </services>
Configure binding under netMsmqBinding section. Set security as none.
- <bindings>
- <netMsmqBinding>
- <binding name="MsmqBindingConfig" exactlyOnce="false">
- <security mode="None" />
- </binding>
- </netMsmqBinding>
- </bindings>
In the interface, we have operation contract namely ‘GetData’, Set ‘IsOneWay’ attribute as true and make return type as void.
- namespace WCFNetMSMQ
- {
- [ServiceContract]
- public interface IQueueService
- {
- [OperationContract(IsOneWay=true)]
- void GetData(int value);
- }
- }
At the implementation part, trace the value which you are going to pass as parameter in the operation contract.
- namespace WCFNetMSMQ
- {
- public class QueueService : IQueueService
- {
- public void GetData(int value)
- {
- System.Diagnostics.Trace.Write(string.Format("You entered: {0}", value));
- }
- }
- }
Now we are done with the service application having operation contract which accepts integer number and log it. In the next step we need to host our application in IIS.
Host WCF Service Application in IIS
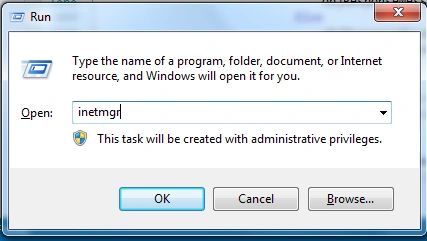
Press Window key + R, it will open Run window.
Enter ‘inetmgr’ and press ‘OK’ button, it will open IIS window.
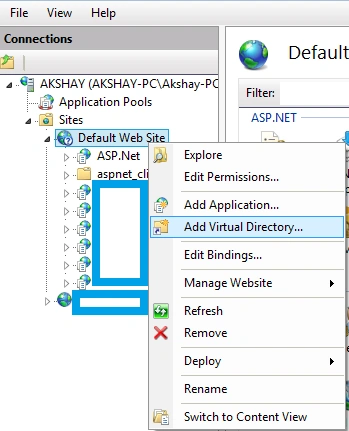
Expand the ‘Sites’ and you will find ‘Default Web Site’.
Right click on ‘Default Web Site’ and click on ‘Add Virtual Directory…’ in order to host the application,
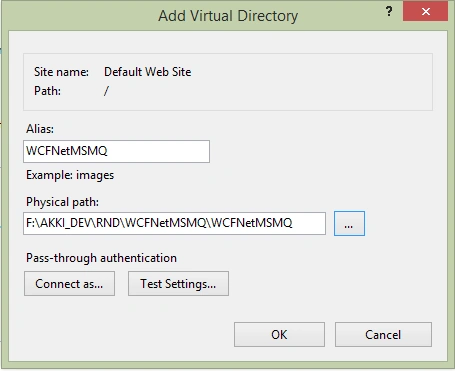
Provide alias name and select our application physical path.
Press ‘OK’ button,
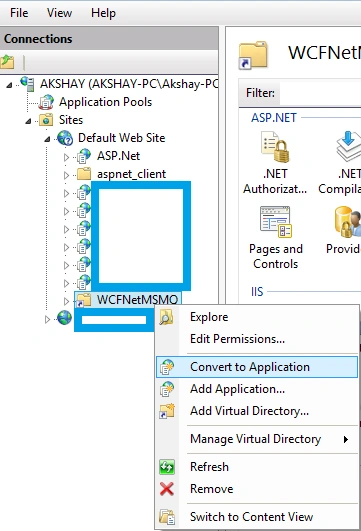
Right click on ‘WCFNetMSMQ’ and click on ‘Convert to Application’.
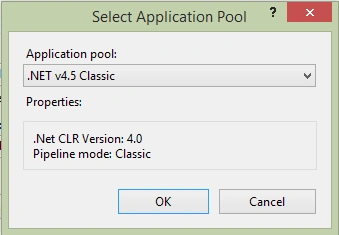
Click on ‘Select…’ button and select the application pool.
Select ‘.NET v4.5 Classic’ application pool and press ‘OK’ button.
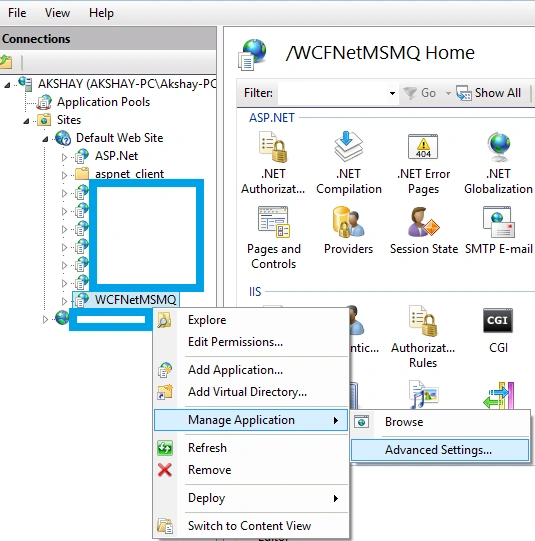
In order to enable net.msmq protocol for this application, Right click on ‘WCFNetMSMQ’, expand ‘Manage Application’ and click on ‘Advanced Settings…’
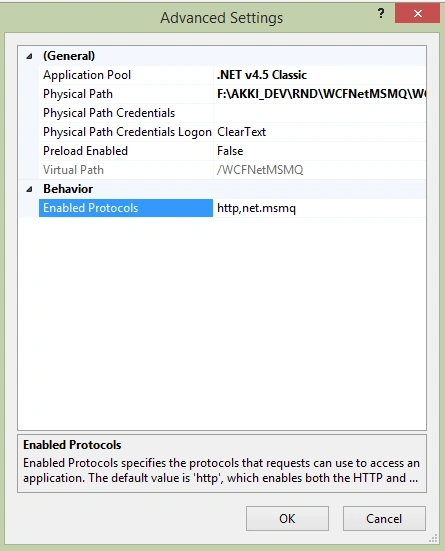
In Enabled Protocols add net.msmq along with http, It will enable net.msmq protocol for our application.
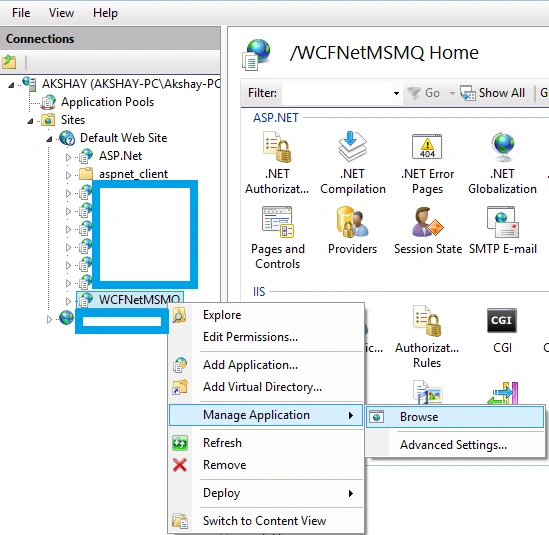
Now check whether configured site is working or not, Right click on ‘WCFNetMSMQ’, expand ‘Manage Application’ and click on ‘Browse’.
In the browser we can see that service is running fine.
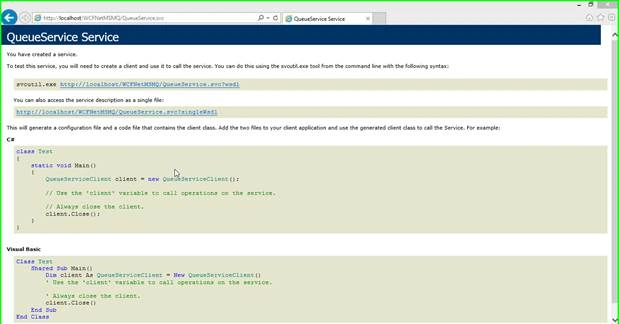
Now it’s time to create client application to consume service.
Create Client Application
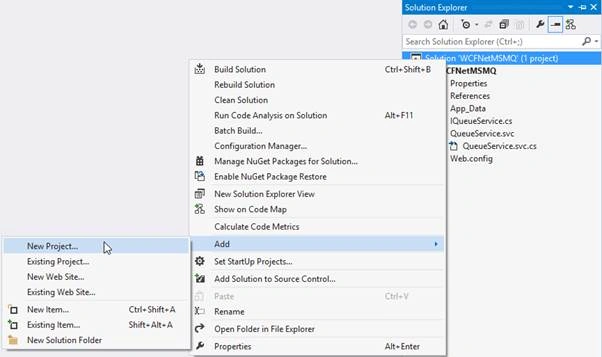
Right click on Solution, expand ‘Add’ and click on ‘New Project…’.
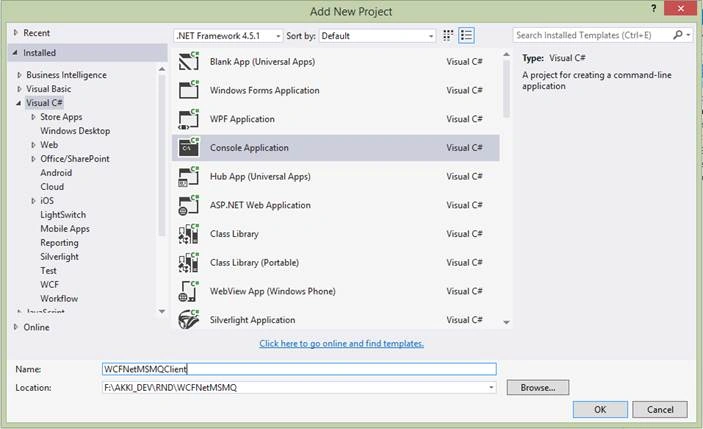
Select ‘Visual C#’ from the left panel and select ‘Console Application’.
Provide appropriate name, select location and click on ‘OK’ button.
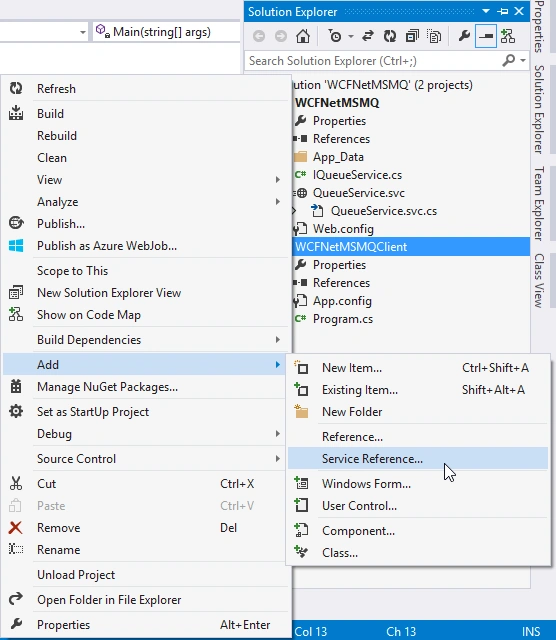
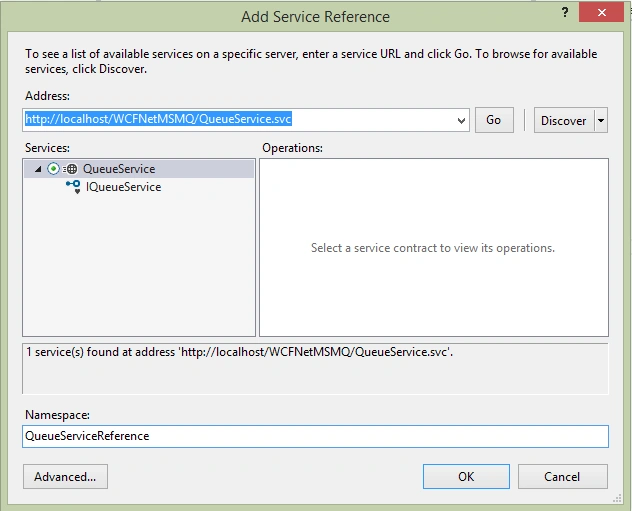
Add service reference in our client application, Right click on the project, expand ‘Add’ and click on ‘Service Reference…’,
Browse application from IIs and copy address from the address bar of the browser.
Paste same address in the ‘Add Service Reference’ window and press ‘Go’ Button.
Select ‘Queue Service’ from Services list.
Give the namespace and press ‘OK’ button.
Create an instance of QueueService client.
Call GetData operation contract using this instance,
- namespace WCFNetMSMQClient
- {
- class Program
- {
- static void Main(string[] args)
- {
- QueueServiceReference.QueueServiceClient serviceClient = new QueueServiceReference.QueueServiceClient();
- serviceClient.GetData(5677);
- }
- }
- }
In order to set client application as startup project, right click on solution and click on ‘Properties’,
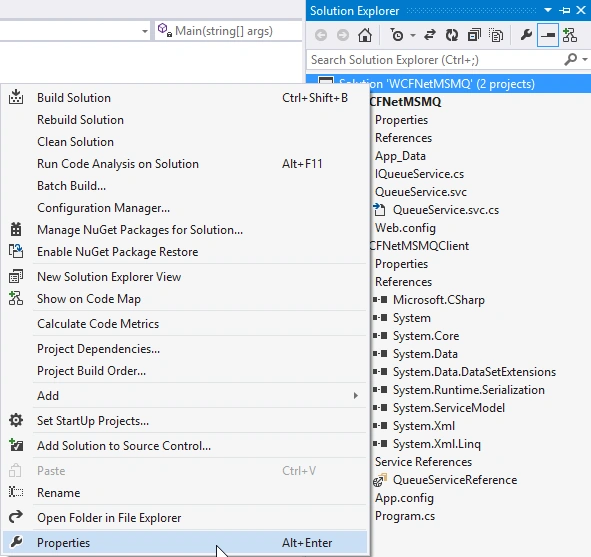
Select client application under ‘Single Startup Project’,
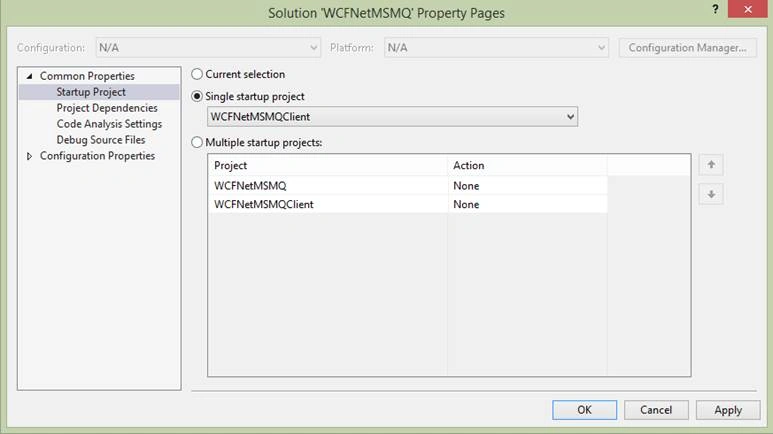
Now run the project and check ‘myqueue’ queue.
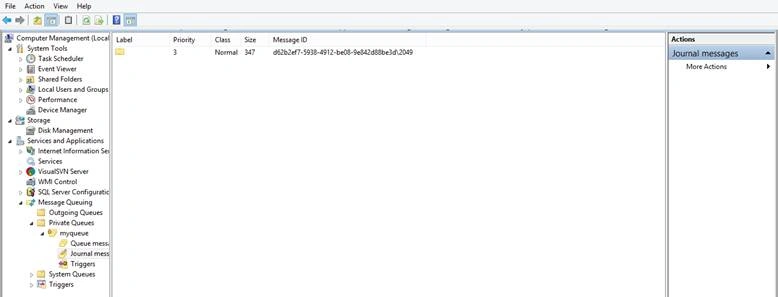
You can see that one message is added in Journal Messages.
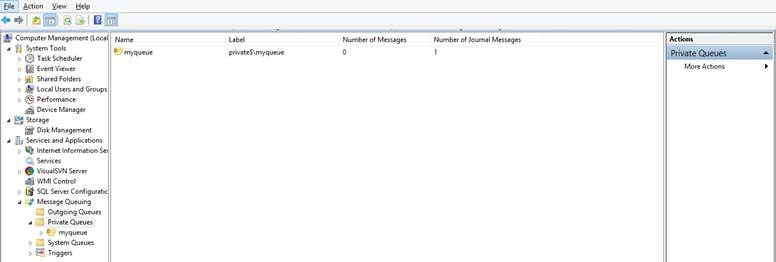
Select Journal Messages under myqueue and you can see the message details like label, priority, class, size and message id.
The main benefit of using queue mechanism is if the destination server is offline when the client sends a message, the message will be queued on the client until the server comes back online.
Read more articles on WCF:
Zdravko StojkoskiPosted May 23, 2017, 12:24 AM
Akshay, I don’t get the point of this at all, i think you have missed a critical point and the other side of it. So when i call this method it is meant to do something? All its doing is storing the messages, what happens if it was successfully sent or not. So is there a second consuming service that then polls the message que for entries? i mean also what’s the point of the que, why not actually just use a database? none of those features are talked about,... it seams like a push / pull system, but you explain one half hwo to do it , and well and simple, but the whole point is actually missed as to how it would use this in a real world example without the other side,...
Anil Kumar PradhanPosted Aug 17, 2016, 7:10 AM
Clear and easy to understand explanation
Sonu ChaudharyPosted Apr 26, 2016, 4:04 AM
nice
Humayun Kabir MamunPosted Apr 24, 2016, 12:57 AM
Nice...
Jaipal ReddyPosted Apr 21, 2016, 8:24 AM
Nice. .
K P Singh ChundawatPosted Apr 20, 2016, 2:42 AM
Thanks for Sharing .
Rahul Kumar SaxenaPosted Apr 19, 2016, 11:08 PM
Good Show