

Introduction
We all would have used snap shots (screen shots) to illustrate bugs or behavior or something that others could understand by seeing them. For taking snap shots we just hit the "Print Screen" key and copy it to Ms Paint and save it. Ever wondered how to programmatically take a snap shot? Then this article is for you.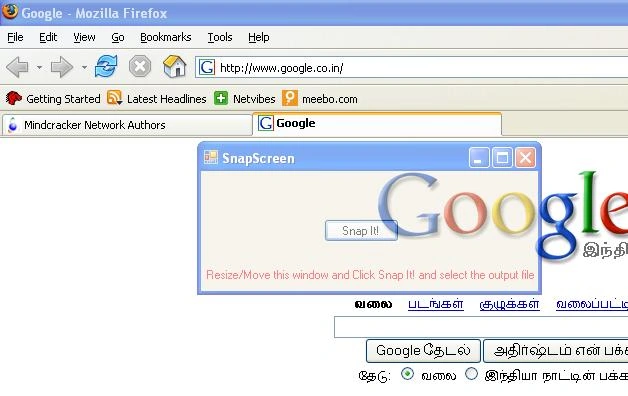
Image-1 This is how the application looks
Scenario
Why do we need to take snapshots programmatically? Consider a scenario where you want to report some kind of behavior errors in an application. Human supervision is not possible when the occurrence of error is random. So we just code a program to take snap shots at regular intervals and store it as a image file. So that later you can use it.
GDI classes we need to know
Lets see what we need to know before we do coding. We need to have a little knowledge about GDI and graphics classes. The Graphics class provides methods for drawing objects to the display device. A Graphics object is associated with a specific device context. This class is used as a canvas to draw images. In order to display anything in a window, you have to obtain a reference to the window's Graphics object.
Next comes the Bitmap class. A Bitmap object is an object used to work with images defined by pixel data. A bitmap consists of the pixel data for a graphics image and its attributes.
Getting Started
To use the GDI classes we need to include System.Drawing.Imaging namespace in the "using" section of the code. Go to the source view and add a string variable and a property to the class. This string variable is used in the property to store and retrieve the output file name.
// variable to store output file name
private string strFilename;
// Property for storing and retrieving output file name
public string filename
{
get{return strFilename;}
set{strFilename=value;}
}
In the design view, add a button and a savefiledialog to the form. Double click the button and go to the click event in the code view. Use the savefiledialog control to retrieve the output file name from the user. And store the file name in the variable strFilename using the property filename.
// Check user clicked OK button
// Get the filename and put in the textbox and property
if (saveFileDialog1.ShowDialog() != DialogResult.Cancel)
{
filename = saveFileDialog1.FileName;
}
Before taking the snap shot we hide our application because we don't want our application in the snap shot image. Sometimes even after hiding the application, the snap shot pictures our application, this is because the application takes few extra milliseconds to hide, so we make our application to wait for some milliseconds.
this.Hide();
// Slow the thread to hide the application before taking the snap
Thread.Sleep(200);
How to Snap It?
Now we create a Bitmap object to set the size of the screen. We use the width and height of the application screen to capture the snap shot. So the user can place our application screen on any area of the screen, move/resize to get the snap shot. To make the user more comfortable in selecting the snap shot area we make the application screen semi-transparent by setting the opacity of the form to 50%.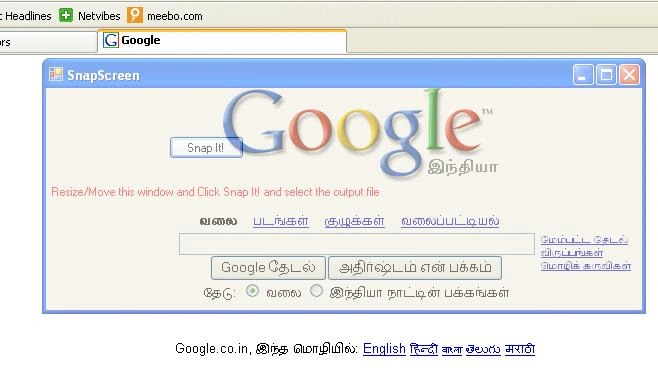
Image- 2 Resizing and Moving the screen
// Setting the size of the screen for the bitmap
Bitmap bmp = new Bitmap(this.Width, this.Height, PixelFormat.Format32bppArgb);
A Graphics object is required to get the image bounds and create the actual picture. So we initialize a Graphics object and get the image bounds from the Bitmap that we have already created. CopyFromScreen method is used to get the snap shot from the screen. Based on the user selection of the file type in the savefiledialog box, we use different image formats to save the file using Bitmap.Save function.
// Saving file in the selected image format
bmp.Save(filename, ImageFormat.Jpeg);
After saving the picture we show the application back by using the following statement :
// Showing the application again
this.Show();
Viewing the snap shot
Now the screen is captured and the picture is saved. We need to view the snap shot. There is an option available to see how your snap shot has come up, just right after saving the file. We use Process class of System.Diagnostic namespace to view the image file.
// Viewing the image
Process pr = new Process();
pr.StartInfo.FileName = filename;
pr.Start();
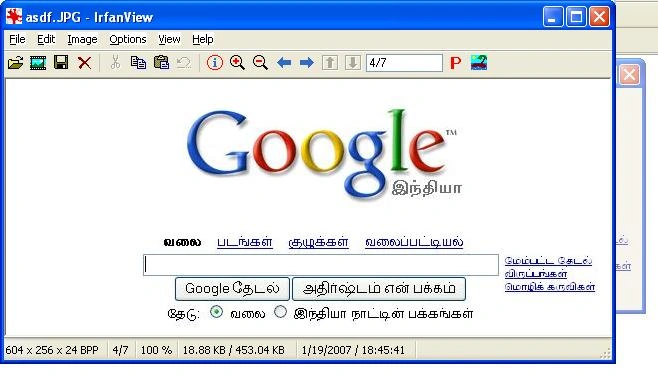
Image - 3 Viewing the saved image file
When the Start method is executed the image file is opened in the respective application configured in the system.
Thats all folks.
Ruga LincyPosted Sep 10, 2015, 7:29 AM
Is this possible to take shot particular area on screen ?
Nidhi ChourasiaPosted Dec 28, 2013, 6:27 AM
i like it but i want that it runs automatically and take snap shot until my system is start
pisey senPosted Feb 13, 2013, 11:45 PM
Do you have source code with WPF
Guest UserPosted Jul 13, 2010, 7:48 PM
gr.CopyFromScreen(Screen.PrimaryScreen.Bounds.X, Screen.PrimaryScreen.Bounds.Y, 0, 0, Screen.PrimaryScreen.Bounds.Size, CopyPixelOperation.SourceCopy); I was looking for this for days!
tamer hatoumPosted Dec 7, 2009, 2:17 AM
It is wonderfulll article and easy to use , Nice code man thank you...
Gerhard KreuzerPosted Oct 23, 2008, 10:33 AM
Hi, thanks, very nice little gimmik Gerhard
swati patilPosted Mar 11, 2008, 1:25 AM
How to take screenshot in ubuntu using programetically???
swati patilPosted Mar 11, 2008, 1:25 AM
How to take screenshot in ubuntu using programetically???
Vijayakumar PatnamPosted Feb 25, 2008, 5:09 AM
Hi Thiagarajan, Your article gave me a clear idea abt how to work with Graphics particulary on this topic. Cheers, Vijay.
Erik RiebePosted Jan 11, 2008, 11:08 PM
Hello, Thank you very much. You are a lifesaver. I'm new to working with graphics and couldn't make head or tails of the MSDN article. This was concise and to the point.
Shaun KiesewetterPosted May 2, 2007, 4:57 AM
If a window has transparency of any degree, then the copy from screen method fails to capture the screen correctly. Everything is captured except for the transparent element. ARE YOU CAPATALIZING ON A BUG ???? Because this will not work on Vista as vista will cap your transparent window ..... public class ScreenShot { public Bitmap TakeScreenShot() { Screen screen = Screen.FromPoint(new Point(0,0)); Bitmap bitmap = new Bitmap(screen.WorkingArea.Width, screen.WorkingArea.Height, System.Drawing.Imaging.PixelFormat.Format32bppArgb); using (Graphics graphics = Graphics.FromImage(bitmap)) { graphics.CopyFromScreen(screen.WorkingArea.Location, new Point(0, 0), screen.WorkingArea.Size); return bitmap; } } }
Gajendra ChouhanPosted Apr 17, 2007, 8:41 AM
I tried this code but not working...It will be great if you can provide with entire code