
Writing multithreaded application in C# in pretty easy. The following are the steps to be followed while writing a multithreaded program.
Step 1: Define Namespace
Since in .NET, threading functionality is defined in System.Threading namespace we have to define it before using any thread class.
using System.Threading
Step 2: Start a thread
The Thread class of System.Threading namespace represents a Thread object. By using this class object, you can create new threads, delete, pause, and résumé threads. The Thread class creates a new thread and thread. Start method starts the thread. The general syntax for initializing a new instance of the thread class is given blow.
using System;
using System.Collections.Generic;
using System.Text;
using System.Threading;
namespace MyFirstConsoleApplication
{
class Program
{
static void Main(string[] args)
{
new Program();
for(int j=0;j<10;j++)
{
Console.WriteLine("Main Thread" + j.ToString());
Thread.Sleep(1000);
}
}
//When Start will called, the new thread will begin executing the ThreadStart delegate //passed
in the constructor. Once the thread is dead, it cannot be restarted with //another call to start.
public Program()
{
Thread thread = new Thread(new ThreadStart(WriteData));
thread.Start();
}
/// <summary>
/// WriteData is a function which will be executed by the thread
/// </summary>
protected static void WriteData()
{
string str;
for (int i = 0; i <= 10; i++)
{
str = "Secondary Thread" + i.ToString();
Thread.Sleep(1000);
Console.WriteLine(str);
}
}
}
}
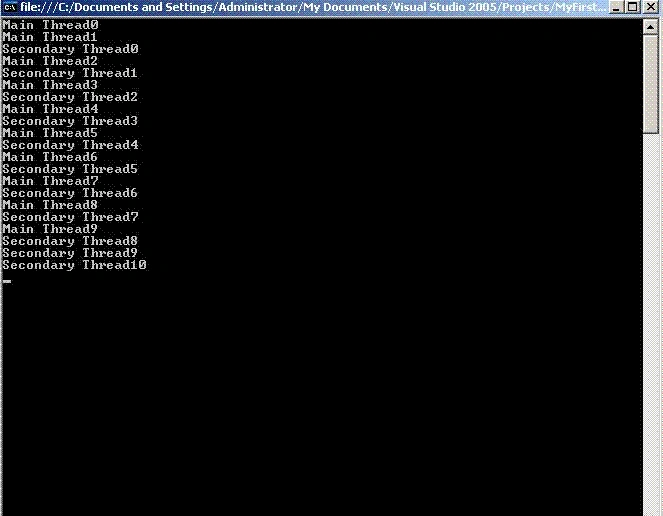
For more Threading Concepts, refer :
Basic concepts of Threading: Part I
Basic concepts of Threading: Part II
Coming soon:
Important Properties and Methods of Threads: Part IV
Markus RissmannPosted Oct 16, 2006, 10:18 AM
Can we get a windows app example? You aren't dealing with common problems that everyday programmers will run into. I am new to C#. Could you show this as a windows app and writing the output to a textbox? Tutorials should be based on common day problems. -Markus