

Introduction
The process of recognizing a person's face in front of the camera by capturing their image and processing it is one of the concepts widely used for automation. It can be done in a very simple way. Here, I am using Python programming for recognizing faces. For using the system for this concept, you need to prepare your system by installing the required attributes for the python. I am using Python 3.7.3 for this process. In this article, we will discuss recognizing the face of a person in front of the camera by capturing their image.
Preparing the System
Before the process, you need to prepare your system by installing some additional attributes to the Python for this purpose. You can run the code given below in the command prompt one by one for installing the packages.
- pip install cmake
- pip install dlib
- pip install face_recognition
- pip install numpy
- pip install opencv-python
If you found any error in the installation of the dlib attribute, you can download the dlib file and install it by executing the codes given below in the command prompt.
- cd C:\Users\Dhanush\Downloads\
- pip install dlib
You need to keep the cascade files in the same directory where you are storing the Python program.
Training the System to Recognize Faces
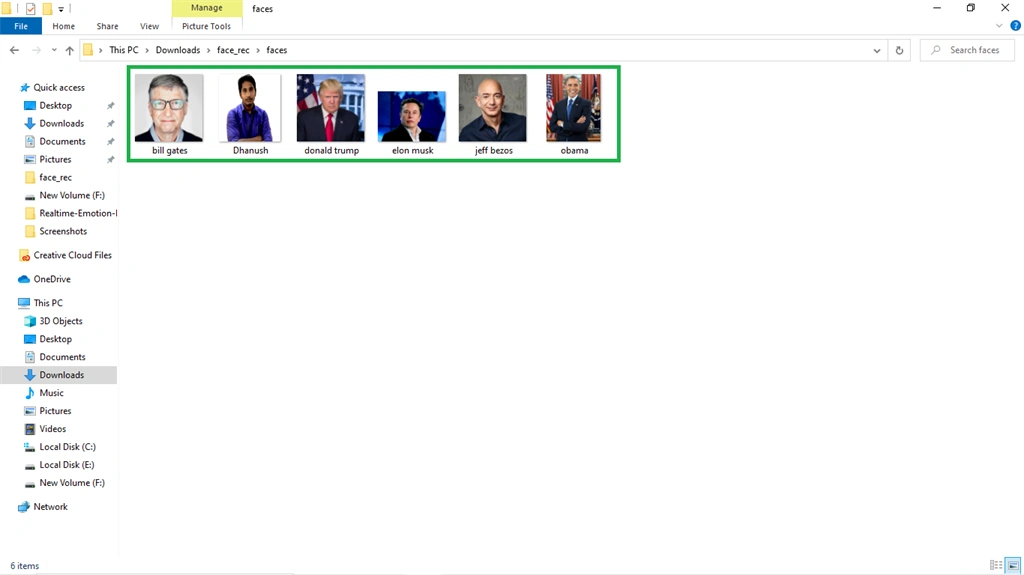
To have the system recognize your face, you need to train the system to recognize their images. For that create a folder named faces in the same directory where you are saving the python program and rename the image in the name of that person. The name given for the image is shown on the screen if the person is recognized. Make sure that the images contain the face of a single person.
Recognizing THE FACE
To recognize the face of a person, you use the Python code given below for that process. By modifying that code, it will detect the faces from the images. For detecting the faces, you need to store the image in the same directory in the name of the test and you need to make the changes on the code based on the extension of your image.
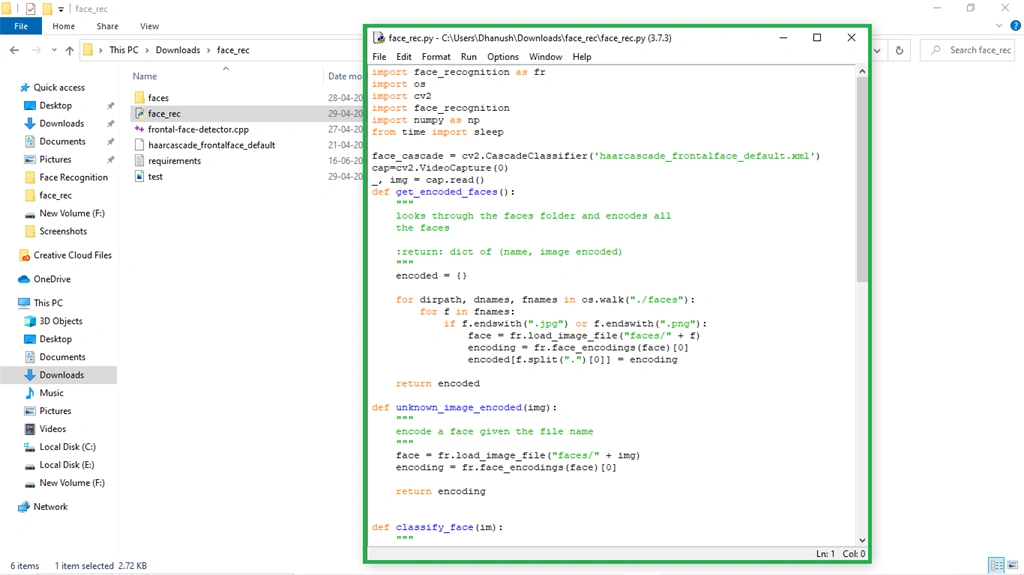
- import face_recognition as fr
- import os
- import cv2
- import face_recognition
- import numpy as np
- from time import sleep
- face_cascade = cv2.CascadeClassifier('haarcascade_frontalface_default.xml')
- cap=cv2.VideoCapture(0)
- _, img = cap.read()
- def get_encoded_faces():
- """
- looks through the faces folder and encodes all
- the faces
- :return: dict of (name, image encoded)
- """
- encoded = {}
- for dirpath, dnames, fnames in os.walk("./faces"):
- for f in fnames:
- if f.endswith(".jpg") or f.endswith(".png"):
- face = fr.load_image_file("faces/" + f)
- encoding = fr.face_encodings(face)[0]
- encoded[f.split(".")[0]] = encoding
- return encoded
- def unknown_image_encoded(img):
- """
- encode a face given the file name
- """
- face = fr.load_image_file("faces/" + img)
- encoding = fr.face_encodings(face)[0]
- return encoding
- def classify_face(im):
- """
- will find all of the faces in a given image and label
- them if it knows what they are
- :param im: str of file path
- :return: list of face names
- """
- faces = get_encoded_faces()
- faces_encoded = list(faces.values())
- known_face_names = list(faces.keys())
- #img = cv2.imread(im, 1)
- #img = cv2.resize(img, (0, 0), fx=0.5, fy=0.5)
- #img = img[:,:,::-1]
- face_locations = face_recognition.face_locations(img)
- unknown_face_encodings = face_recognition.face_encodings(img, face_locations)
- face_names = []
- for face_encoding in unknown_face_encodings:
- # See if the face is a match for the known face(s)
- matches = face_recognition.compare_faces(faces_encoded, face_encoding)
- name = "Unknown"
- # use the known face with the smallest distance to the new face
- face_distances = face_recognition.face_distance(faces_encoded, face_encoding)
- best_match_index = np.argmin(face_distances)
- if matches[best_match_index]:
- name = known_face_names[best_match_index]
- face_names.append(name)
- for (top, right, bottom, left), name in zip(face_locations, face_names):
- # Draw a box around the face
- cv2.rectangle(img, (left-20, top-20), (right+20, bottom+20), (255, 0, 0), 2)
- # Draw a label with a name below the face
- cv2.rectangle(img, (left-20, bottom -15), (right+20, bottom+20), (255, 0, 0), cv2.FILLED)
- font = cv2.FONT_HERSHEY_DUPLEX
- cv2.putText(img, name, (left -20, bottom + 15), font, 1.0, (255, 255, 255), 2)
- # Display the resulting image
- while True:
- cv2.imshow('IMAGE', img)
- return face_names
- print(classify_face("test"))
Output Verification
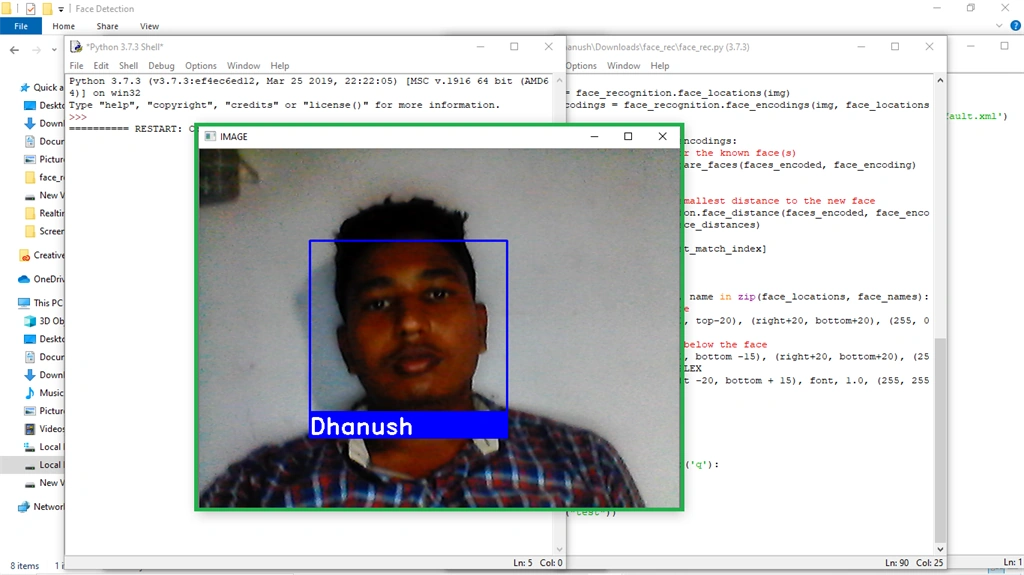
While you are running the program, your camera will automatically turn on and capture the face. The system will recognize the face that is captured. If it is an unknown face, it shows up as unknown.
Conclusion
This is an article for capturing and recognizing faces. In the future, I will upload the article for recognizing the faces from live video from the camera. I hope this article will help you to learn about face recognition. You can download the files for this project from my Github page by clicking here or from the download section.
Luis SotoPosted Oct 10, 2020, 12:52 AM
Excelente informaci? N, como seria el codigo que me permita reconocer a la persona y almacenar el nombre en una base de datos. Me gustaria que me apoyara en esa parte