

Introduction
In this article, I will show you how to create a Progress Bar Android app using Android Studio. We can display the Android progress bar dialog box to display the status of the work being done, e.g., downloading a file or analyzing the status of work, etc.
Requirements
- Android Studio version 2.3.3
- Little bit XML and JAVA knowledge.
- Android Emulator (or) Android mobile
- Download link (Android Studio)
Steps should be followed
Follow these steps to create a Progress Bar app using Android Studio. I have attached the source code too.
Step 1
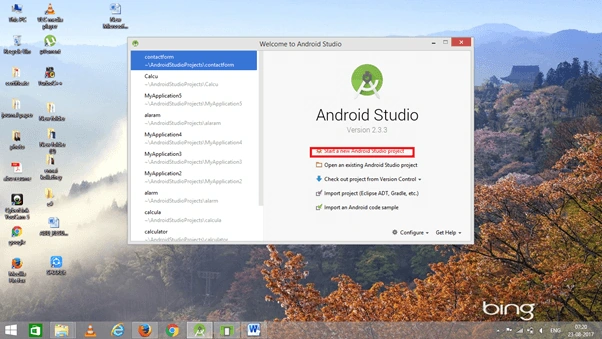
Open Android Studio and start a New Android Studio Project.
Step 2
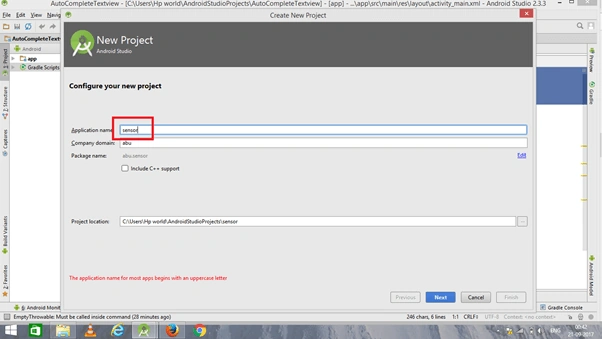
You can choose your application name and choose where your project is stored. If you wish to use C++ for coding the project, mark the "Include C++ support", and click the "Next" button.
Step 3
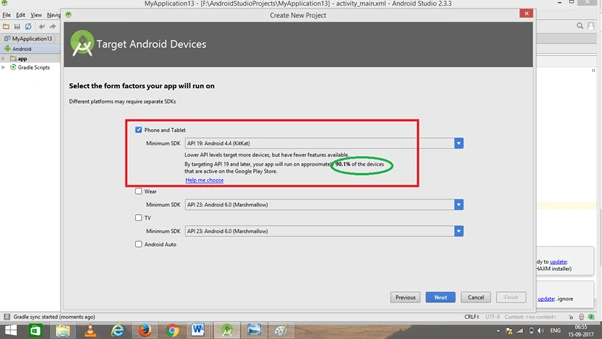
Now, select the version of Android and select the target Android devices. We need to choose the SDK level which plays an important role to run the application.
Step 4
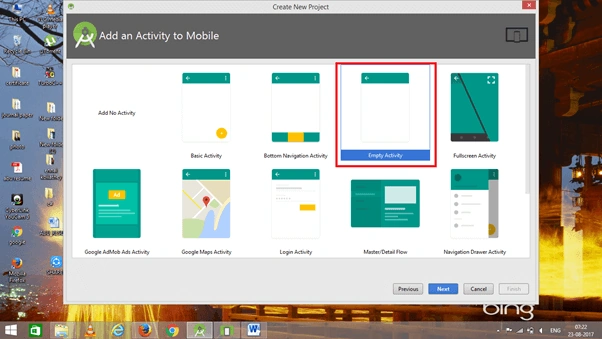
Now, add the activity and click the "Next" button.
Step 5
Add Activity name and click "Finish".
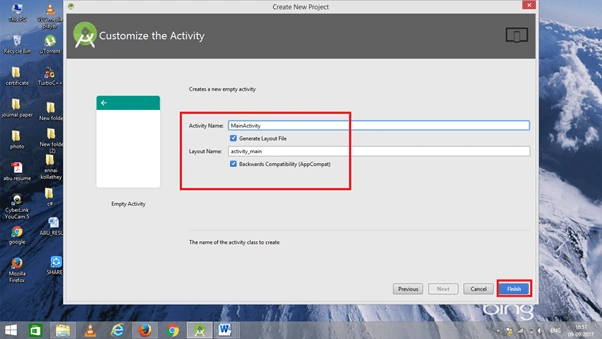
Step 6
Go to activity_main.xml, This XML file contains the designing code for our Android app.
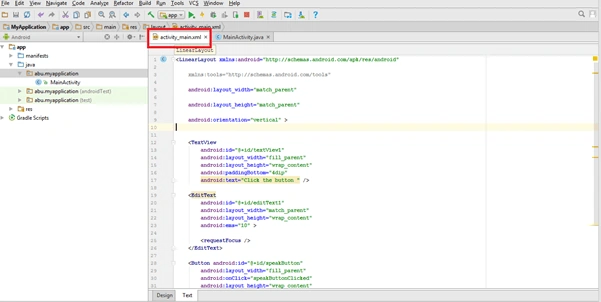
The XML code is given below.
- <RelativeLayout
- xmlns:android="http://schemas.android.com/apk/res/android"
- xmlns:tools="http://schemas.android.com/tools"
- android:layout_width="match_parent"
- android:layout_height="match_parent"
- tools:context=".MainActivity" >
- <Button
- android:id="@+id/button1"
- android:layout_width="wrap_content"
- android:layout_height="wrap_content"
- android:layout_alignParentTop="true"
- android:layout_centerHorizontal="true"
- android:layout_marginTop="116dp"
- android:text="download file" />
- </RelativeLayout>
Step 7
Go to Main Activity.java. This Java program is the backend language for Android.
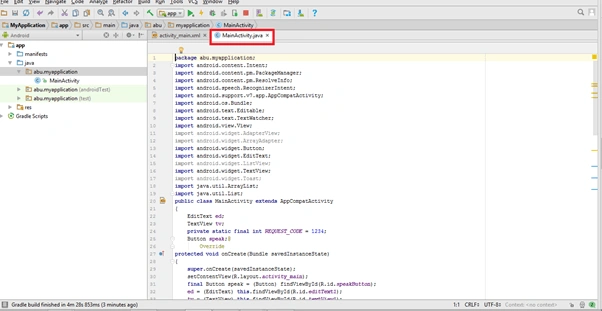
The java code is given below.
- package abu.progressbar;
- import android.app.Activity;
- import android.app.ProgressDialog;
- import android.os.Bundle;
- import android.os.Handler;
- import android.widget.Button;
- import android.view.Menu;
- import android.view.View;
- import android.view.View.OnClickListener;
- public class MainActivity extends Activity {
- Button btnStartProgress;
- ProgressDialog progressBar;
- private int progressBarStatus = 0;
- private Handler progressBarHandler = new Handler();
- private long fileSize = 0;
- @Override
- protected void onCreate(Bundle savedInstanceState) {
- super.onCreate(savedInstanceState);
- setContentView(R.layout.activity_main);
- addListenerOnButtonClick();
- }
- public void addListenerOnButtonClick() {
- btnStartProgress = (Button) findViewById(R.id.button1);
- btnStartProgress.setOnClickListener(new OnClickListener(){
- @Override
- public void onClick(View v) {
- progressBar = new ProgressDialog(v.getContext());
- progressBar.setCancelable(true);
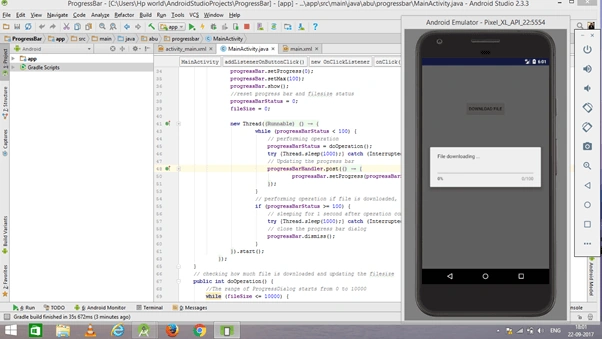
- progressBar.setMessage("File downloading ...");
- progressBar.setProgressStyle(ProgressDialog.STYLE_HORIZONTAL);
- progressBar.setProgress(0);
- progressBar.setMax(100);
- progressBar.show();
- progressBarStatus = 0;
- fileSize = 0;
- new Thread(new Runnable() {
- public void run() {
- while (progressBarStatus < 100) {
- progressBarStatus = doOperation();
- try {Thread.sleep(1000);} catch (InterruptedException e) {e.printStackTrace();}
- progressBarHandler.post(new Runnable() {
- public void run() {
- progressBar.setProgress(progressBarStatus);
- }
- });
- }
- if (progressBarStatus >= 100) {
- try {Thread.sleep(1000);} catch (InterruptedException e) {e.printStackTrace();}
- progressBar.dismiss();
- }
- }
- }).start();
- }
- });
- }
- public int doOperation() {
- while (fileSize <= 10000) {
- fileSize++;
- if (fileSize == 1000) {
- return 10;
- } else if (fileSize == 2000) {
- return 20;
- } else if (fileSize == 3000) {
- return 30;
- } else if (fileSize == 4000) {
- return 40;
- } else{
- return 100;
- }
- }
- return 100;
- }
- @Override
- public boolean onCreateOptionsMenu(Menu menu) {
- getMenuInflater().inflate(R.menu.main, menu);
- return true;
- }
- }
Step 8
Now, go to the menu bar and click "make the project" or press ctrl+f9 to debug the error.
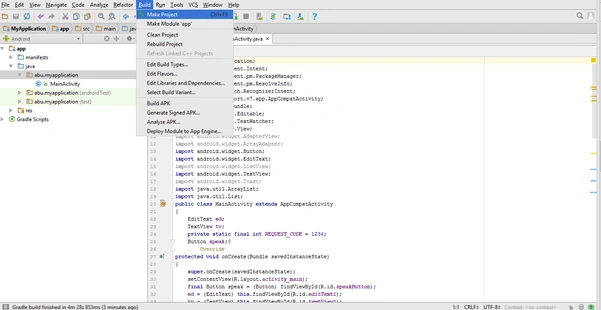
Step 9
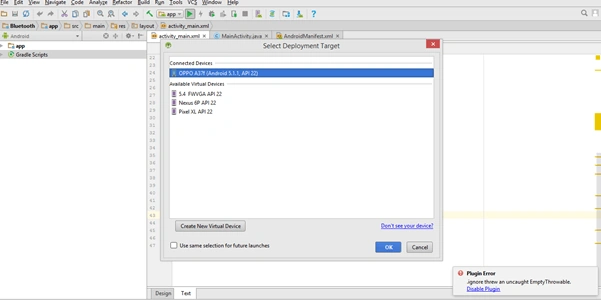
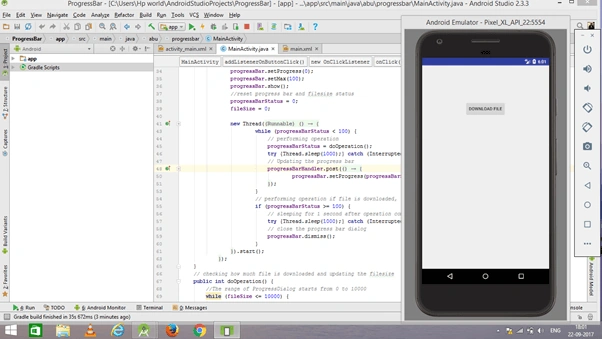
Then, click the Run button or press shift+f10 to run the project. Choose the virtual machine option and click OK.
Conclusion
We have successfully created the Progress Bar Android application using Android Studio.
Join the conversation! Your thoughts help the community grow.