

Introduction
The Azure Logic Apps help us to automate our workflows and integrate data across Azure services. In this demo, we are going to learn how to get an email notification when we upload the files to our FTP Server by using Azure Logic Apps.
Step 1
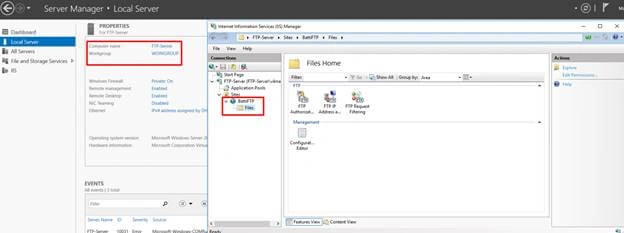
In the Azure Environment, I have already deployed a server named “FTP-Server”. In the FTP server I have already developed IIS Server and then set up the FTP Server. If you want to learn about configuring FTP servers in Microsoft Azure click here.
- FTP Site Name: BattiFTP
- FTP Folder Name: Files
- FTP IP Address: 52.168.135.182
- FTP User Name: viknaraj
Step 2
In this demo, I have already created a Logic App Name “FTPApp”.
Logic App Creating Process
In the Azure Portal Click the “+Create a resource”, and then enter the “Logic App”.
In the Logic App page click “Create” to deploy the Logic App.
In the create Logic App, enter the name for the logic app "FTPApp".
Choose the existing resource group "Article"
Click the “Create” button to start the process.
Step 3
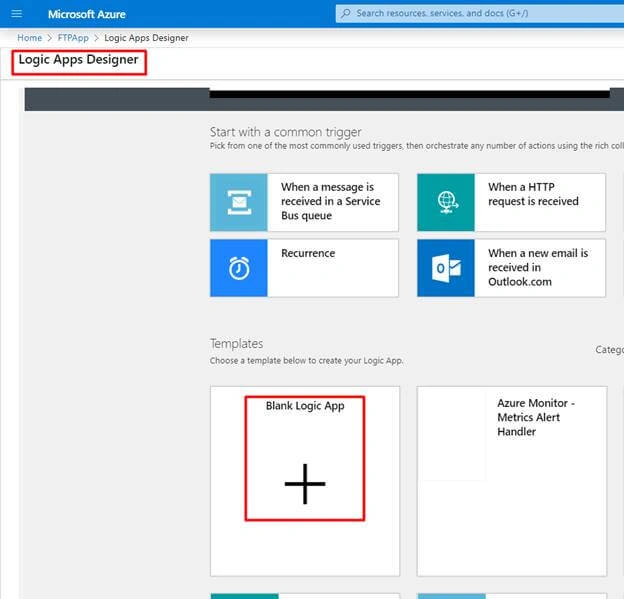
Open the Logic App and then Select “FTPApp” that we have created in Step 2, and then Click “Blank Logic App”.
Step 4
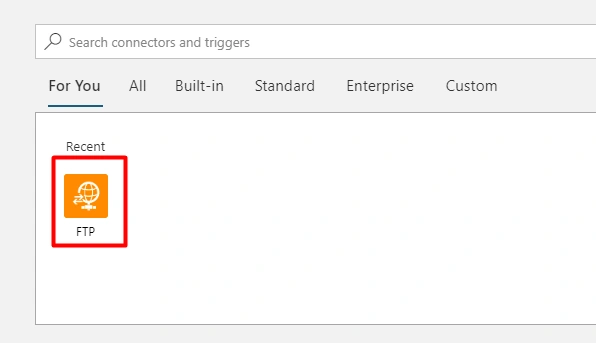
In the Search Box, type “FTP” and then Select “FTP”.
Step 5
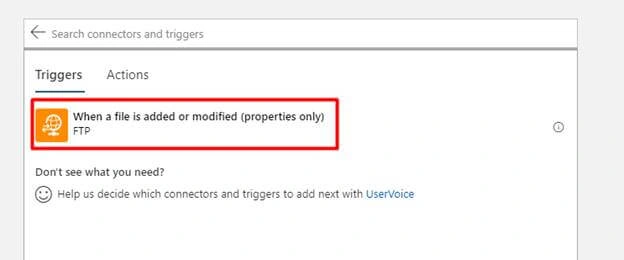
After selecting the FTP then we need to select Triggers, so select “when a file is added or modified (properties only)”.
Step 6
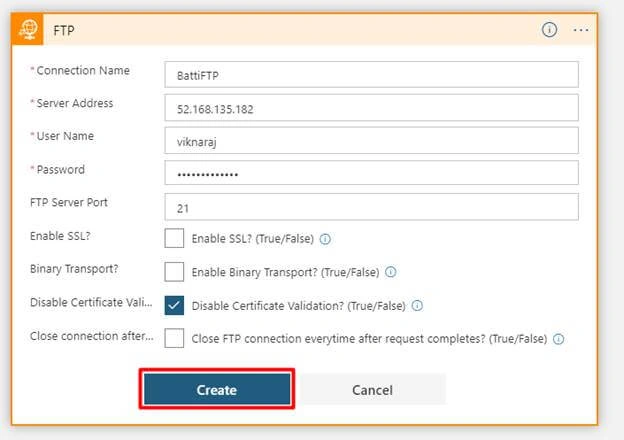
In the FTP Connection Setting enter the FTP account information,
- Connection Name: Name should be the FTP Server Name
- Server Address: FTP Server Public IP Address
- User Name & Password: FTP Server Credential
In this demo we have selected “Disable Certificate Validation”, and then click “Create”.
Step 7
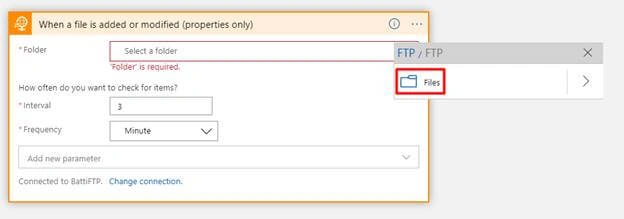
Now we need to select our FTP Folder, so click the button and then select the folder; in this demo our FTP shared folder name is “Files”.
Step 8
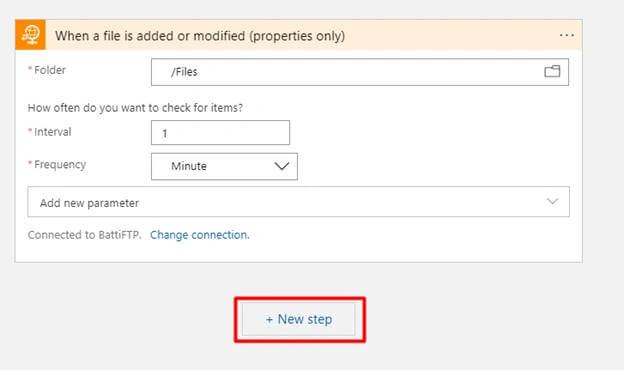
After selecting the FTP Shared folder, then we can assign the Interval time, after assigning the properties, Click “+ New Step”.
Step 9
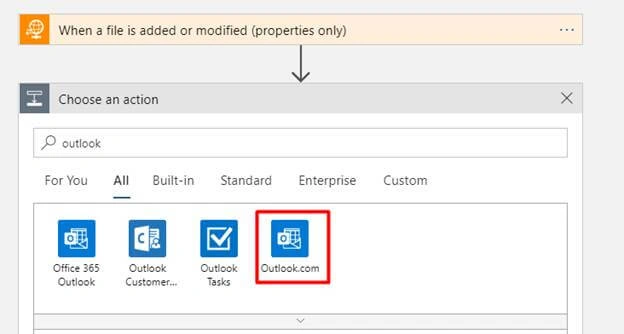
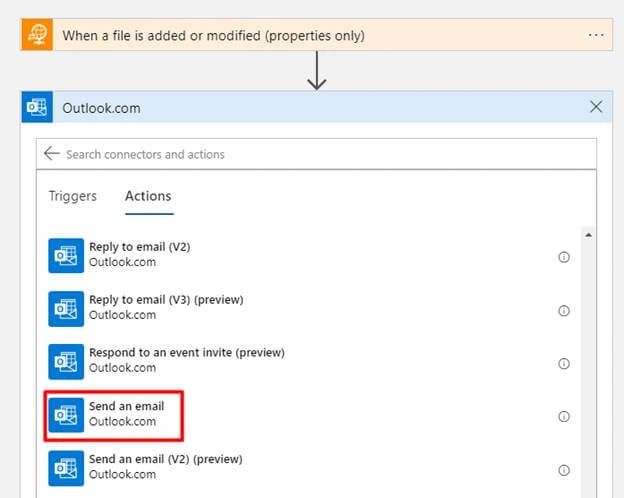
Now we need to choose an action, so type Outlook in the search box, and then select “Outlook.com”.
Step 10
Choose the Connectors action as “Sent an email”.
Step 11
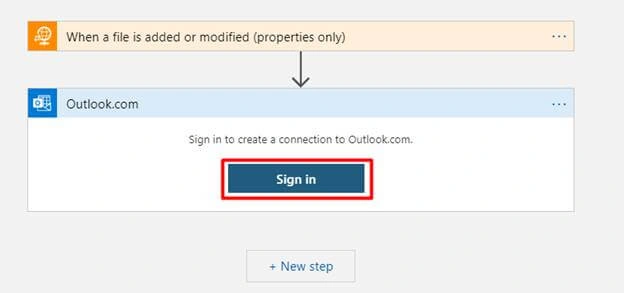
Click the “Sign in button” to connect the Outlook.com account.
Step 12
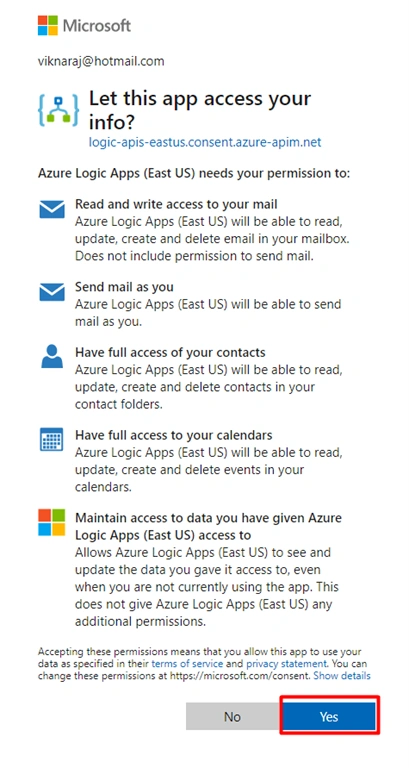
After successfully signing in to the account, Click “Yes” button to allow this app to access your info.
Step 13
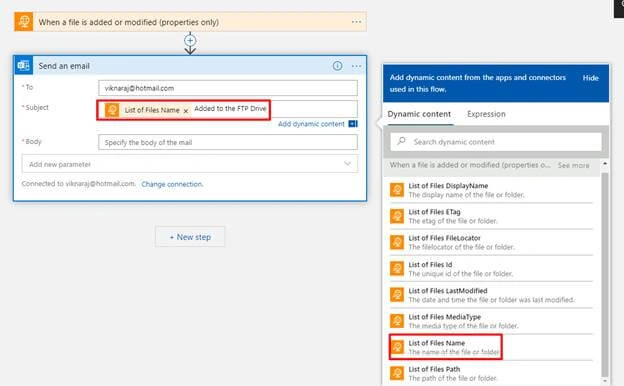
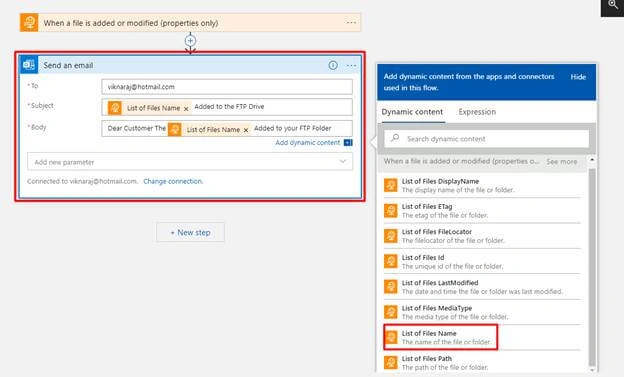
Now we can define the email setting,
- To: Enter the mail address that Logic Apps want to send the email when we upload any files into the FTP Drive.
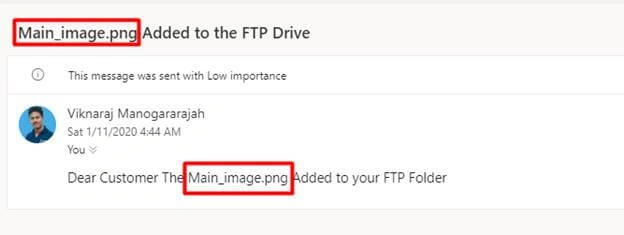
- Subject: Pick the dynamic content like “List of Files Name” and enter the text like “Added to the FTP Drive”.
Step 14
After adding the Subject, then Enter the Body, in this demo I just entered “Dear Customer The List of File Name Added to your FTP Folder”.
Step 15
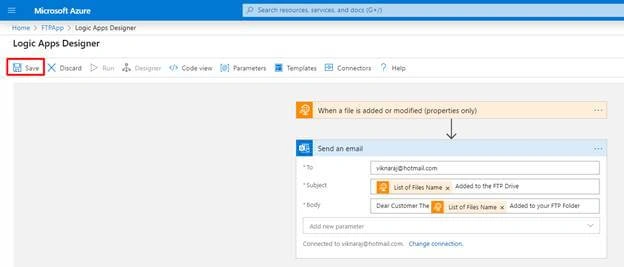
After successfully defining the values, click “Save”.
Step 16
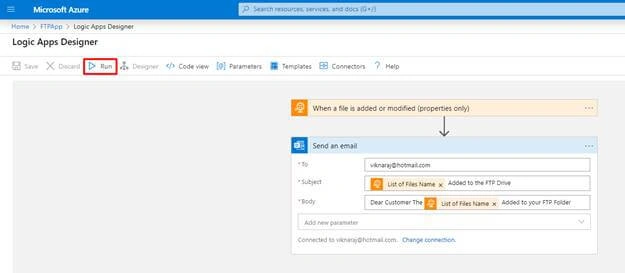
After successfully saving the Logic App, click “Run” to start the App.
Step 17
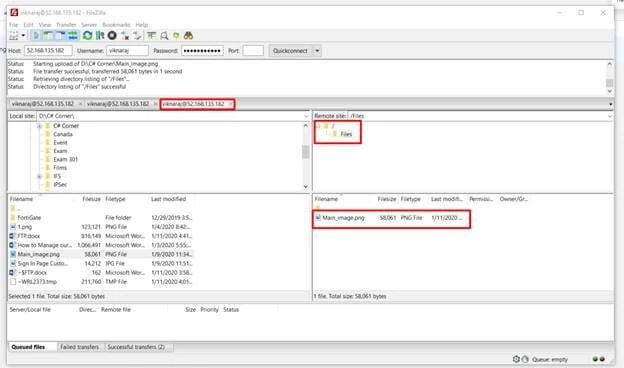
Open the FileZilla and enter the FTP Credential and Click “Quick connect”, after successfully connecting the FTP drive drag and drop the file into the FTP Folder, in this demo our FTP Directory name is “Files” and the file name “Main_image.jpg”.
Step 18
Now we can verify in our Inbox, that we have received an email from our Logic App.
Step 19
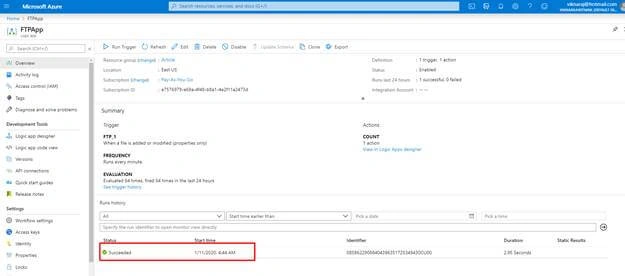
Now we can verify our logic app that runs the history has succeeded.
Summary
In this demo, we have learned how to manage our FTP servers using Logic Apps, If you have any questions, feel free to comment below.
Hadshana KamalanathanPosted Sep 28, 2021, 4:21 AM
Excellent Article;
shekhar gPosted Sep 26, 2020, 12:20 PM
Explained very well. Can you please add more scenarios. Thank you. Viknaraj :)
Disne SivalingamPosted Mar 22, 2020, 2:39 AM
It is very useful