Introduction
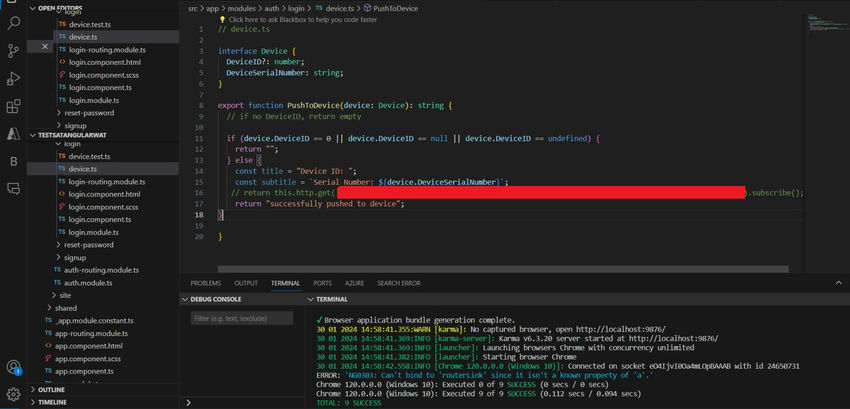
Begin by creating components and their corresponding test files. In this example, I've created device.ts and device.test.ts files. Please refer to the images below.
Next, add the necessary function methods, such as pushToDevice, which handles pushing data to devices, and responsible for sending data to the backend.

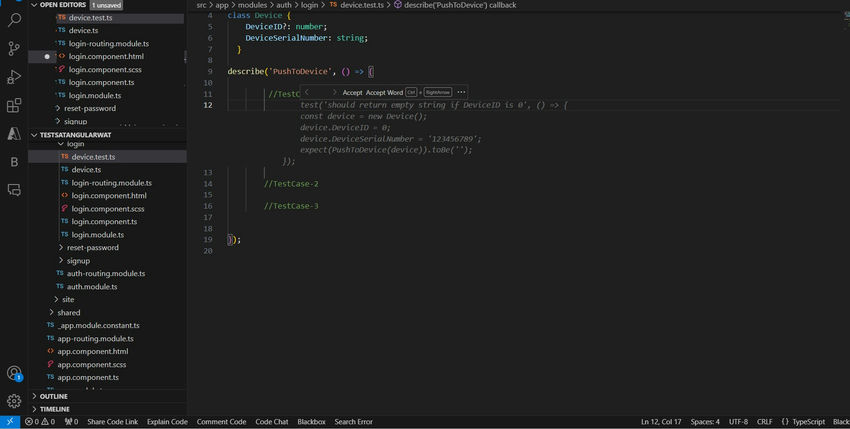
After creating device.ts and device.test.ts files and adding the pushToDevice and sendToBackend methods, proceed to add test cases in the device.test.ts file. Below are some example function names you might use. If you entered the function name with the enter tab key.

![Ts devices]()
![Explorer]()
![Devices]()
Here the copilot will give 1 –5 test cases for these methods. Please refer to the above screenshot. And Angular will run the test cases. Just enter the npm run test command in the terminal the cases will run and execute.
it can assist in providing multiple test case examples based on the context you provide. Here’s how you might structure and execute these test cases in your Angular project.
![]()
In case of any error, the application running time will show. Otherwise, cases executed in the Chrome window opened. When you run tests in an Angular application using Karma (which runs tests in real browsers like Chrome) and Jasmine, here's what typically happens:, Karma will capture and display this error in your terminal or command prompt where you ran the npm run test.
![Server Error]()
I hope this article is helpful for you.