

What is Kendo UI?

It is a JavaScript framework for building modern interactive Web Applications. Kendo is used to develop an interactive website; i.e., look and feel of the Application and the content, various types like HTML, CSS , script and jQuery, so that the developer can achieve the development in minimum time. Usually, it is used for the client side technologies.
Step 1: First, we have to download the Telerik Control setup from here.
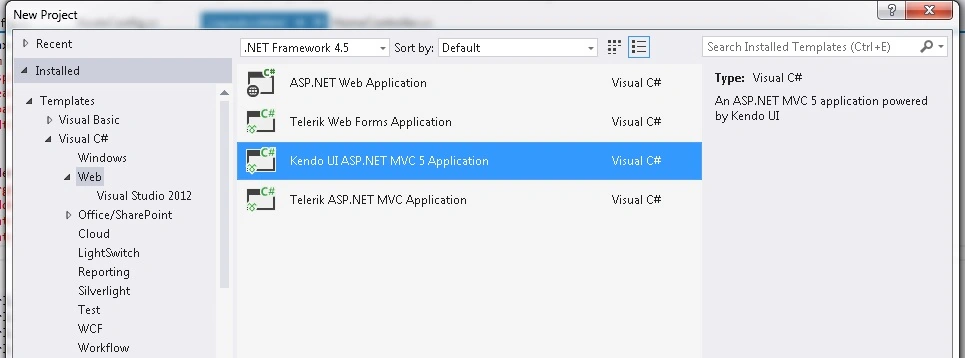
Step 2: Now, create a simple project from your Visual Studio 2013, as given below:
Now, our solution which will contain Kendo CSS, scripts etc. files as:
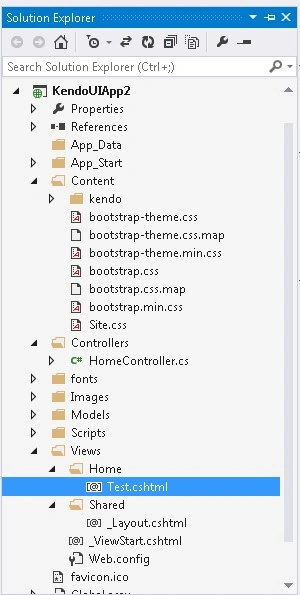
_Layout.cshtml contains Kendo CSS and the script files, given below:
- <link href="@Url.Content(" ~/Content/kendo/2016.2.504/kendo.common-material.min.css ")" rel="stylesheet" type="text/css" />
- <link href="@Url.Content(" ~/Content/kendo/2016.2.504/kendo.mobile.all.min.css ")" rel="stylesheet" type="text/css" />
- <link href="@Url.Content(" ~/Content/kendo/2016.2.504/kendo.dataviz.min.css ")" rel="stylesheet" type="text/css" />
- <link href="@Url.Content(" ~/Content/kendo/2016.2.504/kendo.material.min.css ")" rel="stylesheet" type="text/css" />
- <link href="@Url.Content(" ~/Content/kendo/2016.2.504/kendo.dataviz.material.min.css ")" rel="stylesheet" type="text/css" />
- <script src="@Url.Content(" ~/Scripts/kendo/2016.2.504/jquery.min.js ")"></script>
- <script src="@Url.Content(" ~/Scripts/kendo/2016.2.504/angular.min.js ")"></script>
- <script src="@Url.Content(" ~/Scripts/kendo/2016.2.504/jszip.min.js ")"></script>
- <script src="@Url.Content(" ~/Scripts/kendo/2016.2.504/kendo.all.min.js ")"></script>
- using System;
- using System.Collections.Generic;
- using System.Linq;
- using System.Web;
- using System.Web.Mvc;
- namespace KendoUIApp2.Controllers
- {
- public class HomeController: Controller {
- public ActionResult Test() {
- return View();
- }
- }
- }
- @ {
- ViewBag.Title = "Test";
- Layout = "~/Views/Shared/_Layout.cshtml";
- } < div id = "myPopUp"
- style = "background-color:lightblue;" > < p > Lorem ipsum dolor sit amet, consectetuer adipiscing elit, sed diam nonummy nibh euismod tincidunt ut laoreet dolore magna aliquam erat volutpat. < br / > Lorem ipsum dolor sit amet, consectetuer adipiscing elit, sed diam nonummy nibh euismod tincidunt ut laoreet dolore magna aliquam erat volutpat. < /p> < /div> < button onclick = "myFunction()"
- style = "margin-left:20%" > Click Here To Open Pop Up < /button> < script > function myFunction() {
- var objWin = $("#myPopUp"),
- undo = $("#undo");
- undo.click(function() {
- objWin.data("kendoWindow").open();
- undo.fadeOut();
- });
- function onClose() {
- undo.fadeIn();
- }
- objWin.kendoWindow({
- width: "600px",
- height: "300px",
- visible: false,
- close: onClose
- }).data("kendoWindow").center().open();
- } < /script>
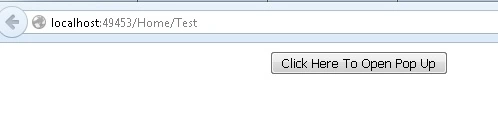
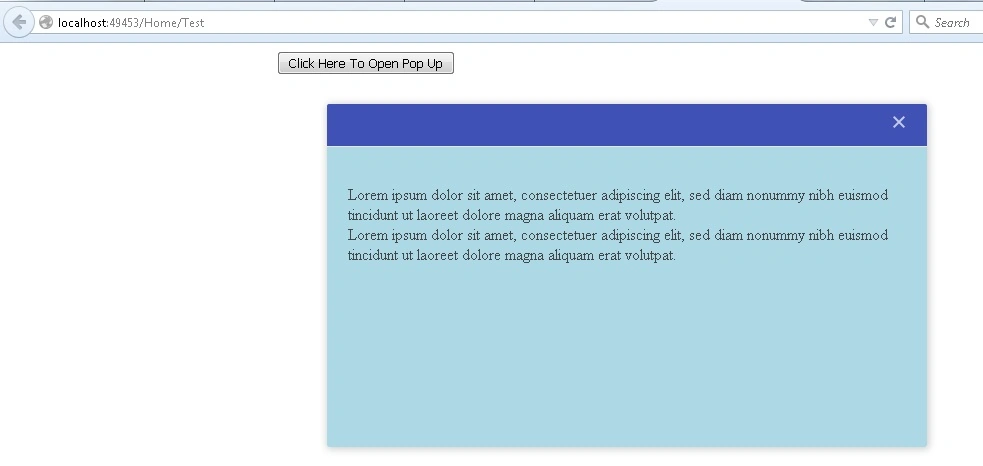
After clicking the button, it will show modal pop up as:
Summary: This article helps the freshers to understand the basics of Kendo UI and its use.
Rupesh KahanePosted Jul 18, 2016, 9:10 AM
Thanks to @Raja T and @kalu singh rao as well
kalu singh raoPosted Jul 18, 2016, 1:56 AM
Nice...
Raja TPosted Jul 17, 2016, 7:53 AM
Nice, Thanks for sharing