

Introduction
What is IntelliJ IDEA?
- A leading Java development environment.
- Published by JetBrains.
- Available for Windows, Mac OS X, and Linux.
IntelliJ IDEA Editions
- Community Edition
- Basic Java Development tools
- Completely free
- Ultimate Edition
- Add database, UML, web, and enterprise development
Android Studio
- Announced at Google I/O in May 2013.
- Version 1.0 was released in December 2014.
- Available free.
Eclipse Android Developers Tool
- Eclipse ADT is no longer under development.
- Google removed links to download the ADT bundle in December 2014.
- Android Developers should now be using android studio.
Especially For Beginners
- When you install an android studio after completion on the android studio you are facing some errors than simple you uninstall the studio and reinstall it.it is only the wastage of time nothing else.
- So if we install with an open eye and follow the overall steps it is too beneficial for us and then makes a standard.
- First, you install JRE and JDK which is mandatory for android studio JDK and JRE.
- Move to the SDK manager and download a standalone version of SDK and install it Android SDK.
- You can install the Android by clicking the link and download the latest version.
- Android Studio for Windows
Step 1
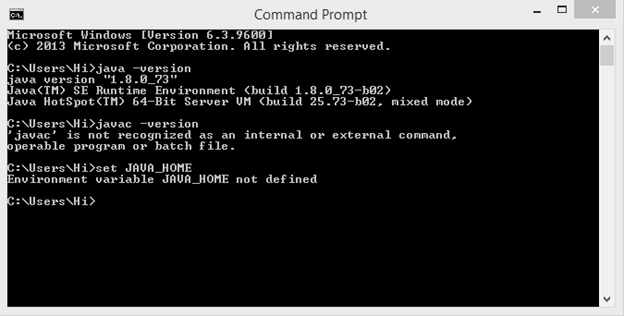
In the first step, we check whether JRE and JDK are present in our computer or not so we move to open a command prompt and type some commands to check. We follow the three commands to check that Java components are installed on the computer or not. On my computer, I already have JDK or JRE but I can’t see the environment variables.
 Step 2
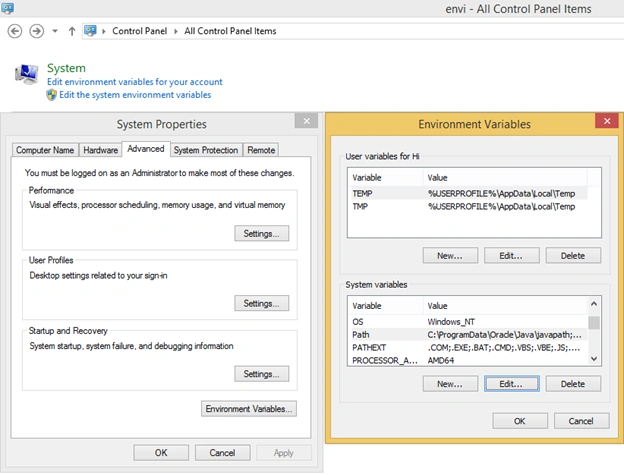
After installation move to the Control Panel and in the search bar, search the environment variables then click on edit dialog which appears.
Step 2
After installation move to the Control Panel and in the search bar, search the environment variables then click on edit dialog which appears.
 Step 3
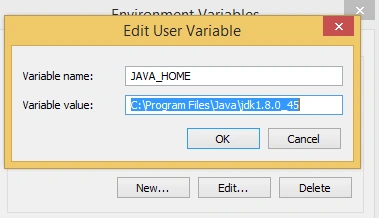
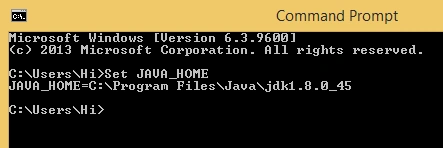
Now if you don’t find the JAVA_HOME directory then click on a new button and make the directory and set the name JAVA_HOME and give the JDK path and then press OK button. After doing this go to the command prompt and give the command and you see that now it gives an actual path.
Step 3
Now if you don’t find the JAVA_HOME directory then click on a new button and make the directory and set the name JAVA_HOME and give the JDK path and then press OK button. After doing this go to the command prompt and give the command and you see that now it gives an actual path.
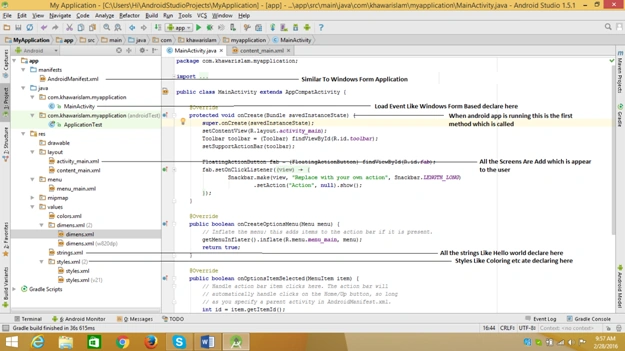
 Now install the Android studio and hopefully, the installation has completed. Now we move to some common discussion about Android studio structure and pattern. Now open Android studio and make a new project, if you aren't familiar with how to create the new project follow this article.
Structure Of Android Studio
Now install the Android studio and hopefully, the installation has completed. Now we move to some common discussion about Android studio structure and pattern. Now open Android studio and make a new project, if you aren't familiar with how to create the new project follow this article.
Structure Of Android Studio
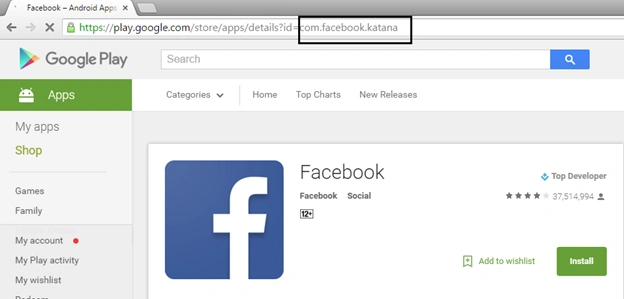
 Package Name Is Unique? What does it mean?
- Is Facebook package name Facebook?
- The Answer is no, the package name is katana.
- So you should give a unique name.
What is APK?
- APK is similar to the EXE file.
- APK is a setup file for the android operating system.
- EXE is a setup file for windows operating system.
- Maximum size of APK is 50MB.
MainActivity.Java?
- All the java methods and definitions are implemented here.
- AndroidManifest.Java?
- This is the type of file that is similar to app.config in a C# application.
- All the configurations are available here.
- All the permissions are here.
App/Build.gradle?
- All the third party components are listed here.
- All the dependencies are declared here.
Read more articles on Android
Shobana JPosted Jul 7, 2016, 7:34 AM
Nice explanation
kalu singh raoPosted Feb 29, 2016, 11:32 AM
Nice
Vignesh ManiPosted Feb 29, 2016, 5:19 AM
Good
Sibeesh VenuPosted Feb 29, 2016, 12:18 AM
Nice Share
Humayun Kabir MamunPosted Feb 28, 2016, 11:42 PM
Nice...
Khawar IslamPosted Feb 28, 2016, 11:54 AM
Thanks
Asfend YarPosted Feb 28, 2016, 11:49 AM
good job