

Toastr is a JavaScript library which is used to create a notification popup.
Step 1
Create an Angular project. To create a new project, open command prompt and add the following command to create the Toastr project.
- ng new Toastr
Step 2
Open this project in Visual Studio Code.
Now, go to View >Terminal and install Toastr into this project by using the following npm command.
- npm install ngx-toastr --save
Now, add @angular/animation to the project.
- npm install @angular/animations --save
Step 3
Open app.module.ts and add animation and Toastr module in it, using the following line.
- import { BrowserAnimationsModule } from '@angular/platform-browser/animations';
- import { ToastrModule } from 'ngx-toastr';
Now, import the below-mentioned modules. Here is the complete App.module.ts file.
- import { BrowserModule } from '@angular/platform-browser';
- import { NgModule } from '@angular/core';
- import { AppRoutingModule } from './app-routing.module';
- import { AppComponent } from './app.component';
- import { BrowserAnimationsModule } from '@angular/platform-browser/animations';
- import { ToastrModule } from 'ngx-toastr';
- import { NotificationComponent } from './notification/notification.component';
- @NgModule({
- declarations: [
- AppComponent,
- NotificationComponent
- ],
- imports: [
- BrowserModule,
- AppRoutingModule, BrowserAnimationsModule,
- ToastrModule.forRoot()
- ],
- providers: [],
- bootstrap: [AppComponent]
- })
- export class AppModule { }
Step 4
Open Style.css file and import toastr.css.
- @import '~ngx-toastr/toastr.css';
Step 5
Let's create a component. To create a component, open terminal and add the following command.
- ng g c Notification
Step 6
Open the notification.component.ts file and import the ToastrService.
- import { ToastrService } from 'ngx-toastr';
Add the following lines to the notification.component.ts file.
- import { Component, OnInit } from '@angular/core';
- import { ToastrService } from 'ngx-toastr';
- @Component({
- selector: 'app-notification',
- templateUrl: './notification.component.html',
- styleUrls: ['./notification.component.css']
- })
- export class NotificationComponent implements OnInit {
- constructor(private toastr: ToastrService) { }
- ngOnInit() {
- }
- successmsg(){
- this.toastr.success("Toastr Success message",'Success')
- }
- errorsmsg(){
- this.toastr.error("Toastr Error Notification",'Error')
- }
- infotoastr()
- {
- this.toastr.info("Important News", 'Information');
- }
- toastrwaring()
- {
- this.toastr.warning("Battery about to Die", 'Warning');
- }
- }
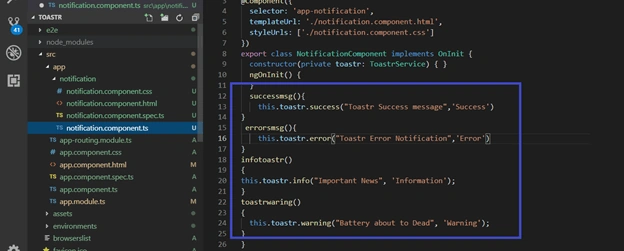
Step 7
Open the notification.component.html file and add 4 buttons and call the functions.
- <div style="padding: top 20px;">
- <input type="button" value=" Success Message" class="button" (click)="successmsg()">
- <input type="button" value=" Error Message" class="button" (click)="errorsmsg()">
- <input type="button" value=" Success Message" class="button" (click)="infotoastr()">
- <input type="button" value=" Info Message" class="button" (click)="toastrwaring()">
- </div>
- <style>
- .button {
- padding: 5px 20px;
- margin: 5px;
- text-align: center;
- text-decoration: none;
- display: inline-block;
- font-size: 14px;
- }
- </style>
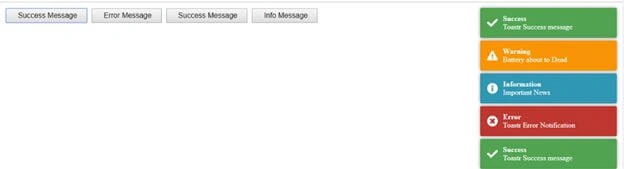
Step 8
We can change the notification popup display location. The default display is at the top-right. We can arrange it at any of the locations on a page.
- top-center
- top-left
- bottom-right
- bottom-center
- bottom-left
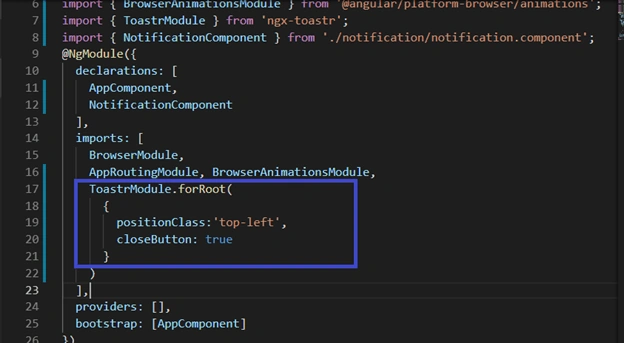
We can also add a button to close the notification pop up. Let's add the following lines in the app.module.ts file and run the project.
- ToastrModule.forRoot(
- {
- positionClass:'top-left',
- closeButton: true,
- }
- )
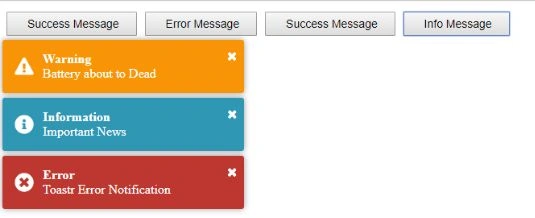
We have successfully changed the location of the notification message pop up. In the same way, we can change the notification popup location on a page.
Summary
In this article, we learned about Toastr and how we use Toastr notifications in Angular. Toastr provides some unique notification popups which we can use to display a message or any other notification within an application.
Join the conversation! Your thoughts help the community grow.