

Introduction
A setup project usually refers to a Visual Studio project that is used to make an installer for your Windows service when discussing Windows services. You can combine your service with any required files, registry entries, and configurations into a single installation package using this installer. The setup project makes it easier to deploy your Windows service.
How we can add a window services installer
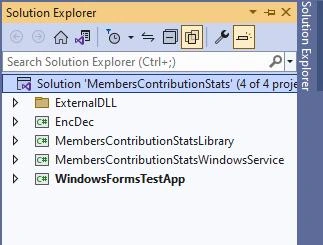
Step 1. To add a setup project in Windows Services, we need to open the Solution Explorer within the project.
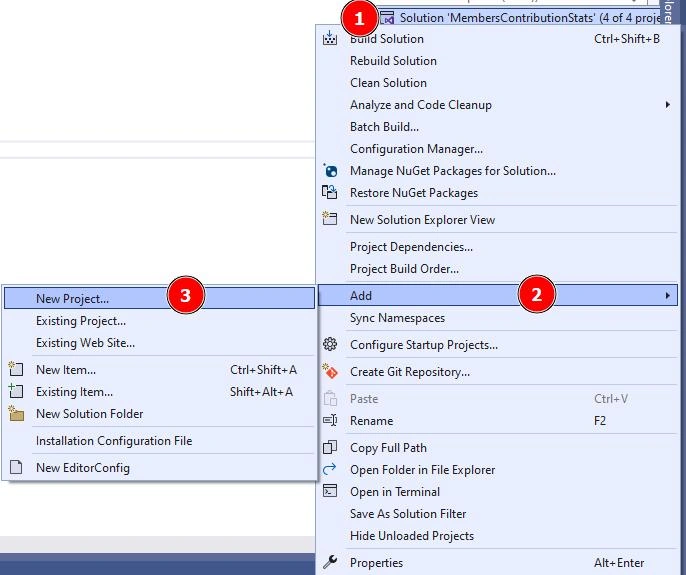
Step 2. In this step right, click on Project Solution. Click on the add option. Then click on the New Project option.
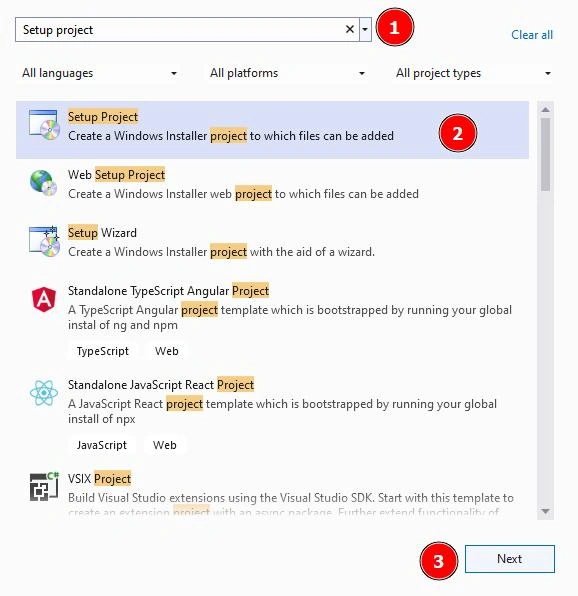
Step 3. Here, we have to find the setup project and select the setup project. Then click the next button.
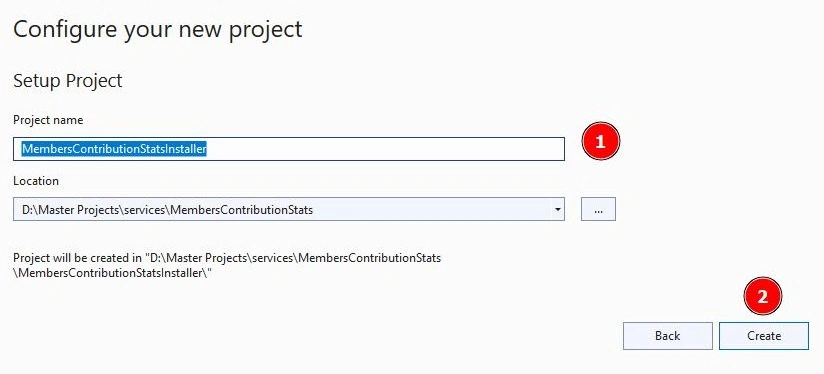
Step 4. Now we set our installer name as MembersContributionStatsInstaller and click on the create button.
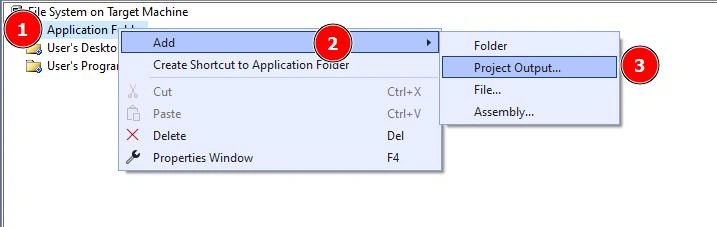
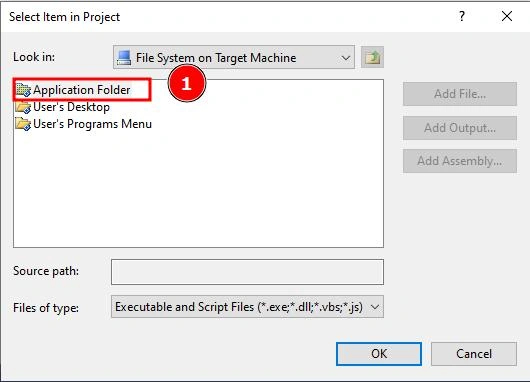
Step 5. In this step, right-click on the application folder, click on the add option then select the project output option.
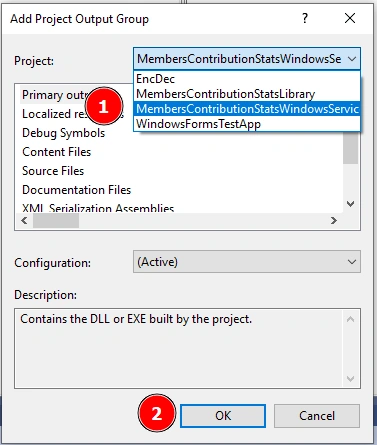
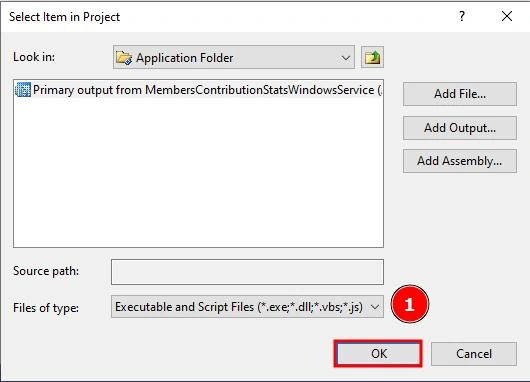
Step 6. Select your window service and click on the ok button.
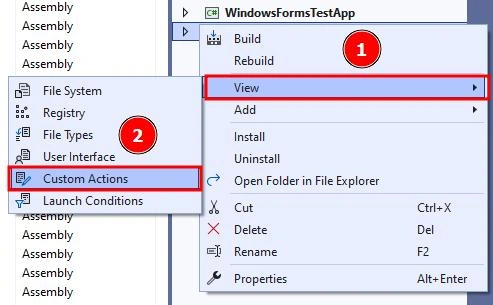
Step 7. Right-click on the installer, select the view option, then select custom actions.
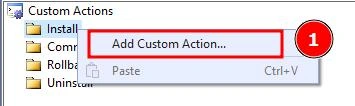
Step 8. Right-click on the install option, then select add custom action.


Join the conversation! Your thoughts help the community grow.