

Introduction
Requirements
- Android Studio version 2.3.3
- Little bit XML and JAVA knowledge.
- Android Emulator (or) Android mobile
- Download link (Android Studio)
Steps to be followed
Follow these steps to create a Calling Application in Android Using Android Studio. I have included the source code in the attachment.
Step 1
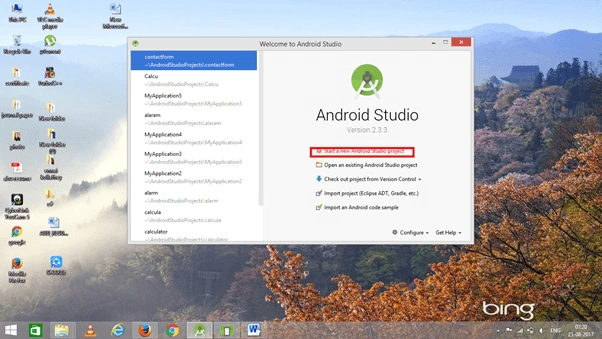
Open Android Studio and start a new Android Studio Project.
Step 2
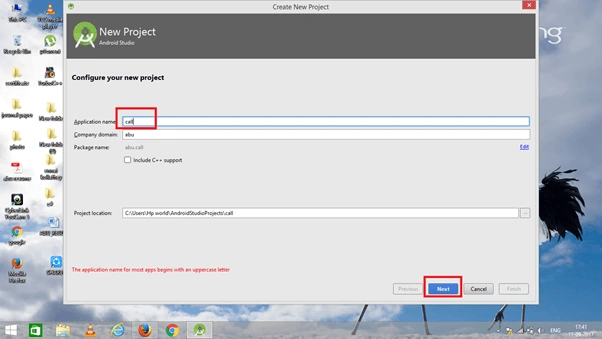
You can choose your application name and choose where your project is stored on the location. If you wish to use C++ for coding the project, mark the "Include C++ support", and click the "Next" button.
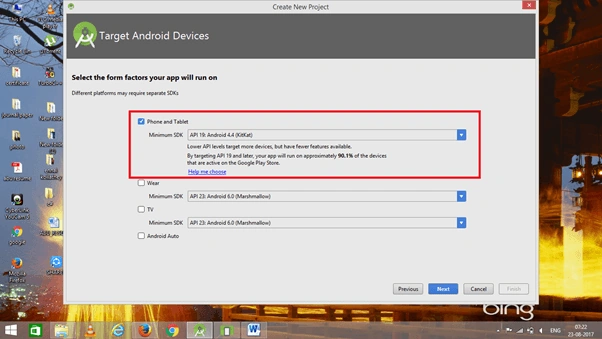
 Now, select the version of Android and select the target Android devices.
Step 3
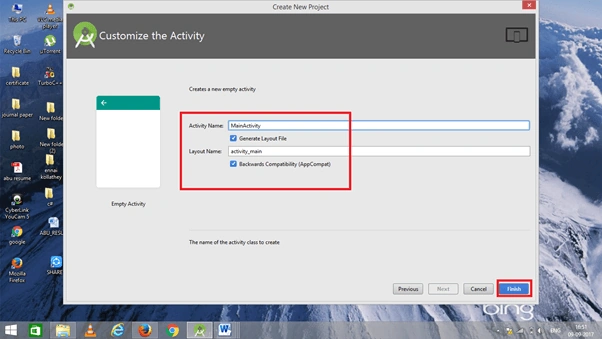
Now, add the activity and click the "Next" button.
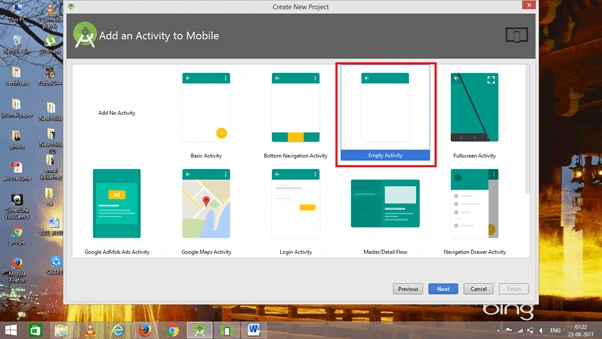 Add activity name and click "Finish".
Step 4
Go to activity_main.xml. This XML file contains the designing code for your Android app.
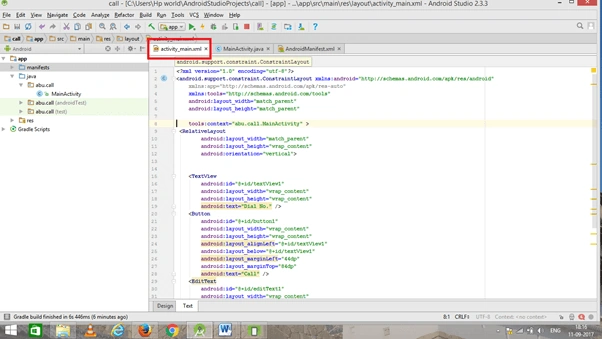 The XML code is given below.
- <?xml version="1.0" encoding="utf-8"?>
- <android.support.constraint.ConstraintLayout xmlns:android="http://schemas.android.com/apk/res/android"
- xmlns:app="http://schemas.android.com/apk/res-auto"
- xmlns:tools="http://schemas.android.com/tools"
- android:layout_width="match_parent"
- android:layout_height="match_parent"
- tools:context="abu.call.MainActivity" >
- <RelativeLayout
- android:layout_width="match_parent"
- android:layout_height="wrap_content"
- android:orientation="vertical">
- <TextView
- android:id="@+id/textView1"
- android:layout_width="wrap_content"
- android:layout_height="wrap_content"
- android:text="Dial No." />
- <Button
- android:id="@+id/button1"
- android:layout_width="wrap_content"
- android:layout_height="wrap_content"
- android:layout_alignLeft="@+id/textView1"
- android:layout_below="@+id/textView1"
- android:layout_marginLeft="44dp"
- android:layout_marginTop="84dp"
- android:text="Call" />
- <EditText
- android:id="@+id/editText1"
- android:layout_width="wrap_content"
- android:layout_height="wrap_content"
- android:layout_alignLeft="@+id/textView1"
- android:layout_below="@+id/textView1"
- android:layout_marginLeft="18dp"
- android:ems="10" >
- <requestFocus />
- </EditText>
- </RelativeLayout>
- </android.support.constraint.ConstraintLayout>
Step 5
Go to Main Activity.java. This Java program is the backend language of the Android app.
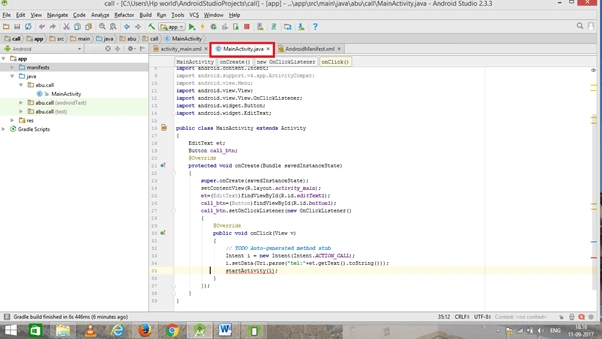 The Java code is given below
- package abu.call;
- import android.Manifest;
- import android.content.pm.PackageManager;
- import android.net.Uri;
- import android.os.Bundle;
- import android.app.Activity;
- import android.content.Intent;
- import android.support.v4.app.ActivityCompat;
- import android.view.Menu;
- import android.view.View;
- import android.view.View.OnClickListener;
- import android.widget.Button;
- import android.widget.EditText;
- public class MainActivity extends Activity
- {
- EditText et;
- Button call_btn;
- @Override
- protected void onCreate(Bundle savedInstanceState)
- {
- super.onCreate(savedInstanceState);
- setContentView(R.layout.activity_main);
- et=(EditText)findViewById(R.id.editText1);
- call_btn=(Button)findViewById(R.id.button1);
- call_btn.setOnClickListener(new OnClickListener()
- {
- @Override
- public void onClick(View v)
- {
- // TODO Auto-generated method stub
- Intent i = new Intent(Intent.ACTION_CALL);
- i.setData(Uri.parse("tel:"+et.getText().toString()));
- startActivity(i);
- }
- });
- }
- }
Step 6
We need to make call requests, so add call permissions in AndroidManifest.xml.
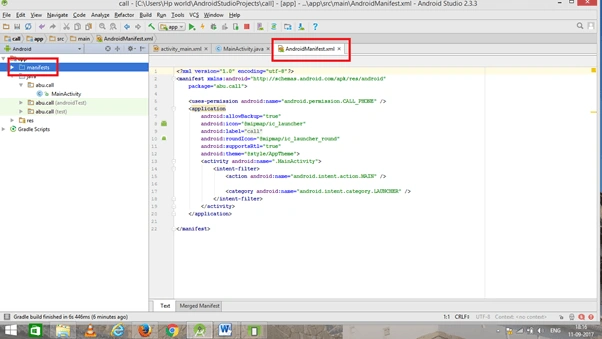 The AndroidManifest.xml code is given below.
- <?xml version="1.0" encoding="utf-8"?>
- <manifest xmlns:android="http://schemas.android.com/apk/res/android"
- package="abu.call">
- <uses-permission android:name="android.permission.CALL_PHONE" />
- <application
- android:allowBackup="true"
- android:icon="@mipmap/ic_launcher"
- android:label="@string/app_name"
- android:roundIcon="@mipmap/ic_launcher_round"
- android:supportsRtl="true"
- android:theme="@style/AppTheme">
- <activity android:name=".MainActivity">
- <intent-filter>
- <action android:name="android.intent.action.MAIN" />
- <category android:name="android.intent.category.LAUNCHER" />
- </intent-filter>
- </activity>
- </application>
- </manifest>
Step 7
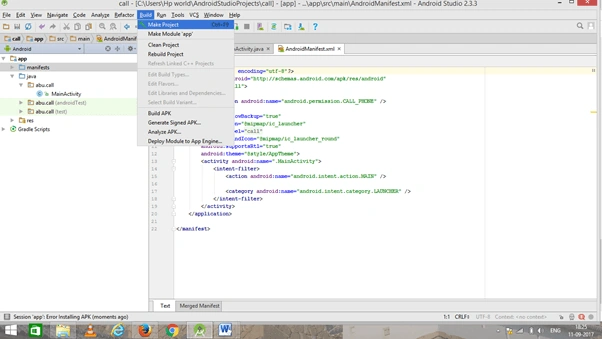
Now, go to the menu bar and click "Make Project" or press ctrl+f9 so as to debug it from errors.
 Step 8
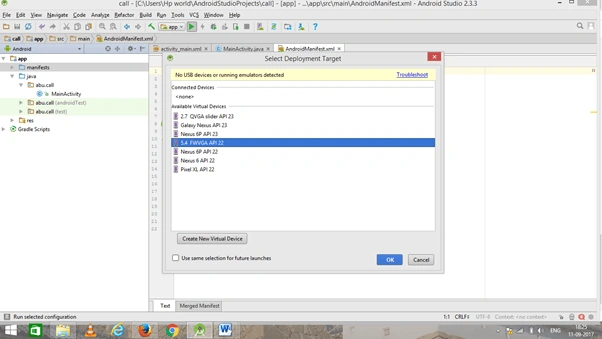
Then, click the "Run" button or press shift+f10 to run the project. Choose the "virtual machine" option and click OK.
Conclusion
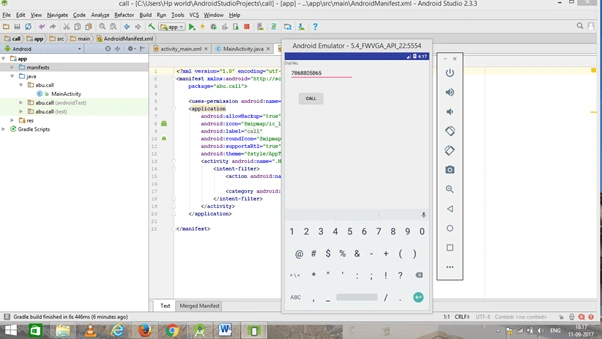
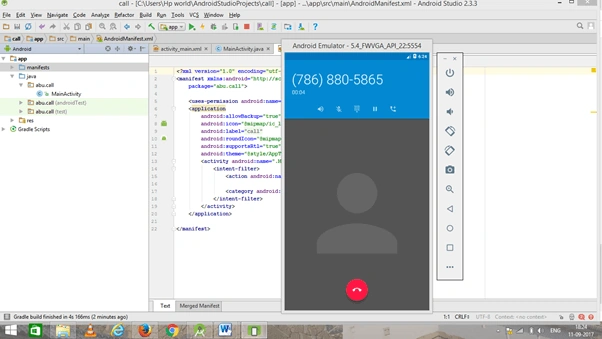
We have successfully created a Calling application in Android using Android Studio.
Dan WardPosted Mar 14, 2021, 8:38 AM
Would this project work now in 2021
Rifat ArefinPosted Apr 8, 2019, 9:58 PM
Can i save the dialed number for the next time?
Faisal PalawaPosted Oct 28, 2018, 12:41 PM
How to create merge calls in android..
Srk VangalaPosted Oct 6, 2018, 4:33 AM
Bro how to display codes like *#06# like codes
HAFIZRAMEEZ ANSARIPosted Jun 4, 2018, 1:31 PM
Good very good keep it up