

Introduction
Android is an open-source operating system based on Linux with a Java programming interface for mobile devices such as Smartphone (touch screen devices which support Android OS) as well for Tablets. With over 85% of the market share worldwide, Android Operating System dominates the mobile platform market. Today, I will show you how to create a BottomSheet using Kotlin.
Requirements
-
Android Studio version 3.6.1
-
Little bit XML and KOTLIN knowledge
-
Android Emulator (or) Android mobile
Steps to be followed,
Follow these steps to create a bottom sheet picker In Kotlin. I have included the source code in the attachment.
Step 1
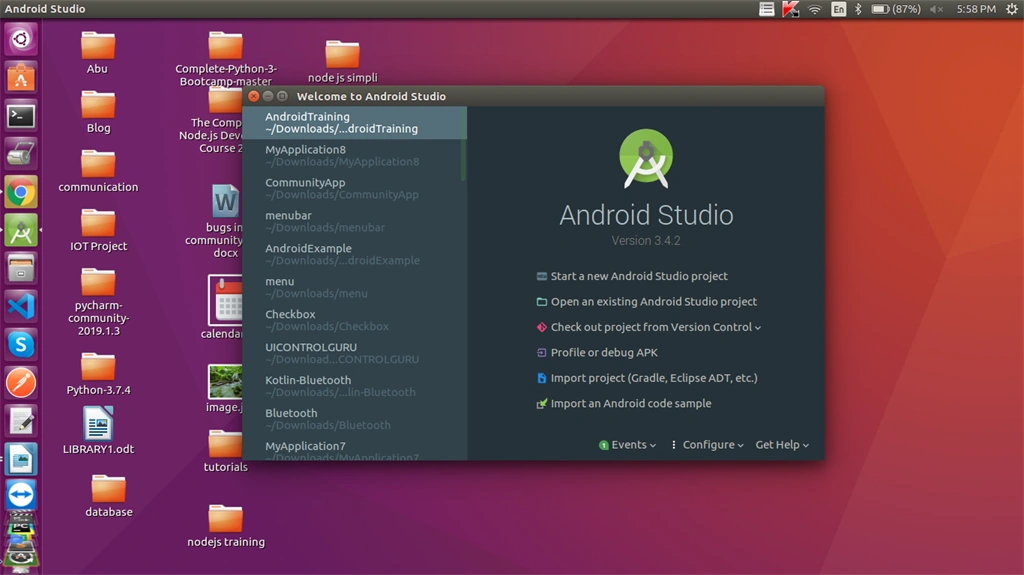
Open Android Studio and start a new Android Studio Project.
Step 2
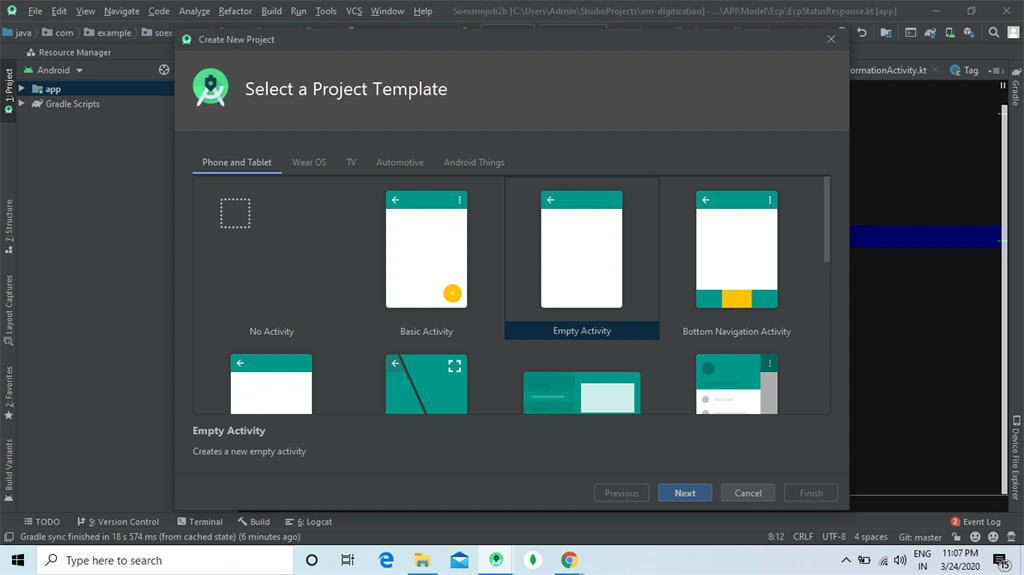
Now, add the activity and click the "Next" button.
Step 3
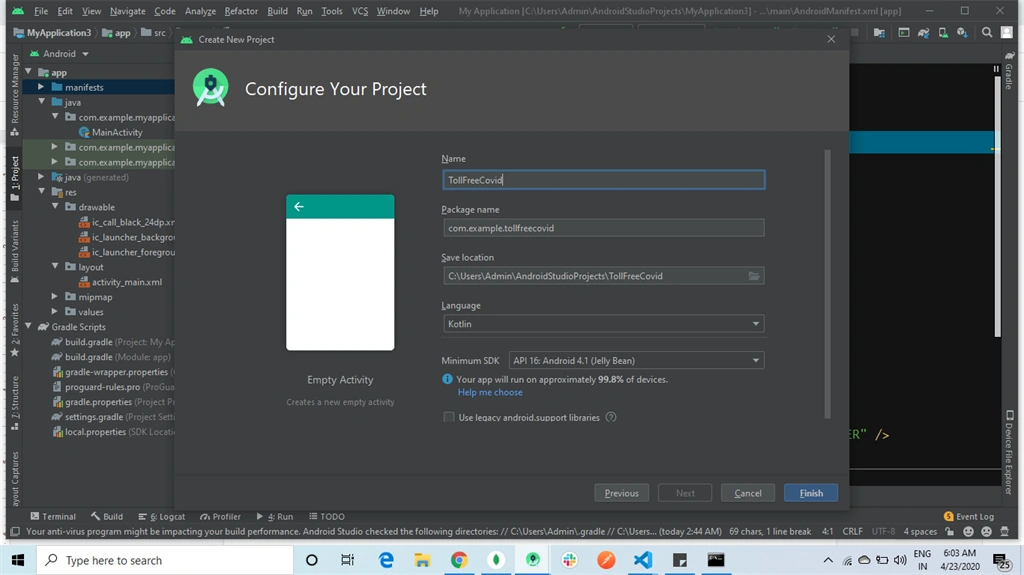
You can choose your application name and choose where your project is to be stored and choose Kotlin language for coding the project, Now, select the version of Android and select the target Android devices, and click the "Finish" button.
Step 4
Go to activity_main.xml. This XML file contains the designing code for your Android app.
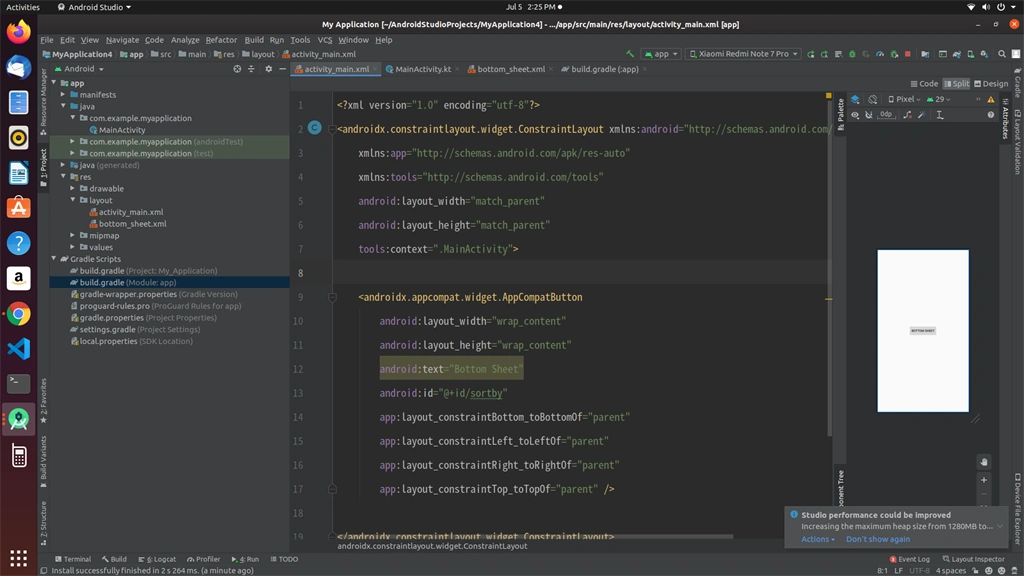
The XML code is given below,
- <?xml version="1.0" encoding="utf-8"?>
- <androidx.constraintlayout.widget.ConstraintLayout xmlns:android="http://schemas.android.com/apk/res/android"
- xmlns:app="http://schemas.android.com/apk/res-auto"
- xmlns:tools="http://schemas.android.com/tools"
- android:layout_width="match_parent"
- android:layout_height="match_parent"
- tools:context=".MainActivity">
- <androidx.appcompat.widget.AppCompatButton
- android:layout_width="wrap_content"
- android:layout_height="wrap_content"
- android:text="Bottom Sheet"
- android:id="@+id/sortby"
- app:layout_constraintBottom_toBottomOf="parent"
- app:layout_constraintLeft_toLeftOf="parent"
- app:layout_constraintRight_toRightOf="parent"
- app:layout_constraintTop_toTopOf="parent" />
- </androidx.constraintlayout.widget.ConstraintLayout>
Step 5
Create a bootom_sheet.xml. This XML file contains the Designing code of Bottom Sheet.
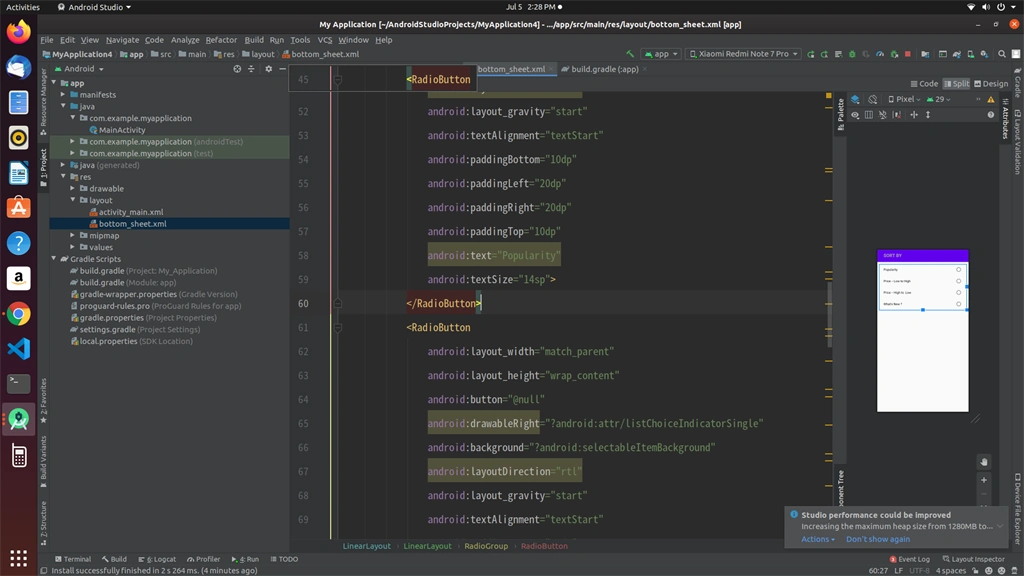
The XML code is given below,
- <?xml version="1.0" encoding="utf-8"?>
- <LinearLayout
- xmlns:android="http://schemas.android.com/apk/res/android"
- xmlns:app="http://schemas.android.com/apk/res-auto"
- android:orientation="vertical"
- android:layout_width="match_parent"
- android:layout_height="match_parent"> <com.google.android.material.appbar.AppBarLayout
- android:id="@+id/appBar"
- android:layout_width="match_parent"
- android:layout_height="wrap_content">
- <androidx.appcompat.widget.Toolbar
- android:id="@+id/toolbar"
- android:background="@color/colorPrimary"
- android:layout_width="match_parent"
- android:layout_height="?attr/actionBarSize"
- >
- <androidx.appcompat.widget.AppCompatTextView
- android:text="SORT BY"
- android:paddingStart="12sp"
- android:layout_marginTop="12dp"
- android:layout_gravity="center"
- android:textColor="#A9A9A9"
- android:textSize="20sp"
- android:textStyle="bold"
- android:layout_width="match_parent"
- android:layout_height="match_parent"
- android:paddingLeft="12sp"></androidx.appcompat.widget.AppCompatTextView>
- </androidx.appcompat.widget.Toolbar>
- </com.google.android.material.appbar.AppBarLayout>
- <LinearLayout
- android:layout_width="match_parent"
- android:layout_height="wrap_content"
- android:orientation="vertical"
- android:id="@+id/shareLinearLayout"
- android:background="?android:attr/selectableItemBackground"
- android:padding="8dp"
- > <RadioGroup
- android:layout_width="match_parent"
- android:layout_height="wrap_content">
- <RadioButton
- android:layout_width="match_parent"
- android:layout_height="wrap_content"
- android:button="@null"
- android:drawableRight="?android:attr/listChoiceIndicatorSingle"
- android:background="?android:selectableItemBackground"
- android:layoutDirection="rtl"
- android:layout_gravity="start"
- android:textAlignment="textStart"
- android:paddingBottom="10dp"
- android:paddingLeft="20dp"
- android:paddingRight="20dp"
- android:paddingTop="10dp"
- android:text="Popularity"
- android:textSize="14sp"></RadioButton>
- <RadioButton
- android:layout_width="match_parent"
- android:layout_height="wrap_content"
- android:button="@null"
- android:drawableRight="?android:attr/listChoiceIndicatorSingle"
- android:background="?android:selectableItemBackground"
- android:layoutDirection="rtl"
- android:layout_gravity="start"
- android:textAlignment="textStart"
- android:paddingBottom="10dp"
- android:paddingLeft="20dp"
- android:paddingRight="20dp"
- android:paddingTop="10dp"
- android:text="Price -- Low to High"
- android:textSize="14sp"></RadioButton>
- <RadioButton
- android:layout_width="match_parent"
- android:layout_height="wrap_content"
- android:button="@null"
- android:drawableRight="?android:attr/listChoiceIndicatorSingle"
- android:background="?android:selectableItemBackground"
- android:layoutDirection="rtl"
- android:layout_gravity="start"
- android:textAlignment="textStart"
- android:paddingBottom="10dp"
- android:paddingLeft="20dp"
- android:paddingRight="20dp"
- android:paddingTop="10dp"
- android:text="Price -- High to Low"
- ></RadioButton>
- <RadioButton
- android:layout_width="match_parent"
- android:layout_height="wrap_content"
- android:button="@null"
- android:drawableRight="?android:attr/listChoiceIndicatorSingle"
- android:background="?android:selectableItemBackground"
- android:layoutDirection="rtl"
- android:layout_gravity="start"
- android:textAlignment="textStart"
- android:paddingBottom="10dp"
- android:paddingLeft="20dp"
- android:paddingRight="20dp"
- android:paddingTop="10dp"
- android:text="What's New ?"
- android:textSize="14sp"></RadioButton>
- </RadioGroup>
- </LinearLayout>
- </LinearLayout>
Step 6
Go to Main Activity.kt. This Kotlin program is the back-end language for your app
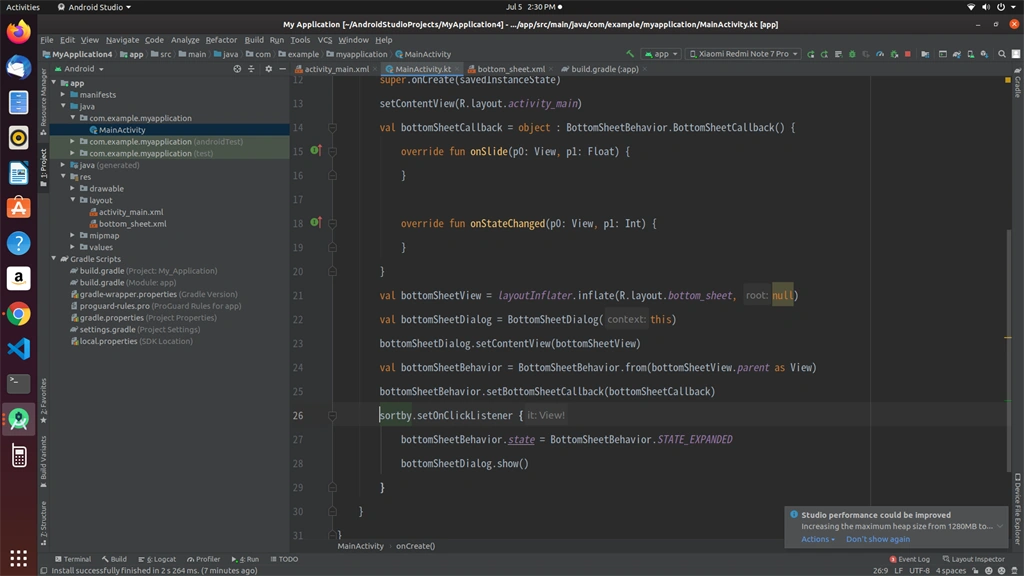
The Kotlin code is given below,
- package com.example.myapplication
- import androidx.appcompat.app.AppCompatActivity
- import android.os.Bundle
- import android.view.View
- import com.google.android.material.bottomsheet.BottomSheetBehavior
- import com.google.android.material.bottomsheet.BottomSheetDialog
- import kotlinx.android.synthetic.main.activity_main.*class MainActivity: AppCompatActivity() {
- override fun onCreate(savedInstanceState: Bundle ? ) {
- super.onCreate(savedInstanceState)
- setContentView(R.layout.activity_main)
- val bottomSheetCallback = object: BottomSheetBehavior.BottomSheetCallback() {
- override fun onSlide(p0: View, p1: Float) {}
- override fun onStateChanged(p0: View, p1: Int) {}
- }
- val bottomSheetView = layoutInflater.inflate(R.layout.bottom_sheet, null)
- val bottomSheetDialog = BottomSheetDialog(this)
- bottomSheetDialog.setContentView(bottomSheetView)
- val bottomSheetBehavior = BottomSheetBehavior.from(bottomSheetView.parent as View)
- bottomSheetBehavior.setBottomSheetCallback(bottomSheetCallback)
- sortby.setOnClickListener {
- bottomSheetBehavior.state = BottomSheetBehavior.STATE_EXPANDED
- bottomSheetDialog.show()
- }
- }
- }
Step 7
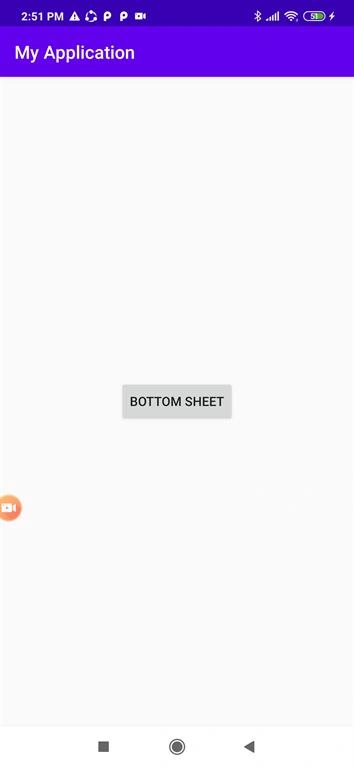
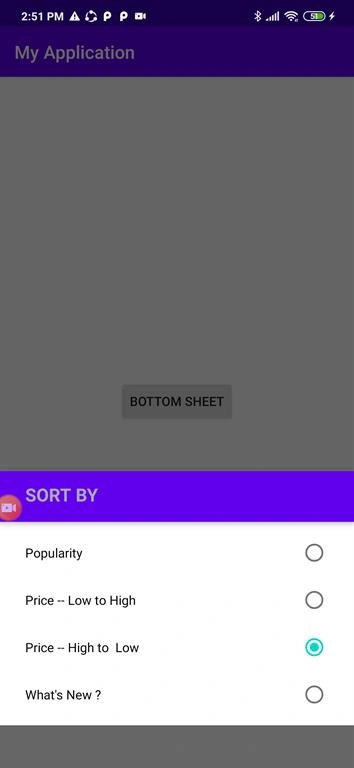
Then, click the "Run" button or press shift+f10 to finally run the project. And, choose the "virtual machine" option and click OK.
Conclusion
Join the conversation! Your thoughts help the community grow.