

Creating a SQL Azure Database in Microsoft Azure is very simple. Interestingly, we can connect our SQL Azure database to the SQL Server Management Studio easily. Let's see how.
Prerequisites
- Microsoft Azure Account
- SQL Server Management Studio
Step 1 - Create SQL Database on Azure
To create a SQL database on Azure, first, we need to create an Azure account. So, let's go to the Microsoft Azure portal and create a free account. If we already have an account, then we need to log into the account.
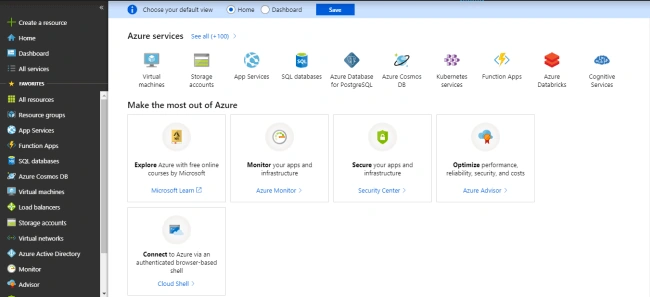
The home screen is displayed after successful login.
Step 2
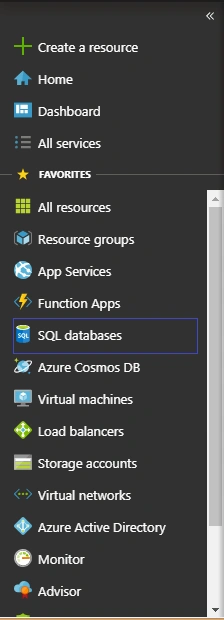
Check on the left side menu and click "SQL Databases".
Step 3
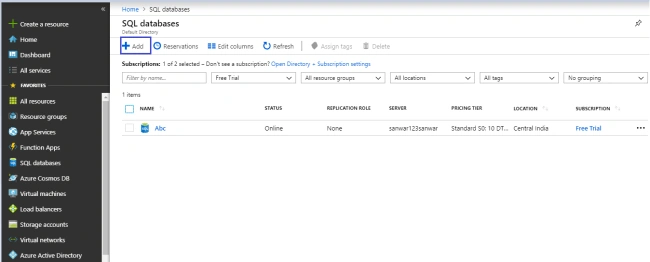
The following screen will open. On the top menu, click on the "Add" button to create a new database.
Step 4
Now, give it a name and in the second dropdown, select your preferred subscription plan. Here, I selected "Free Trial".
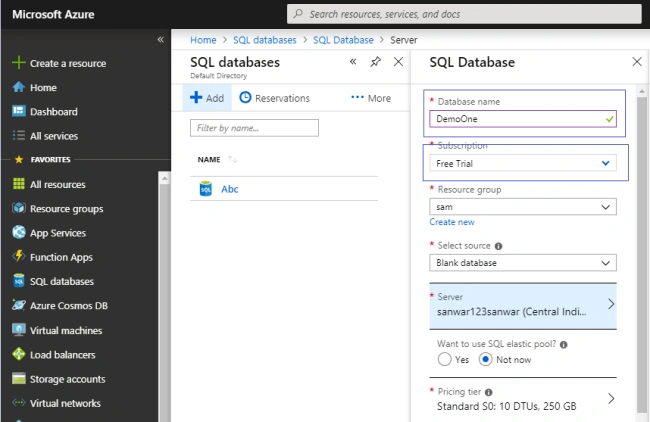
In the third dropdown, select a Resource group or create a new resource group by clicking on "Create new". Let's create a new resource group and click OK.
In the next dropdown, select a database source. We created a blank database.
Now, click on "Configure required settings" and create a new server.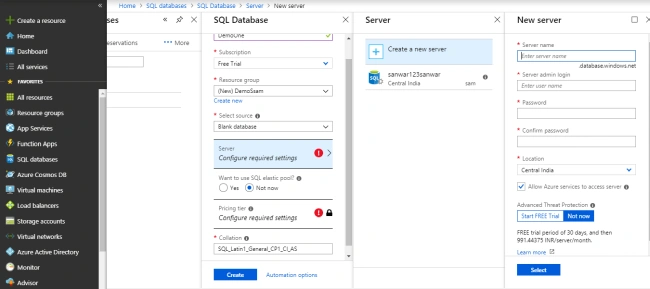
- In the first textbox, enter the server name.
- Enter the login name.
- Add Password and Confirm Password.
- Select a location.
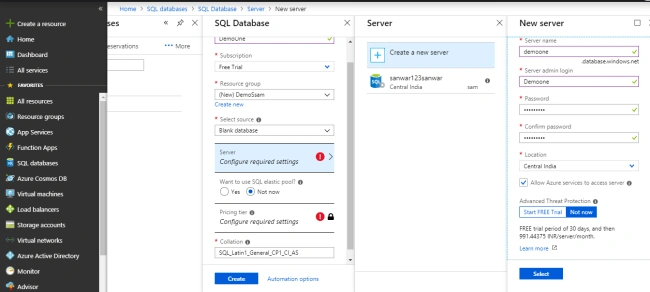
Add the details and click "Select". The server is created.
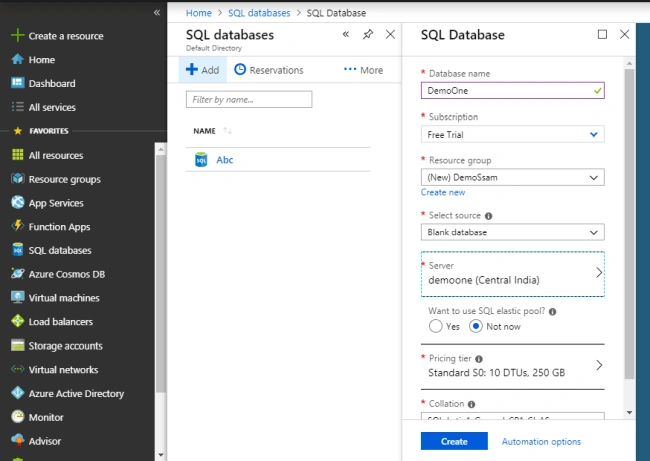
Now, click on the "Create" button, wait for a few minutes, and click on the notification icon.
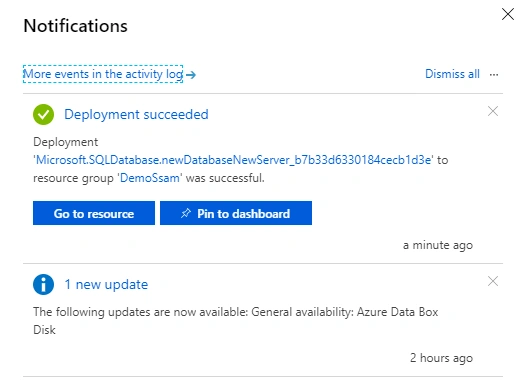
The database is created successfully. Now, click on "Go to source" or click on "All Resources" in the left menu bar and check demo. One database is created.
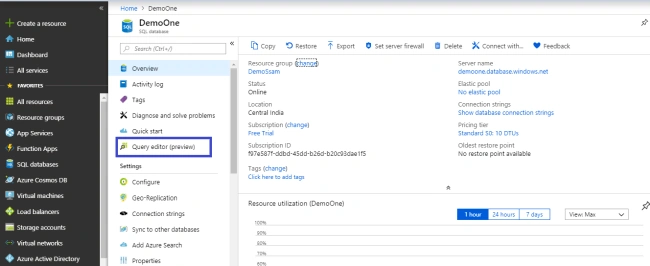
Now, click on Query editor (preview) and enter login details. In query edtior let's create a demo table and insert some values in the table
- create table TblDemo(Id int,Name varchar(50),City varchar(50))
- insert into TblDemo values(1,'Sanwar','Jaipur')
- insert into TblDemo values(1,'Demo','Demo')
Now check the data in table,
select * from TblDemo
Data is inserted successfully in the table,
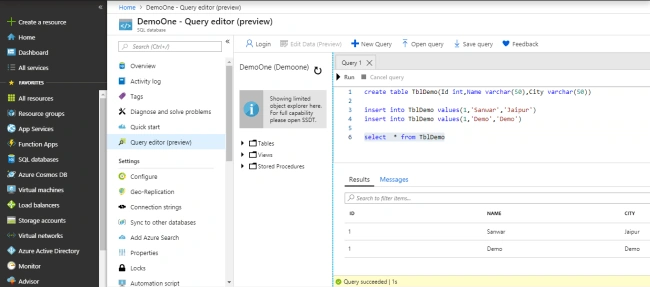
In the same way, we can create View and procedures.
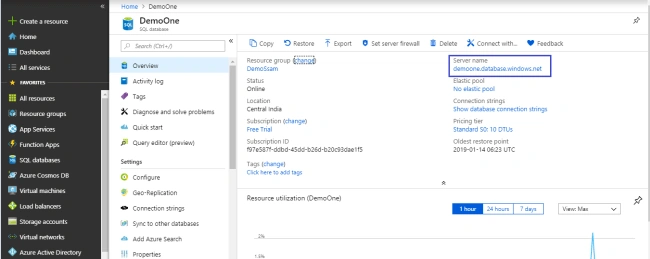
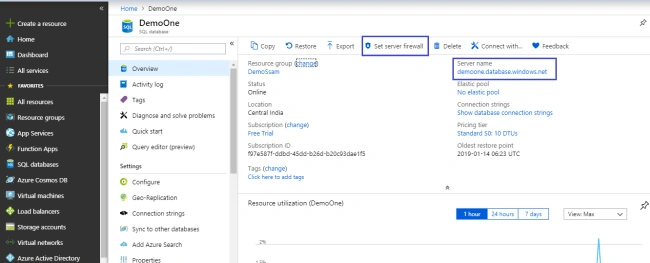
Now, connect this SQL Azure Database to SQL Server Management Studio. Open SSMS and copy the server name from Azure Portal,
Server firewall is updated successfully. Now, go to SSMS and click on "Connect".
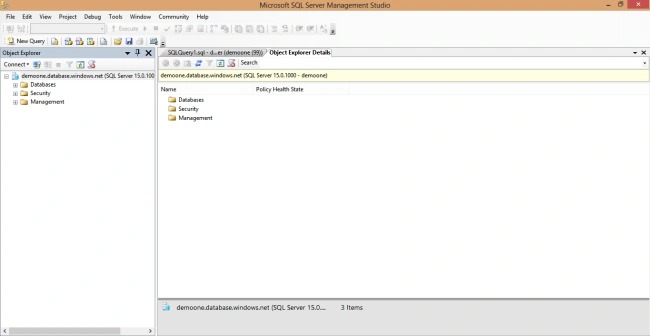
Add server name in SSMS and enter the Login Id and Password.
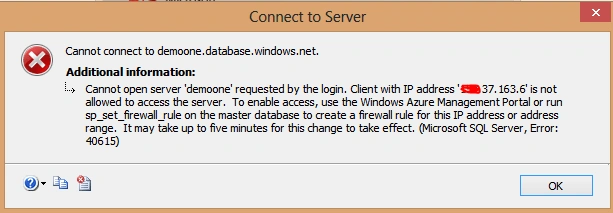
Click on the "Connect" button. Well, we get an error.
To solve this error, go to the Azure portal and click on "Set server firewall" tab.
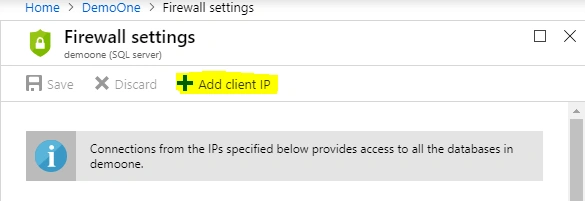
Now, click "Add client IP" and save.
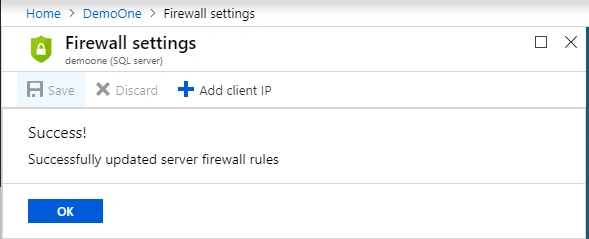
Server firewall is updated successfully. Now, go to SSMS and click on "Connect".
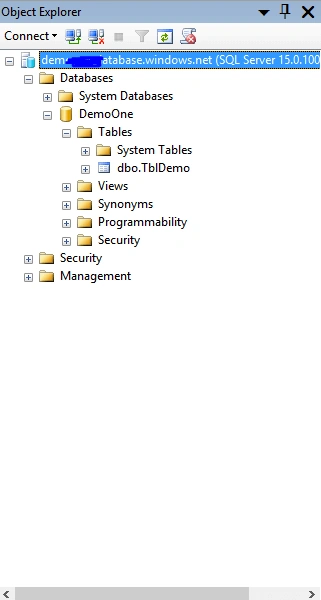
Now, the SSMS is connected to the Azure SQL Database. Check the database and table.
Summary
In this article, we learned how we create a database in the Azure Portal and connect Azure Portal to SQL Server Management Studio.
Join the conversation! Your thoughts help the community grow.