

Prerequisites
- Visual Studio Community Edition
- Azure account.
Now, let's get started with the following steps.
Create a new Azure Mobile App Back-end
Step 1 - Sign in to the online Microsoft Azure Portal.
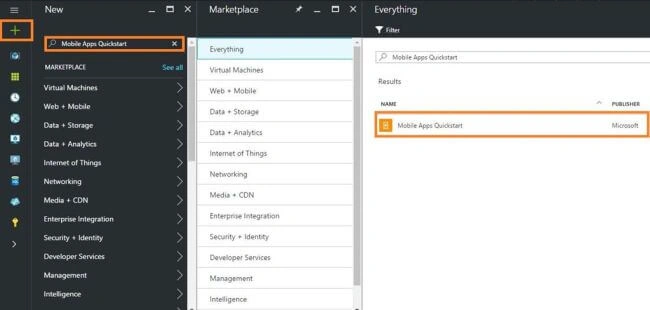
Step 2 - Click "+NEW" and type Mobile Apps in "Search the marketplace". Select "Mobile Apps Quickstart".
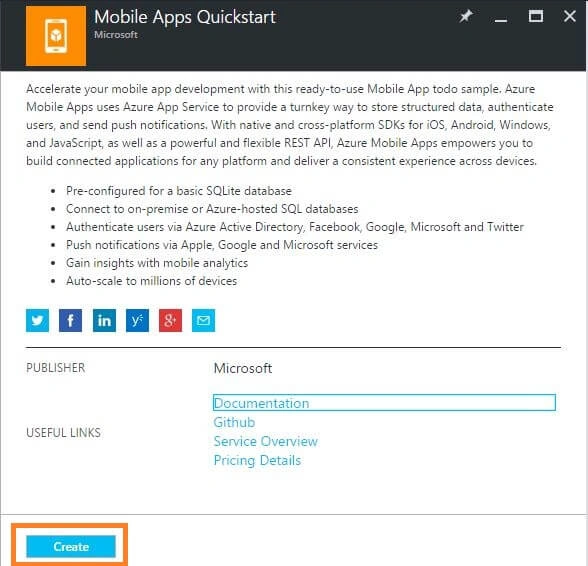
Step 4 - In the Mobile App Quickstart account blade, specify the desired configuration for the Mobile App account name & resource group. Click "Create" at the bottom of the screen to create the Mobile App Quickstart.
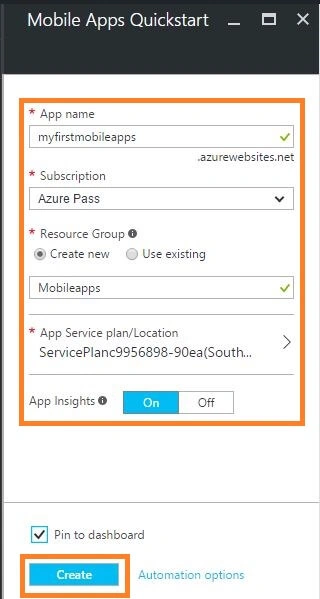
We will wait a few minutes for the service to be deployed successfully.
Download the client project
Step 5 - In the new "Mobile App Settings" blade, click Quickstart and select Windows(C#).

Step 6 - In the Quickstart blade for your Mobile App backend, select "Create a new app" and click "Download".
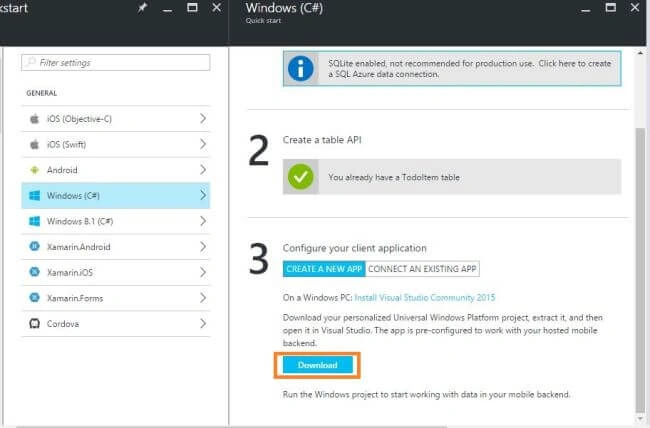
This downloads a complete Windows project for an app pre-configured to connect to our back-end.
Run the client project
Step 7 - Open the downloaded project, using Visual Studio. Next, build the project and click "Run". Now, start the app in the Windows simulator.
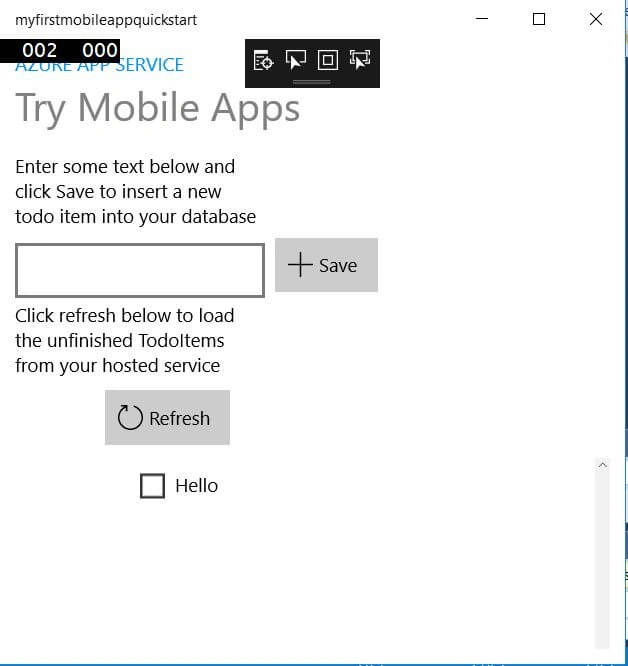
I hope you understood how to add a cloud based back-end service to a Universal Windows Platform (UWP) app using Azure Mobile Apps.
Join the conversation! Your thoughts help the community grow.