

Objective
In this article, we will add product and then will add an API. Under the API we will add one POST operation that will call a backend service(external service or internal based on requirement). Also, will understand the API request and response flow and will test API from APIM and postman by calling the gateway endpoint that API exposes. If you don’t know how to create APIM then first you can go through my last article How to create API Management.
Let’s begin!
In the last article, we already understand what is product and APIs. API Management already provides the two products named Starter and Unlimited and one API which has POST PUT GET DELETE operations as samples. Anyways, we will add a new product and API, so we can understand it better.
Step 1
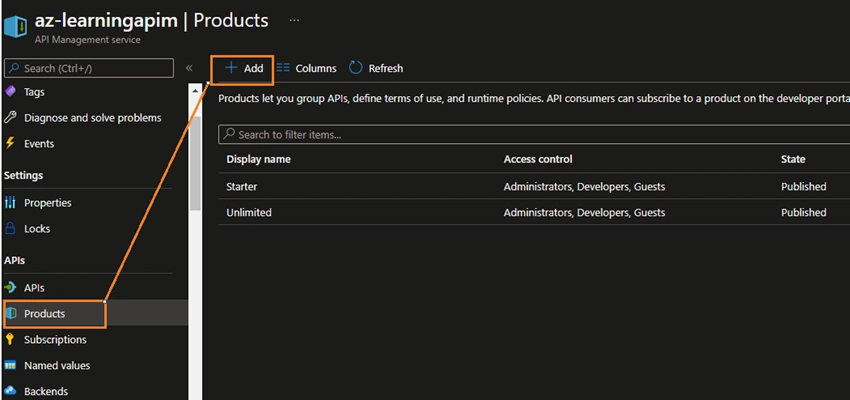
Click on the Products-> Add.
Step 2
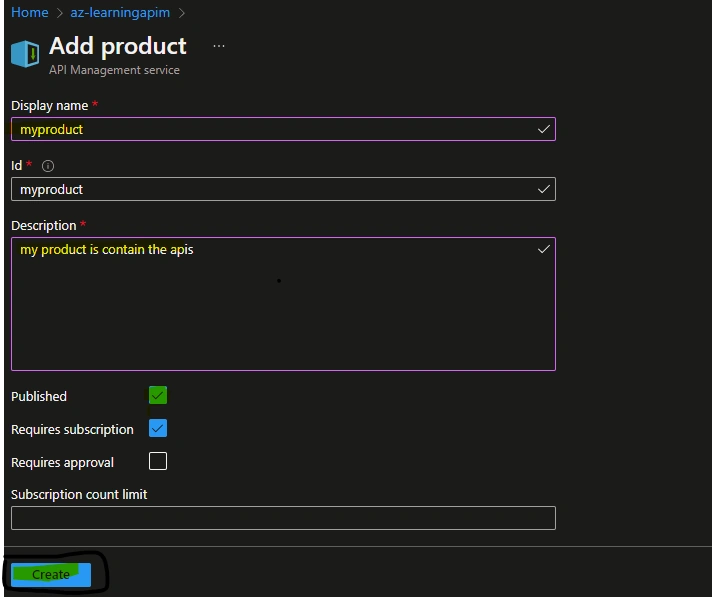
In this step you have to give some input as in below screenshot, I have given the display name, Id will be same as display name and it's auto-populated, no need to fill it in. Provide the description for the product and check the checkbox ‘Published’, finally click the create button. If you do not check the checkbox ‘Published’ then no worries, you can publish your product after creating the product as well.
Step 3
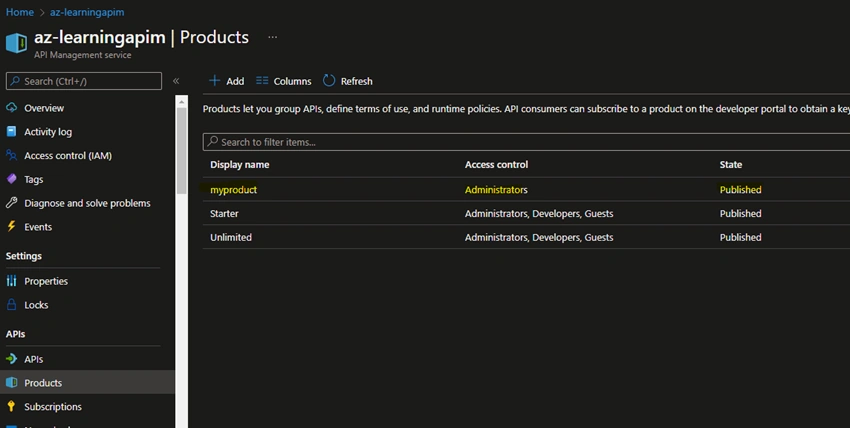
Now you can see in below screenshot yellow highlighted product listed along with the default products.
Step 4
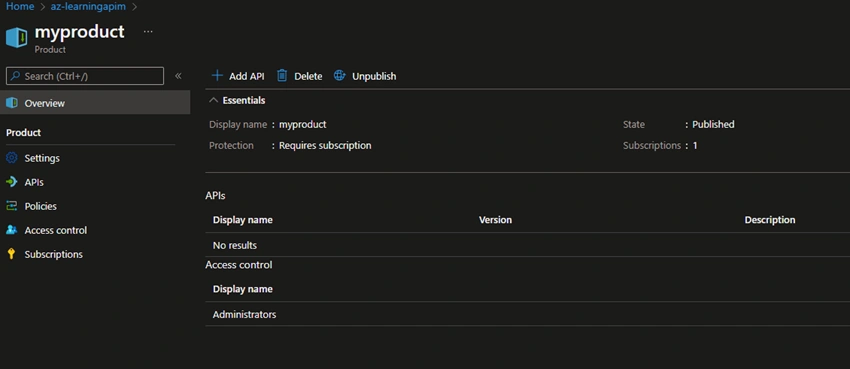
Click on the product and explore it, you can see in the below screenshot how many APIs it contains and the subscription keys under the subscription, so after creating the product, just explore the product by clicking on the product name.
Step 5
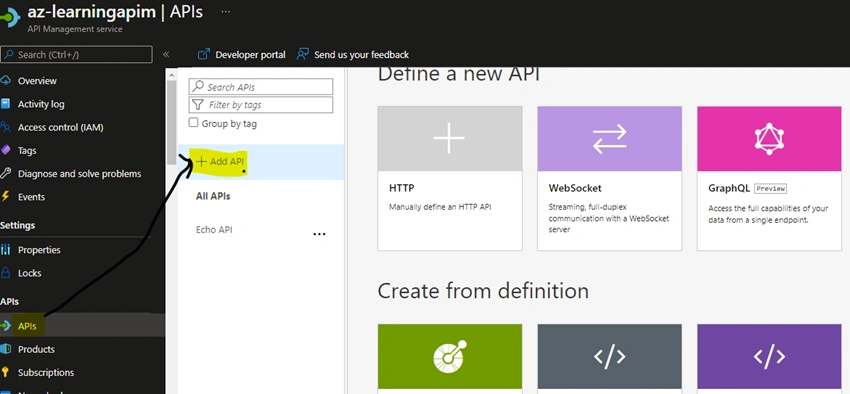
Go back and click on APIs-> Add API, then you will see multiple options to go with, we will go with the first one to create manually HTTP API to define a new API.
We will also brief the other options because all options are very important as per the requirements.
1. Defile a new API
In the option, we have to create a brand new API from scratch, here we can create three different types of APIs
- HTTP: Manually define an HTTP API.
- WebSocket: Streaming, full-duplex communication with WebSocket Server.
- GraphQL: Access the full capabilities of your data from a single endpoint. Currently its in under review version not stable.
2. Create From Definition
Here you can create API by definition, which means if you have swagger file for API which have all the operations and payload details, no need to create operations, you have to simply import from your swagger file. Same if you have wsdl definition file you can import the operations and later you need to focus on the API policies as per your requirements.
- OpenAPI: Standard, language-agnostic interface to REST APIs.
- WADL: Standard XML representation of RESTful APIs.
- WSDL: Standard XML representation of SOAP APIs.
3. Create From Azure Resources
There are three Azure services Logic App, App Service, Function App, Container which you can directly browse and publish your API.
Step 6
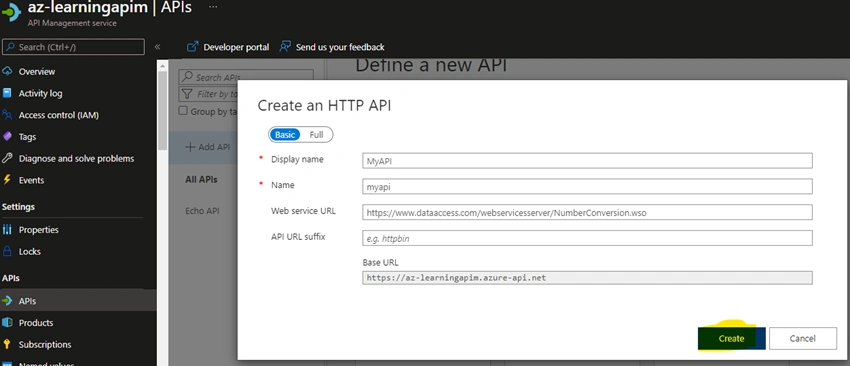
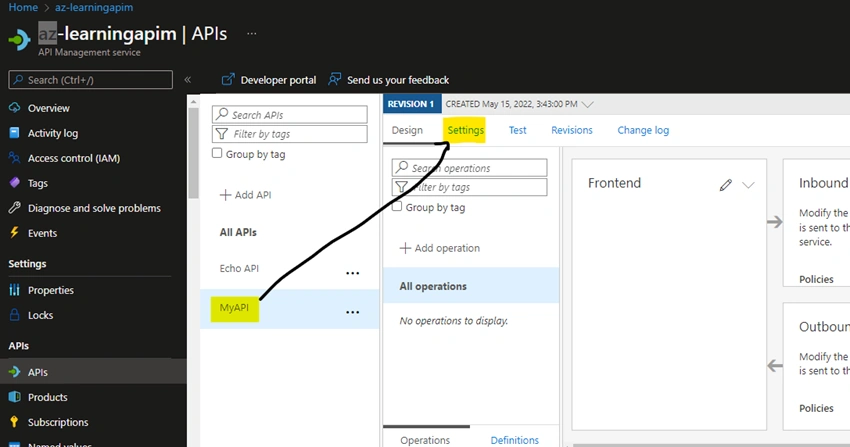
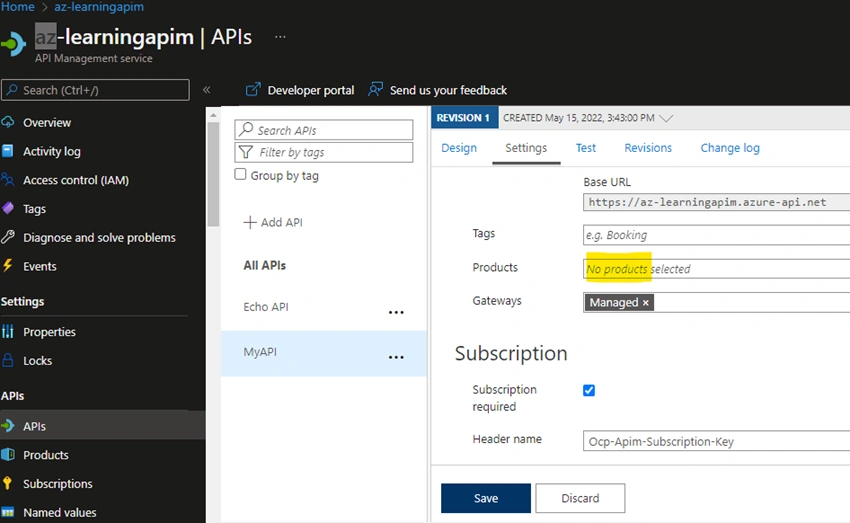
As we clicked on the first option to manually create HTTP API, you will get below popup to give some input. Also, there is option to give basic or full detail, now we are giving the basic details, and in full details there few more input that needs to be provided like product name, so that we will add later once API is created.
Here I have given the following inputs
- Display Name: Its API name that will be listed in the APIs
- Name: It will be auto-populated same name as display name.
- Web Service URL: This will be your backend Service URL(External Service) which you are going to call from API management API to expose gateway endpoint. So I have got a soap service which is available online and endpoint is https://www.dataaccess.com/webservicesserver/NumberConversion.wso. This service is basically converting the Number to Word. I will give you the payload details for backend service later when we test it.
- API URL suffix: If you append something to your gateway endpoint then you can put anything, I did not give anything.
Join the conversation! Your thoughts help the community grow.