
Introduction
Google API
- Google Vision API is used to find objects like images, faces in photos, and videos, and barcodes.
- It recognizes the texts and other things that are digitally captured; thus, it is very useful to build our barcode reader app.
Barcode API Overview
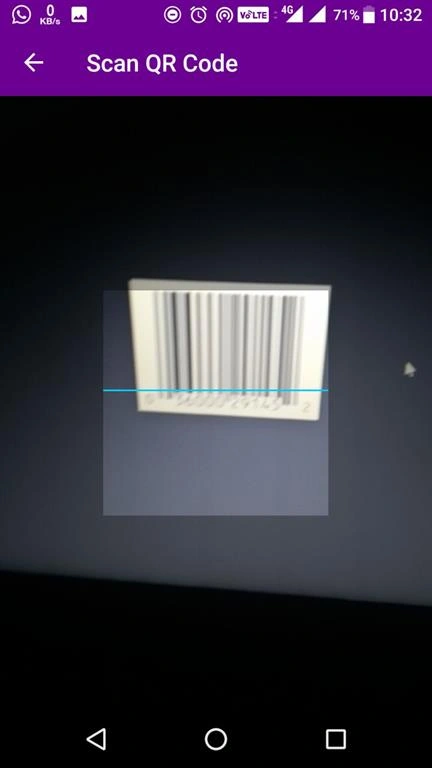
- This app will let us detect the information from a barcode with the help of Vision API.
- A barcode is classified into 1d Barcode and 2d Barcode.
- To know more about it, you can visit the Barcode API information page from the Google Developers portal.
Requirements
- Android Studio
- How to code
- Understanding basic functionalities of how API works
- Free to learn
Steps to follow
Add the below code in "build Gradle" to add library files to our Barcode reader.
- compile 'com.google.android.gms:play-services-vision:11.0.2'
- build.gradle
- dependencies {
- implementation 'info.androidhive:barcode-reader:1.1.5'
- implementation 'com.google.android.gms:play-services-vision:11.0.2'
- }
- <fragment
- android:id="@+id/barcode_scanner"
- android:name="info.androidhive.barcode.BarcodeReader"
- android:layout_width="match_parent"
- android:layout_height="match_parent"
- app:auto_focus="true"
- app:use_flash="false" />
- This is code for Camera Actvity
- import android.support.v7.app.AppCompatActivity;
- import android.os.Bundle;
- import android.util.SparseArray;
- import com.google.android.gms.vision.barcode.Barcode;
- import java.util.List;
- import info.androidhive.barcode.BarcodeReader;
- public class MainActivity extends AppCompatActivity implements BarcodeReader.BarcodeReaderListener {
- @Override
- protected void onCreate(Bundle savedInstanceState) {
- super.onCreate(savedInstanceState);
- setContentView(R.layout.activity_scan);
- }
- @Override
- public void onScanned(Barcode barcode) {
- // single barcode scanned
- }
- @Override
- public void onScannedMultiple(List<Barcode> list) {
- // multiple barcodes scanned
- }
- @Override
- public void onBitmapScanned(SparseArray<Barcode> sparseArray) {
- }
- @Override
- public void onScanError(String s) {
- // now scan error
- }
- @Override
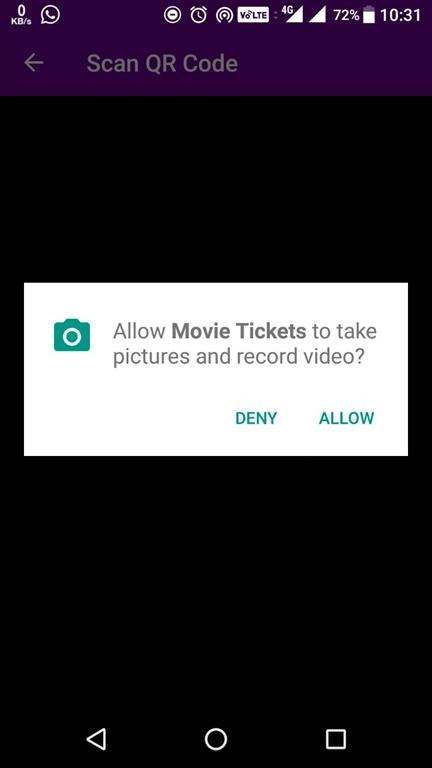
- public void onCameraPermissionDenied() {
- // camera permission actually denied
- }
- }
- import android.app.Application;
- import android.text.TextUtils;
- import com.android.volley.Request;
- public class MyApplication extends Application {
- public static final String TAG = MyApplication.class
- .getSimpleName();
- private RequestQueue mRequestQueue;
- private static MyApplication mInstance;
- @Override
- public void onCreate() {
- super.onCreate();
- mInstance = this;
- }
- public static synchronized MyApplication getInstance() {
- return mInstance;
- }
- public RequestQueue getRequestQueue() {
- if (mRequestQueue == null) {
- mRequestQueue = Volley.newRequestQueue(getApplicationContext());
- }
- return mRequestQueue;
- }
- public <T> void addToRequestQueue(Request<T> req, String tag) {
- // set the default tag if tag is empty
- req.setTag(TextUtils.isEmpty(tag) ? TAG : tag);
- getRequestQueue().add(req);
- }
- public <T> void addToRequestQueue(Request<T> req) {
- req.setTag(TAG);
- getRequestQueue().add(req);
- }
- public void cancelPendingRequests(Object tag) {
- if (mRequestQueue != null) {
- mRequestQueue.cancelAll(tag);
- }
- }
- }
- <?xml version="1.0" encoding="utf-8"?>
- <RelativeLayout xmlns:android="http://schemas.android.com/apk/res/android"
- xmlns:app="http://schemas.android.com/apk/res-auto"
- xmlns:tools="http://schemas.android.com/tools"
- android:layout_width="match_parent"
- android:layout_height="match_parent"
- android:background="@drawable/bg_gradient"
- tools:context="info.androidhive.movietickets.MainActivity">
- //akshayrao code
- <LinearLayout
- android:layout_width="wrap_content"
- android:layout_height="wrap_content"
- android:layout_centerHorizontal="true"
- android:layout_centerInParent="true"
- android:gravity="center"
- android:orientation="vertical"
- android:paddingLeft="40dp"
- android:paddingRight="40dp">
- <ImageView
- android:id="@+id/icon"
- android:layout_width="100dp"
- android:layout_height="100dp"
- android:layout_centerHorizontal="true"
- android:clickable="true"
- android:foreground="?attr/selectableItemBackground"
- android:src="@drawable/qrcode"
- android:tint="@android:color/white" />
- <TextView
- android:layout_width="wrap_content"
- android:layout_height="wrap_content"
- android:layout_marginTop="30dp"
- android:fontFamily="sans-serif-light"
- android:gravity="center"
- android:text="Scan the QR code on the poster and book your movie tickets"
- android:textColor="@android:color/white"
- android:textSize="16dp" />
- </LinearLayout>
- <Button
- android:id="@+id/btn_scan"
- android:layout_width="wrap_content"
- android:layout_height="wrap_content"
- android:layout_alignParentBottom="true"
- android:layout_centerHorizontal="true"
- android:layout_marginBottom="40dp"
- android:background="@android:color/transparent"
- android:foreground="?attr/selectableItemBackground"
- android:paddingLeft="20dp"
- android:paddingRight="20dp"
- android:fontFamily="sans-serif-medium"
- android:text="Scan QR Code"
- android:textColor="@android:color/white"
- android:textSize="18sp" />
- </RelativeLayout>
Join the conversation! Your thoughts help the community grow.