

Introduction
In this article, we will learn how to handle exception at global level using NLog. Exception handling is one of most important functionalities of any application. Here we will learn how to configure NLog to log Info, Error, Warning, Debug, Trace information and we will learn how to create middleware to handle the error at global level. Here I will try to explain it step by step.
Background
NLog is a flexible and free logging platform for various .NET platforms, including .NET standard. NLog makes it easy to write to several targets (database, file, console) and change the logging configuration on-the-fly.
Similiar to other Logging Frameworks, NLog has the following log levels.
- Trace – The entire trace of the codebase.
- Debug – useful while developing the application.
- Info – A general Message.
- Warn – Used for unexpected events.
- Error – When something breaks.
- Fatal – When something very crucial breaks.
To know more about NLog, please click on the link https://nlog-project.org/
Project Architecture
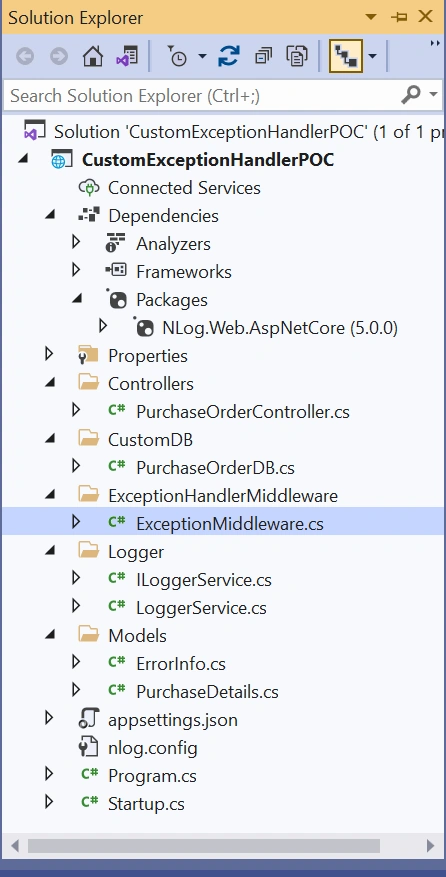
Implementation
Let’s create the application step by step.
Step 1. Create an ASP .NET Core 3.1 Web API and give the application name as “CustomExceptionHandlerPOC”.
Step 2. Install NLog (NLog.Web.AspNetCore(5.0.0)) by using Nuget Package Manager.
Step 3. Now let’s configure NLog. To configure NLog add a config file “nlog.config”. Set your folder path where you want to log error. As in below code I have set path as “C:/Learning/.NET Core/ExceptionHandling/logs”. You can set the path as per your choice.
<?xml version="1.0" encoding="utf-8"?>
<nlog xmlns="http://www.nlog-project.org/schemas/NLog.xsd"
      xmlns:xsi="http://www.w3.org/2001/XMLSchema-instance"
      autoReload="true"
      internalLogLevel="Trace"
      internalLogFile="C:/Learning/.NET Core/ExceptionHandling/internal_logs/internallog.txt">

  <targets>
    <target name="logfile" xsi:type="File"
            fileName="C:/Learning/.NET Core/ExceptionHandling/logs/${shortdate}_logfile.txt"
            layout="${longdate} ${level:uppercase=true} ${message}"/>
  </targets>

  <rules>
    <logger name="*" minlevel="Debug" writeTo="logfile" />
  </rules>
</nlog>
Step 4. Create a “Logger” folder in the application. Inside the Logger folder, create an Interface “ILoggerService”.
using System;
using System.Collections.Generic;
using System.Linq;
using System.Threading.Tasks;

namespace CustomExceptionHandlerPOC.Logger
{
    public interface ILoggerService
    {
        void LogInfo(string message);
        void LogWarn(string message);
        void LogDebug(string message);
        void LogError(string message);
        void LogTrace(string message);
    }
}
Step 5. Inside the Logger folder, create a class “LoggerService” and implement the “ILoggerService” interface. The GetCurrentClassLogger() method provides the logger named after the currently-being-initialized class.
using System;
using System.Collections.Generic;
using System.Linq;
using System.Threading.Tasks;
using NLog;

namespace CustomExceptionHandlerPOC.Logger
{
    public class LoggerService : ILoggerService
    {
        private static ILogger logger = LogManager.GetCurrentClassLogger();
        public LoggerService()
        {
        }
        public void LogDebug(string message)
        {
            logger.Debug(message);
        }

        public void LogError(string message)
        {
            logger.Error(message);
        }

        public void LogInfo(string message)
        {
            logger.Info(message);
        }

        public void LogWarn(string message)
        {
            logger.Warn(message);
        }
        public void LogTrace(string message)
        {
            logger.Trace(message);
        }
    }
}
Step 6. Create a “Models” folder in the application. Inside the Logger folder, create two classes. One is “ErrorInfo”, which will be used for logging errors and other is “PurchaseDetails” which will be used for creating Purchase order List.
using System;
using System.Collections.Generic;
using System.Linq;
using System.Text.Json;
using System.Threading.Tasks;

namespace CustomExceptionHandlerPOC.Models
{
    public class ErrorInfo
    {
        public int StatusCode { get; set; }
        public string Message { get; set; }
        public override string ToString()
        {
            return JsonSerializer.Serialize(this);
        }
    }
}
using System;
using System.Collections.Generic;
using System.Linq;
using System.Threading.Tasks;

namespace CustomExceptionHandlerPOC.Models
{
    public class PurchaseDetails
    {
        public string ProductName { get; set; }
        public int Rate { get; set; }
        public int Qty { get; set; }
        public int Amount { get; set; }
    }
}
Step 7. Create a “CustomDB” folder in the application. Inside the CustomDB folder, create a “PurchaseOrderDB” classes. This class has a method “GetPurchaseOrders”, which will provide list of order. Basically, here I am not using any Database. So, for the demo purpose I have created list of purchase orders locally.
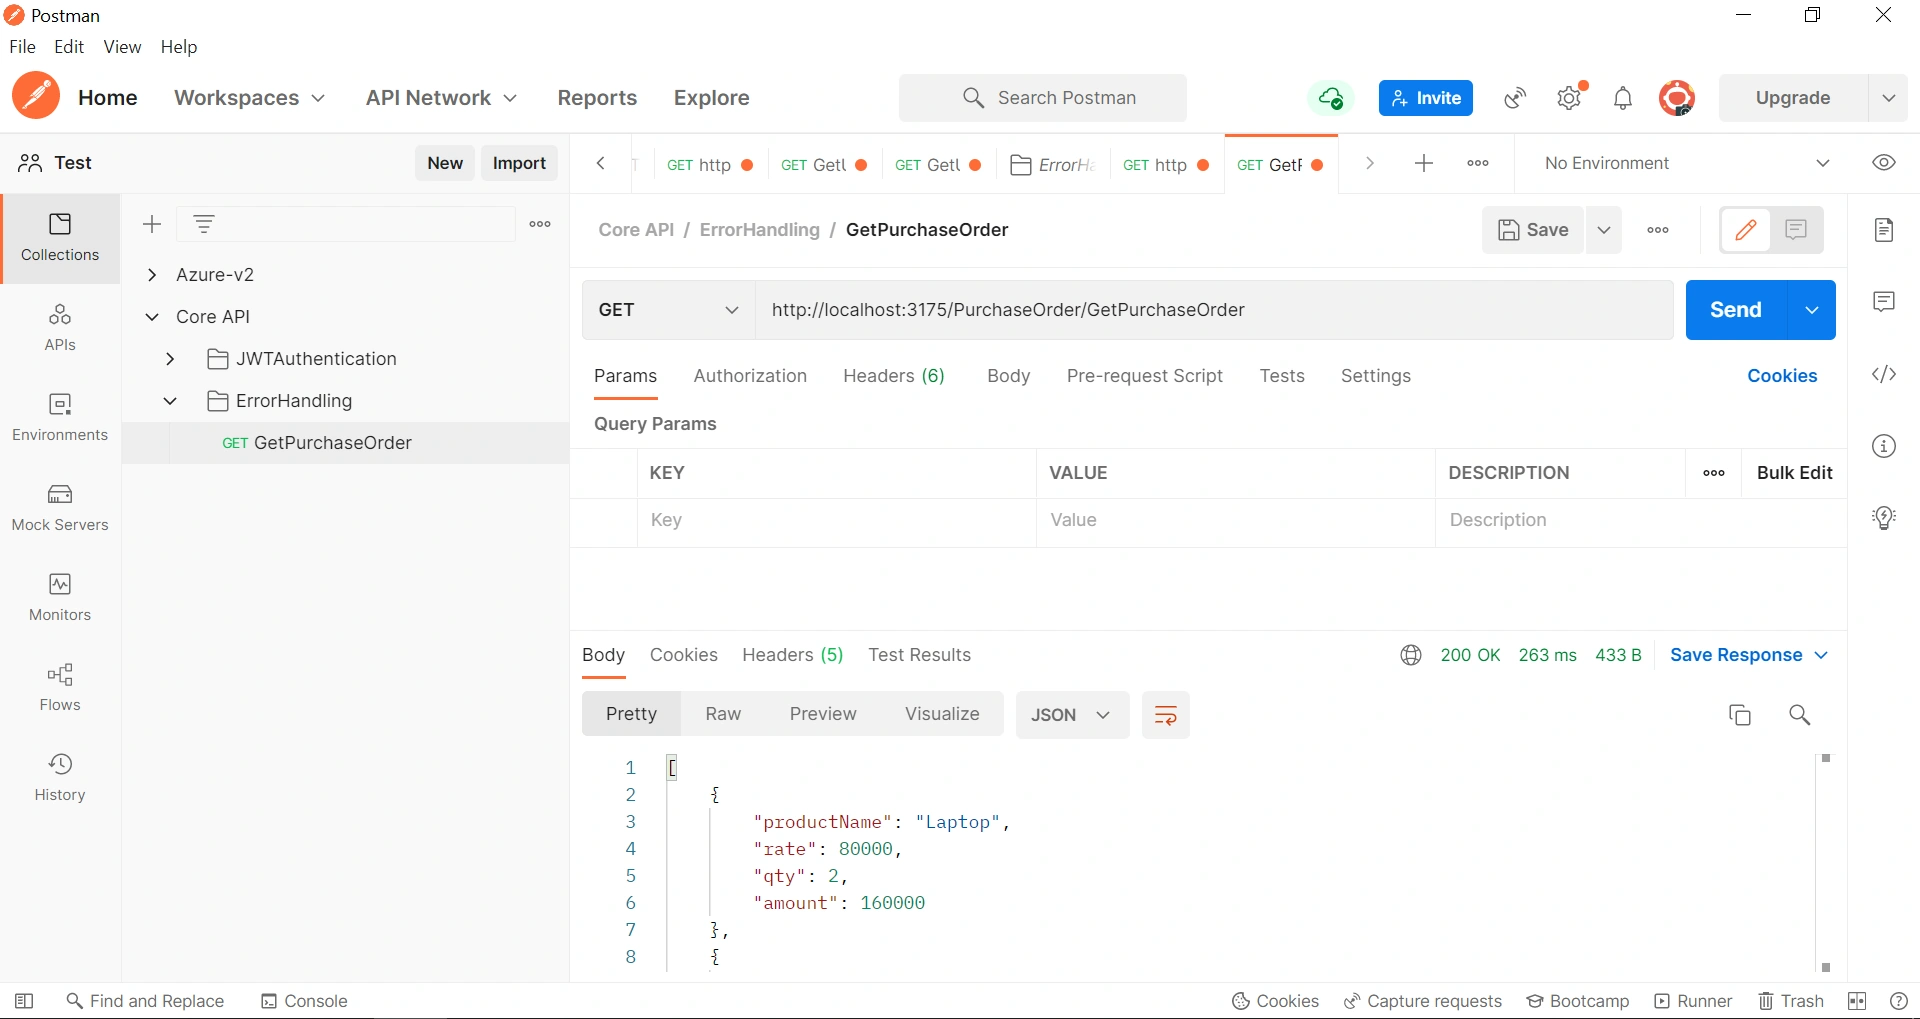

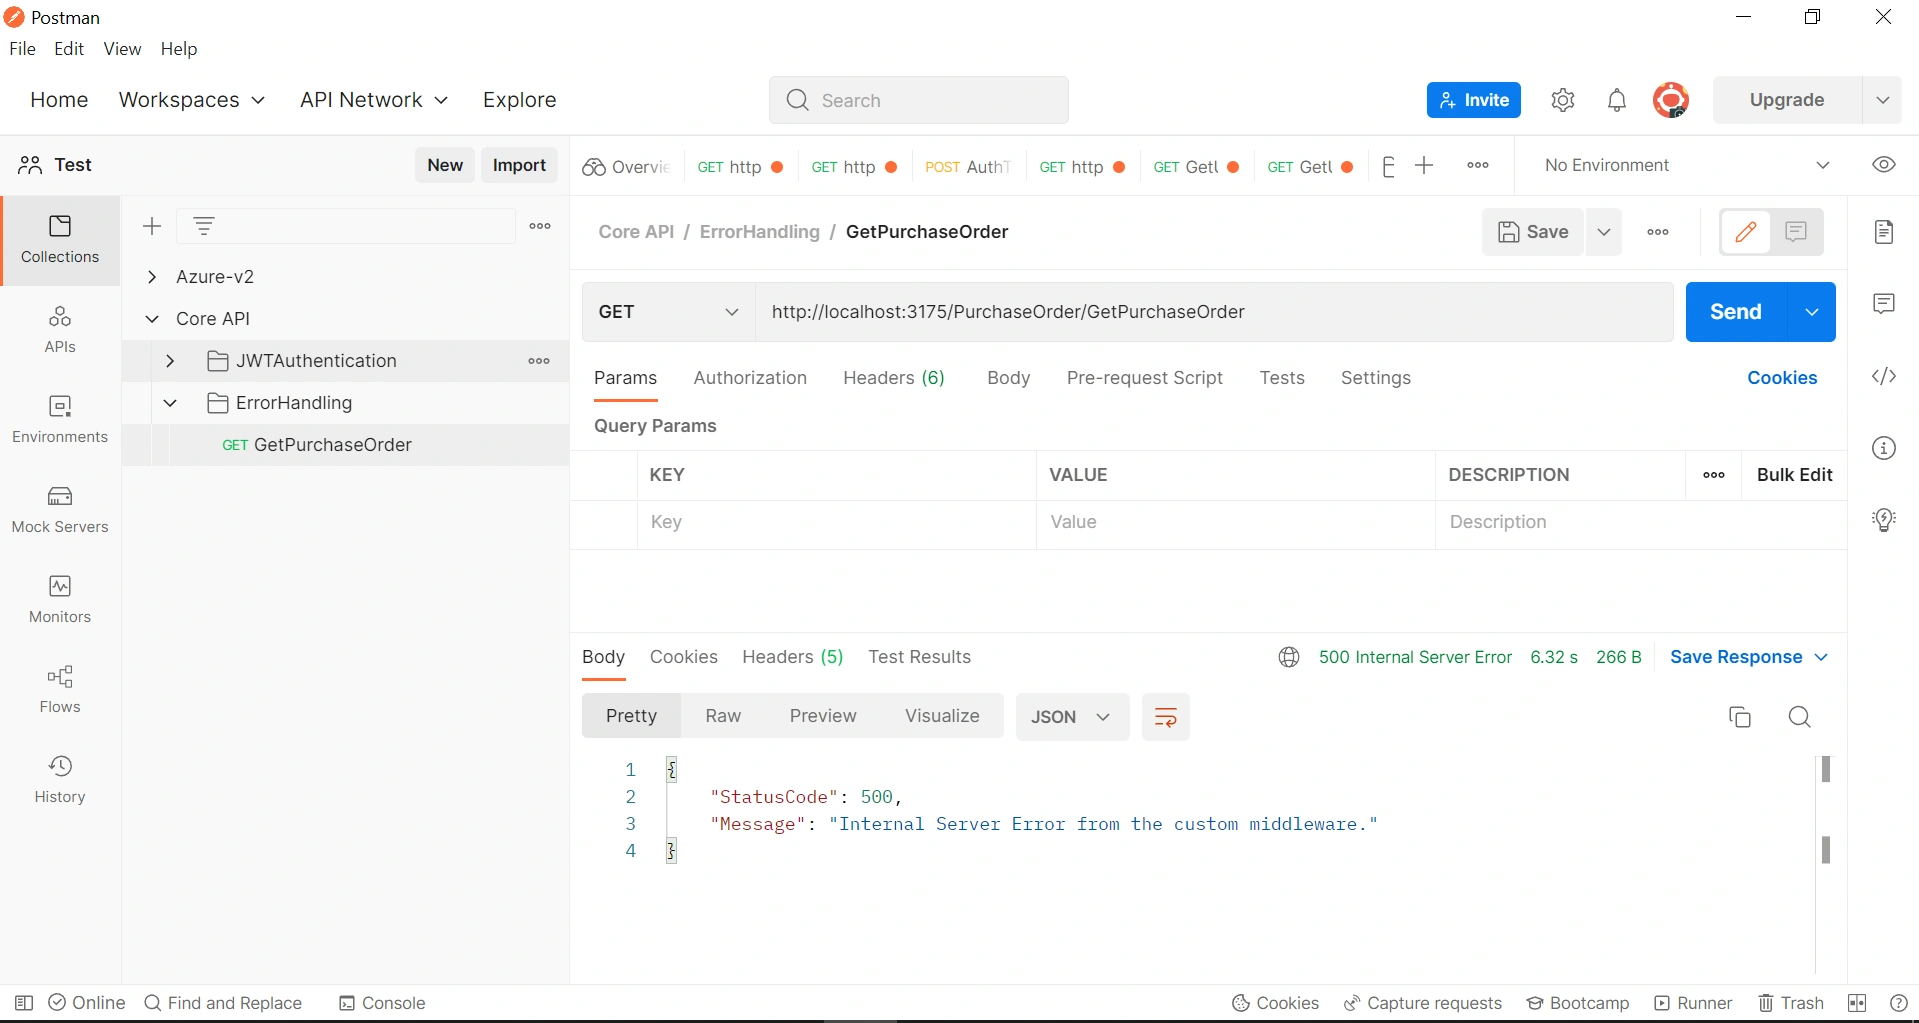
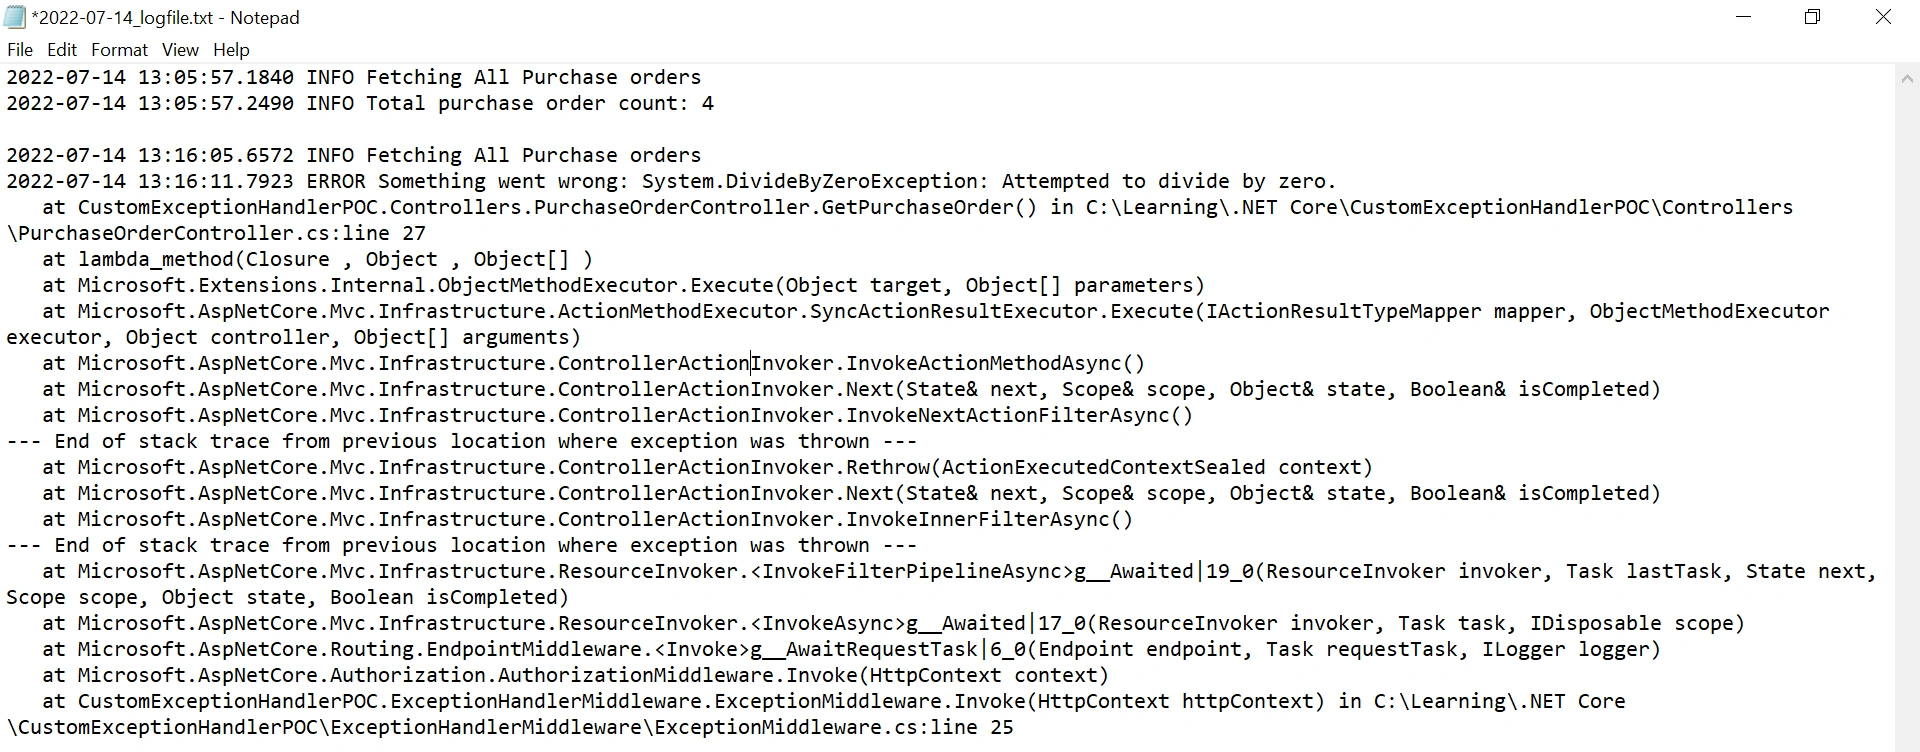
Liubomyr LebedynPosted Mar 28, 2023, 9:15 AM
Hi, can you suggest how to implement this flow in Test Automation Framework (NUnit, RestSharp). Thanks, in advance.