

Introduction
Requirements
- Android Studio version 2.3.3
- A little bit of XML and JAVA knowledge.
- Android Emulator (or) Android mobile
- Download link (Android Studio)
Steps to be followed
Follow these steps to create a Gallery Android app. I have included the source code below.
Step 1
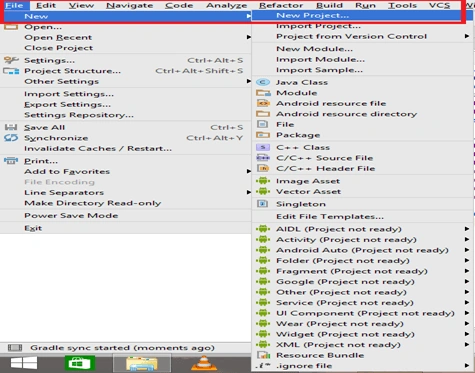
Open Android Studio and start a New Android Studio Project.
Step 2
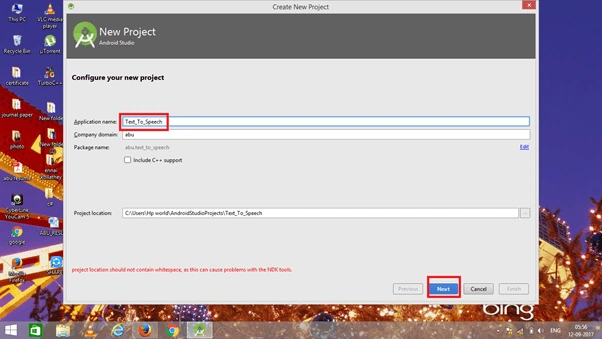
You can choose your application name and choose where your project is stored on the location. If you wish to use C++ for coding the project, mark the "Include C++ support", and click the "Next" button.
Step 3
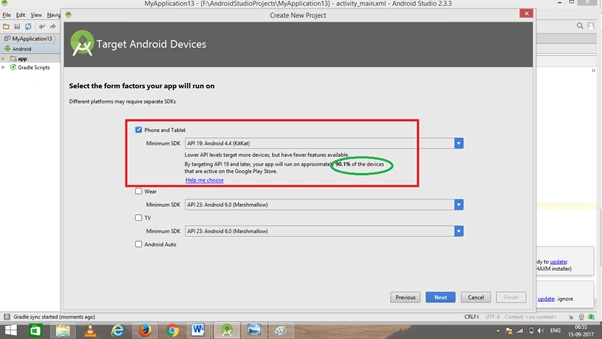
Now, select the version of Android and select the target Android devices. We need to choose the SDK level which plays an important role to run the application.
Step 4
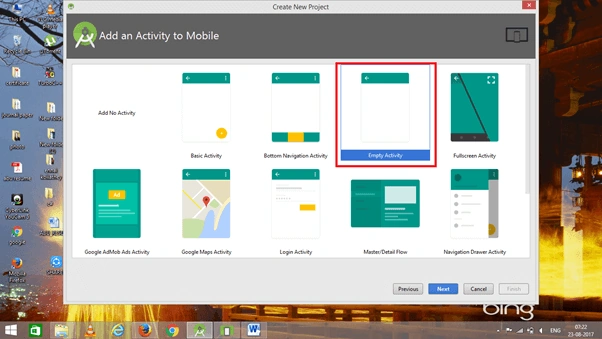
Now, add the activity and click the "Next" button.
Step 5
Add Activity name and click "Finish".

Step 6
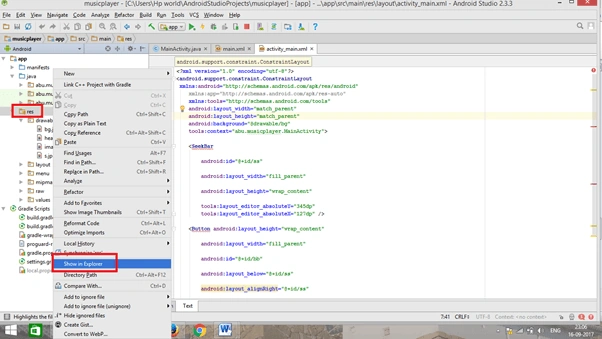
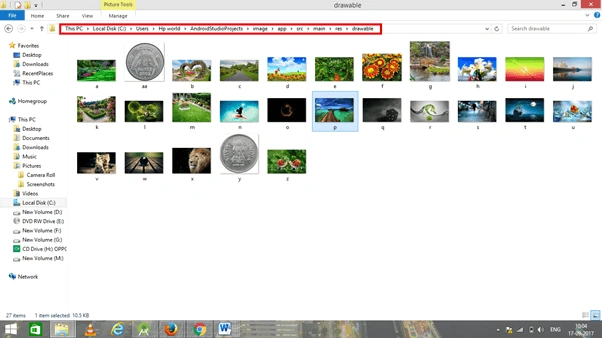
Add images in the Drawable file. The below template shows how to add the image file. Go to the app and right-click. The “Show in Explorer” option will appear. Click on the path and add an image in the main folder.
Step 7
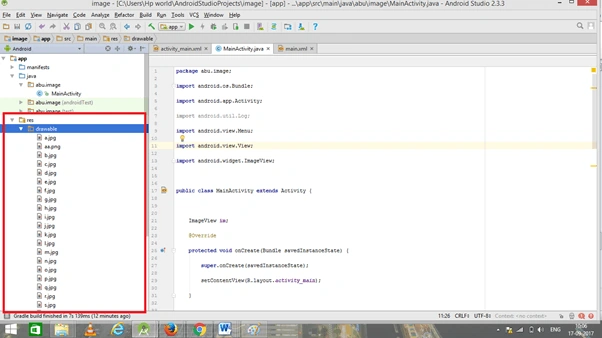
The below template is shown after adding the image file.
- <RelativeLayout xmlns:android="http://schemas.android.com/apk/res/android"
- android:layout_width="match_parent"
- android:layout_height="match_parent"
- android:background="@android:color/white"
- android:orientation="vertical" >
- <ImageView
- android:id="@+id/selected"
- android:layout_width="fill_parent"
- android:layout_height="fill_parent"
- android:layout_above="@+id/gallery_relative_layout"
- android:layout_marginLeft="30dip"
- android:layout_marginRight="30dip"
- android:layout_marginTop="30dip" />
- <View
- android:layout_width="match_parent"
- android:layout_height="1dp"
- android:background="#770000ff"
- android:layout_marginTop="300dp"
- android:layout_above="@+id/gallery_relative_layout" />
- <RelativeLayout
- android:id="@+id/gallery_relative_layout"
- android:layout_width="fill_parent"
- android:layout_height="200dip"
- android:layout_alignParentBottom="true"
- android:orientation="horizontal"
- android:paddingTop="20dp">
- <verticalScrollView
- android:id="@+id/hor_scroll_view"
- android:layout_width="match_parent"
- android:layout_height="wrap_content"
- >
- <LinearLayout
- android:id="@+id/gallery"
- android:layout_width="wrap_content"
- android:layout_height="wrap_content"
- android:orientation="horizontal" >
- <ImageView
- android:id="@+id/image1"
- android:layout_width="wrap_content"
- android:layout_height="wrap_content"
- android:src="@drawable/a"
- android:onClick="biggerView"/>
- <ImageView
- android:id="@+id/image8"
- android:layout_width="wrap_content"
- android:layout_height="wrap_content"
- android:src="@drawable/aa"
- android:onClick="biggerView"/>
- <ImageView
- android:id="@+id/image2"
- android:layout_width="wrap_content"
- android:layout_height="wrap_content"
- android:src="@drawable/b"
- android:onClick="biggerView"/>
- <ImageView
- android:id="@+id/image3"
- android:layout_width="wrap_content"
- android:layout_height="wrap_content"
- android:src="@drawable/c"
- android:onClick="biggerView"/>
- <ImageView
- android:id="@+id/image4"
- android:layout_width="wrap_content"
- android:layout_height="wrap_content"
- android:src="@drawable/d"
- android:onClick="biggerView"/>
- <ImageView
- android:id="@+id/image5"
- android:layout_width="wrap_content"
- android:layout_height="wrap_content"
- android:src="@drawable/e"
- android:onClick="biggerView"/>
- <ImageView
- android:id="@+id/image6"
- android:layout_width="wrap_content"
- android:layout_height="wrap_content"
- android:src="@drawable/f"
- android:onClick="biggerView"/>
- <ImageView
- android:id="@+id/image7"
- android:layout_width="wrap_content"
- android:layout_height="wrap_content"
- android:src="@drawable/g"
- android:onClick="biggerView"/>
- </LinearLayout>
- </verticalScrollView>
- </RelativeLayout>
- </RelativeLayout>
Step 9
Go to Main Activity.java. This Java program is the backend language for Android.
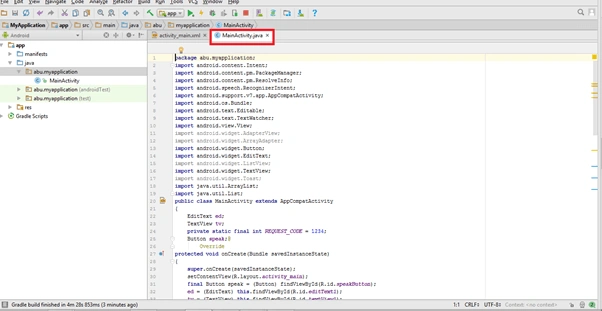 The java code is given below
- package abu.image;
- import android.os.Bundle;
- import android.app.Activity;
- import android.util.Log;
- import android.view.Menu;
- import android.view.View;
- import android.widget.ImageView;
- public class MainActivity extends Activity {
- ImageView im;
- @Override
- protected void onCreate(Bundle savedInstanceState) {
- super.onCreate(savedInstanceState);
- setContentView(R.layout.activity_main);
- }
- public void biggerView(View v) {
- im = (ImageView) findViewById(R.id.selected);
- switch (v.getId()) {
- case R.id.image1:
- im.setImageResource(R.drawable.a);
- break;
- case R.id.image2:
- im.setImageResource(R.drawable.b);
- break;
- case R.id.image3:
- im.setImageResource(R.drawable.c);
- break;
- case R.id.image4:
- im.setImageResource(R.drawable.d);
- break;
- case R.id.image5:
- im.setImageResource(R.drawable.e);
- break;
- case R.id.image6:
- im.setImageResource(R.drawable.f);
- break;
- case R.id.image7:
- im.setImageResource(R.drawable.g);
- break;
- case R.id.image8:
- im.setImageResource(R.drawable.aa);
- break;
- }
- }
- @Override
- public boolean onCreateOptionsMenu(Menu menu) {
- // Inflate the menu; this adds items to the action bar if it is present.
- getMenuInflater().inflate(R.menu.main, menu);
- return true;
- }
- }
Step 10
Now, go to the menu bar and click "Make a project" or press ctrl+f9 to debug the errors.
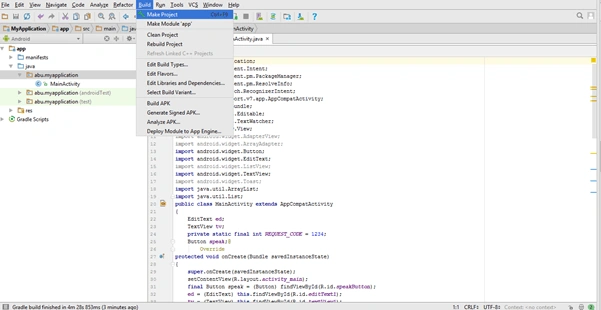 Step 11
Then, click the "Run" button or press shift+f10 to run the project. And choose the virtual machine and click OK.
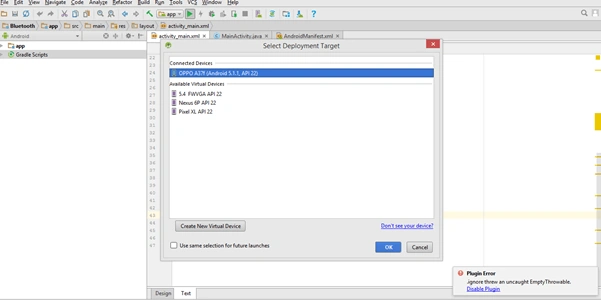
Conclusion
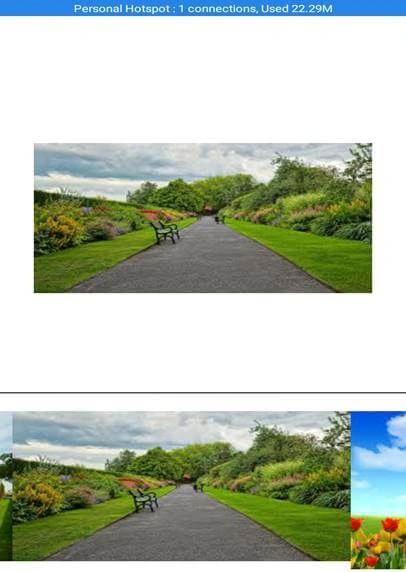
We have successfully created a Gallery Android application using Android Studio.
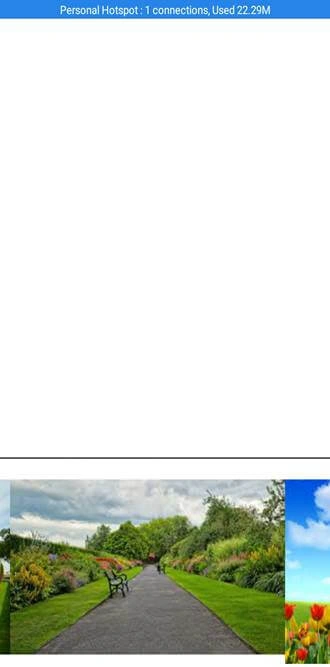
Munish APosted Oct 30, 2017, 9:57 PM
Nice article.........