

Introduction
Azure AI Language is a cloud-based service that supplies Natural Language Processing (NLP) features for analyzing and understanding text. We can use this service to help build intelligent applications using the web-based Language Studio, REST APIs, and client libraries.
The Language service also supplies several new features as well, which can either be:
- Preconfigured, which means the AI models that the feature uses are not customizable. You can just send your data and use the feature's output in your applications.
- Customizable, which means you'll train an AI model using our tools to fit your data specifically.
Language Studio is a set of UI-based tools that lets you explore, build, and integrate features from Azure AI Language into your applications.
Language Studio enables you to use the service features below without needing to write code.
- Named Entity Recognition (NER)
- Personally identifying (PII) and health (PHI) information detection
- Language detection
- Sentiment Analysis and opinion mining
- Summarization
- Key phrase extraction
- Entity linking
- Text analytics for health
- Custom text classification
- Custom Named Entity Recognition (Custom NER)
- Conversational language understanding
- Orchestration workflow
- Question answering
- Custom text analytics for health
Conversational language understanding (CLU) enables users to build custom natural language understanding models to predict the overall intention of an incoming utterance and extract essential information from it.
CLU refers to the technology and methods used to enable computers to understand, interpret, and respond to human language in a natural and intuitive manner, particularly within the context of a conversation. This involves various components and challenges, including:
- Natural Language Processing (NLP): The foundational technology that allows machines to understand, interpret, and generate human language.
- Context Understanding: Grasping the context of the conversation, including earlier turns in the dialogue, to supply relevant and coherent responses.
- Intent Recognition: Finding the user's intention behind their message. For example, deciding whether the user is asking a question, making a request, or supplying information.
- Entity Recognition: Finding and extracting specific pieces of information from the user’s message, such as names, dates, locations, and other relevant details.
- Dialogue Management: Managing the flow of the conversation, deciding when and how to respond, and keeping coherence throughout the dialogue.
- Sentiment Analysis: Understanding the emotional tone of the user’s message, which can be crucial for supplying proper responses, especially in customer service scenarios.
- Disambiguation: Clarifying and resolving ambiguities in the user's message, which might require asking follow-up questions or using context to infer the correct meaning.
- Personalization: Adapting responses based on user preferences, history, and profile to supply a more tailored and engaging conversational experience.
- Multimodality: Integrating and understanding inputs from various channels and modalities, such as text, voice, and images, to supply a comprehensive understanding of the user’s message.
- Continuous Learning: The ability to learn from user interactions and improve performance over time, adapting to new language usage, slang, and user preferences.
Conversational Language Understanding is used in various applications, including chatbots, virtual assistants, customer support systems, and conversational agents across different industries. It aims to provide users with an intuitive and efficient way to interact with technology using natural language, enhancing user experience and accessibility.
In this post, we will see all the steps to create a Language Service and Language Studio inside Language Service.
Create Language Service in Azure portal
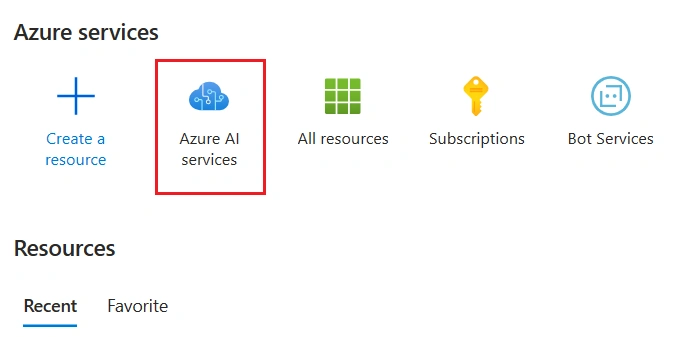
Choose Azure AI services blade from Azure portal.
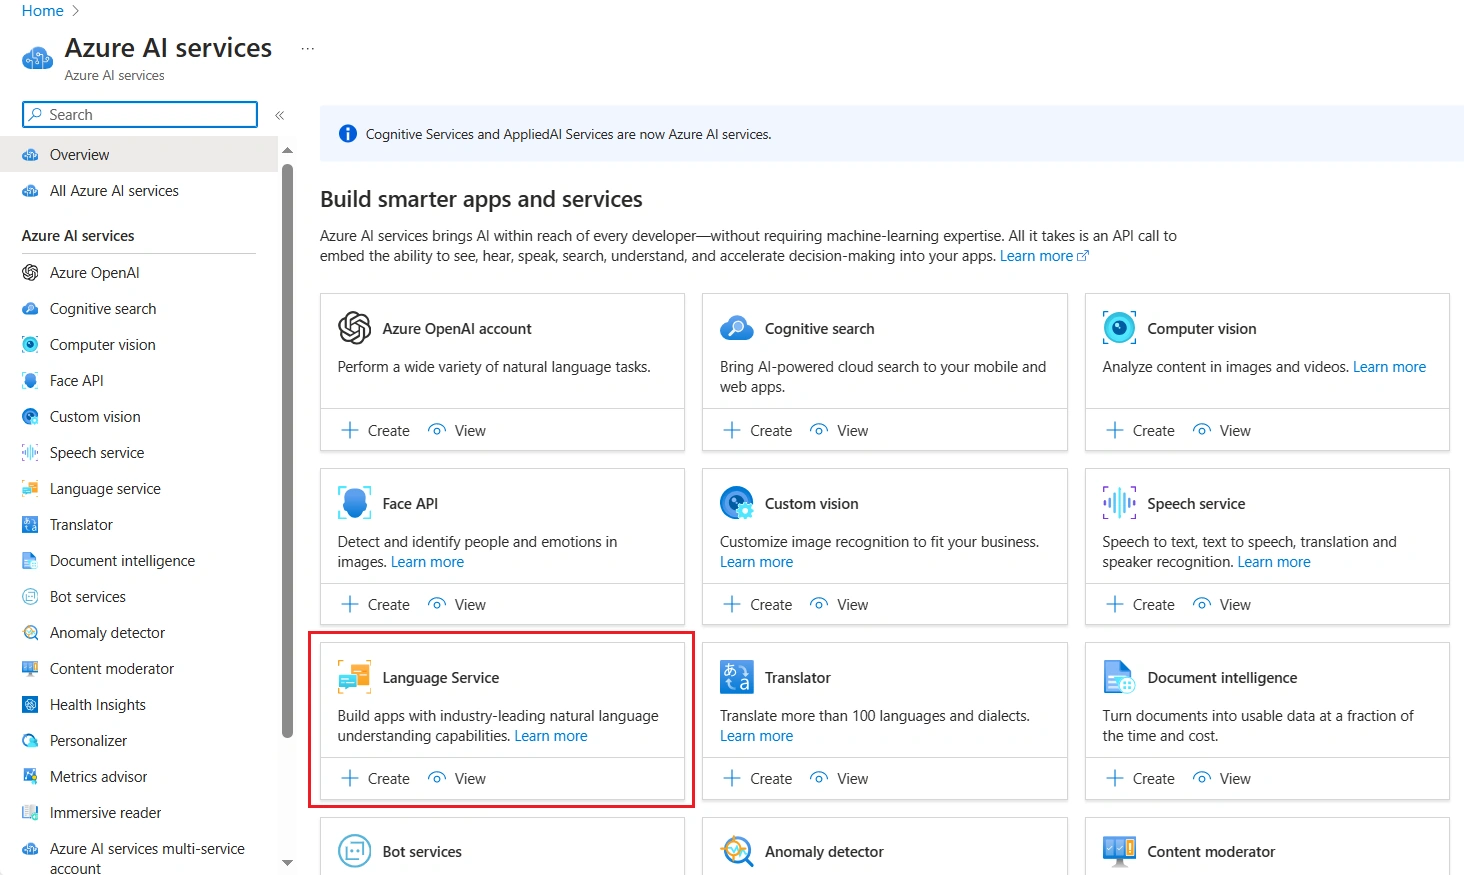
Choose Language Service from below listed Azure AI services and click Create button.
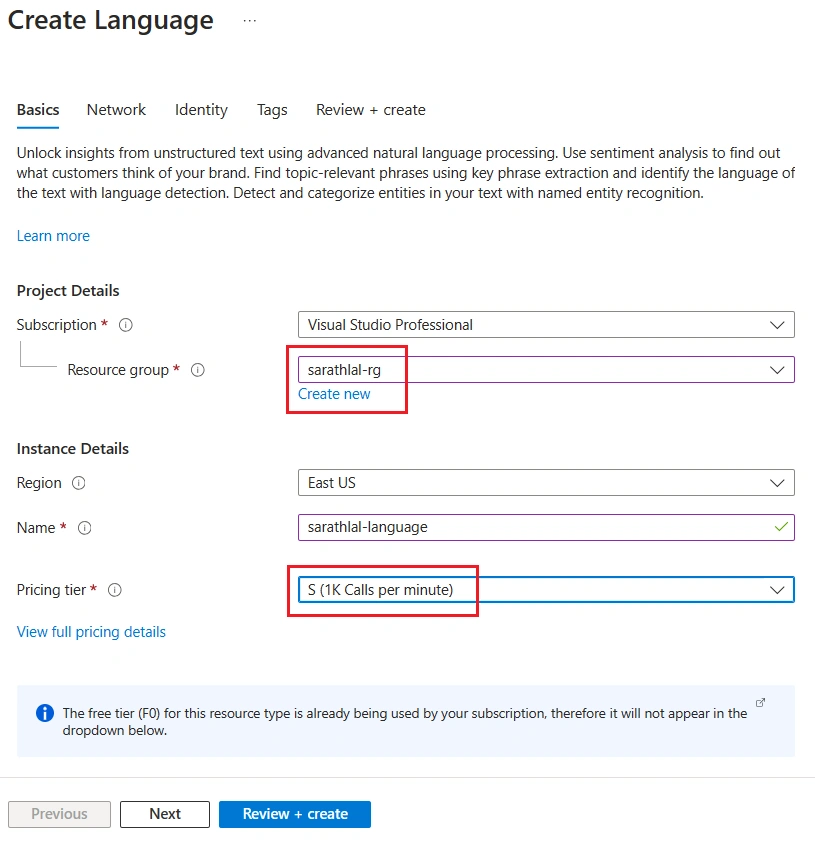
We can create/choose the existing resource group and select a valid instance name for your language service.
Currently Azure gives one free tier plan for Language service per subscription. If you have already chosen the free tier, you can choose plan S. It will allow you to make 1K calls per minute.
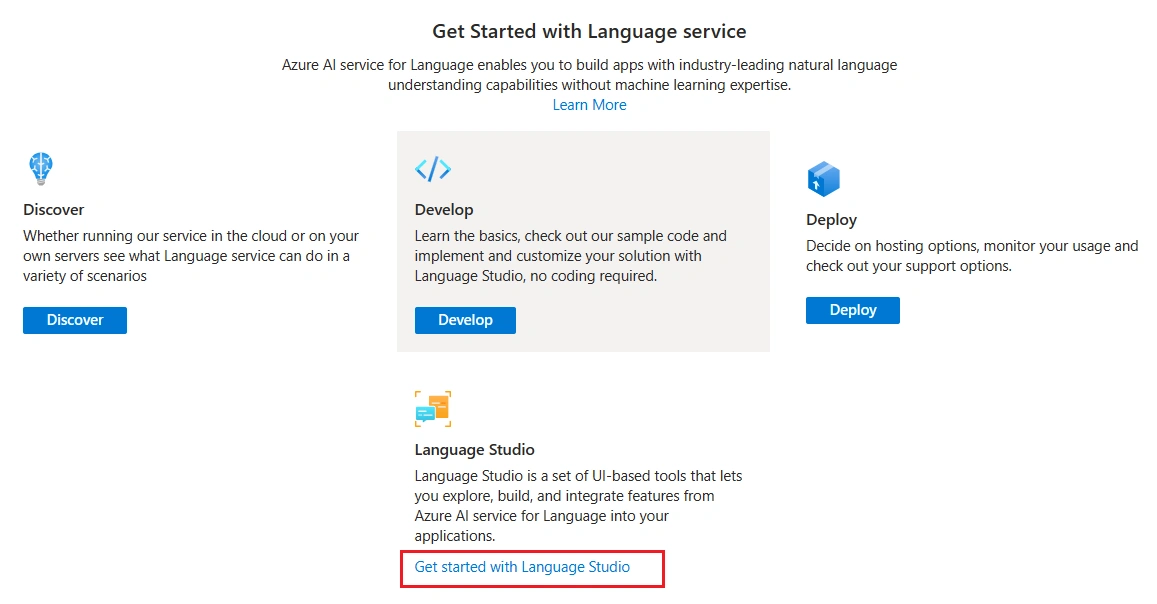
Open the Language resource in Azure and click the Language Studio link.
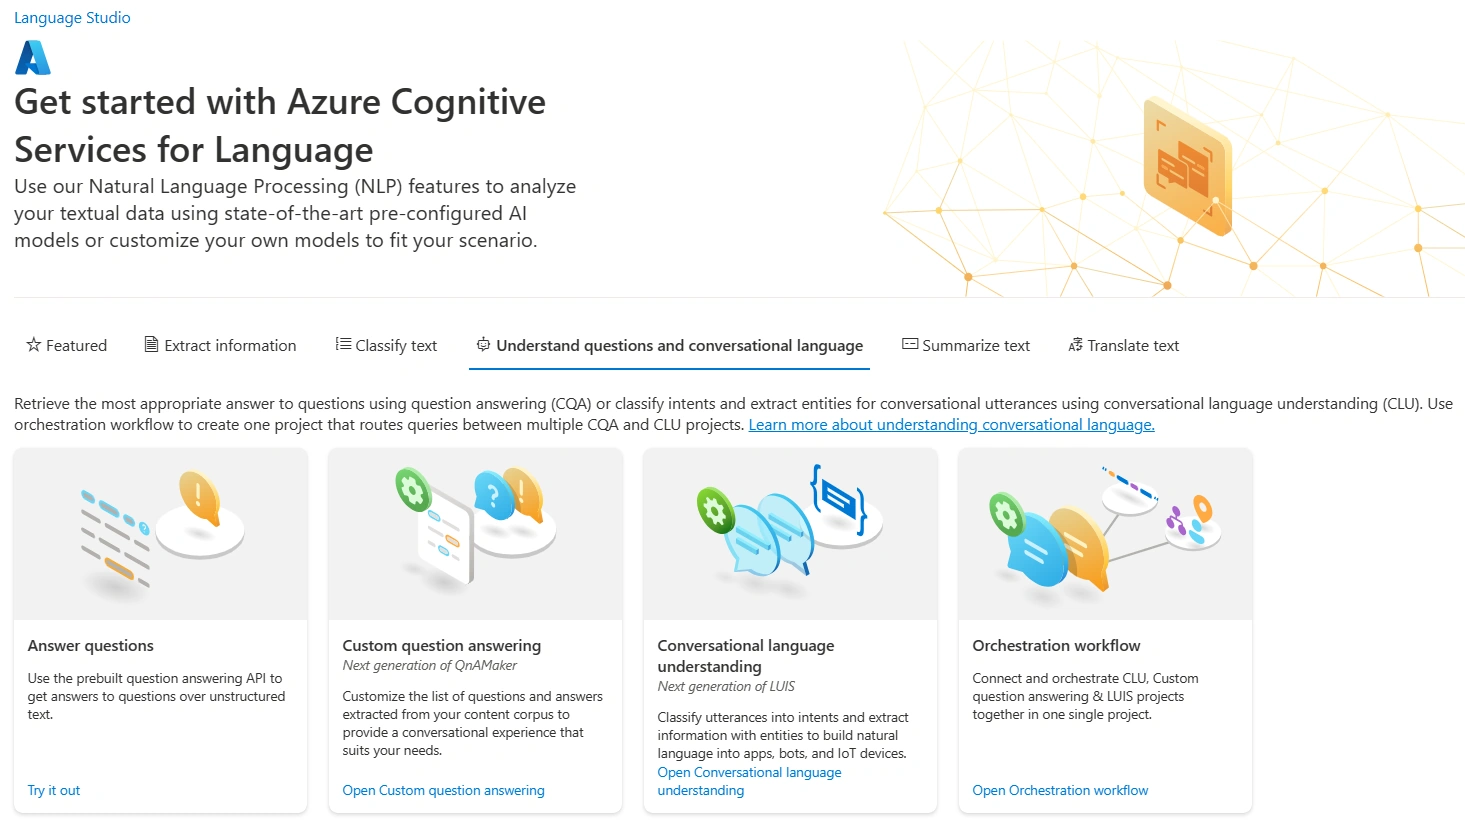
Select Conversational Language Understanding blade from Understand questions and conversational language tab.
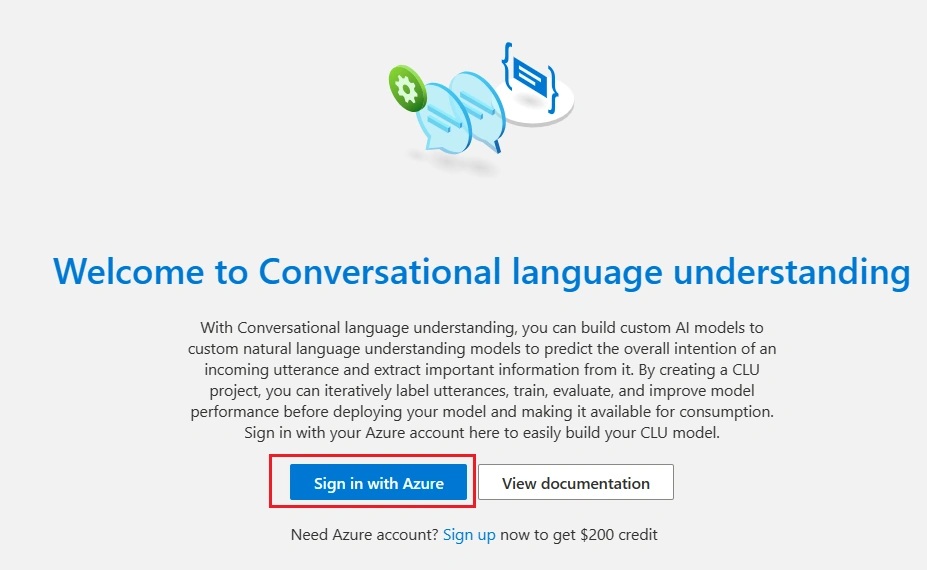
We need to login again to Azure to create a language project.
We can click choose resource and select our already created Language service from the Azure portal.
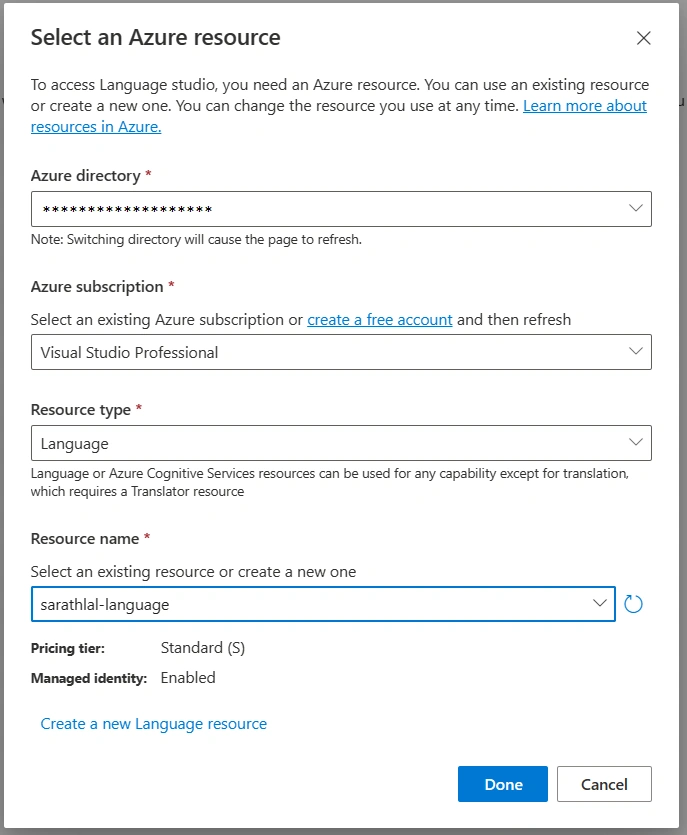
Click the Done button to complete this step.
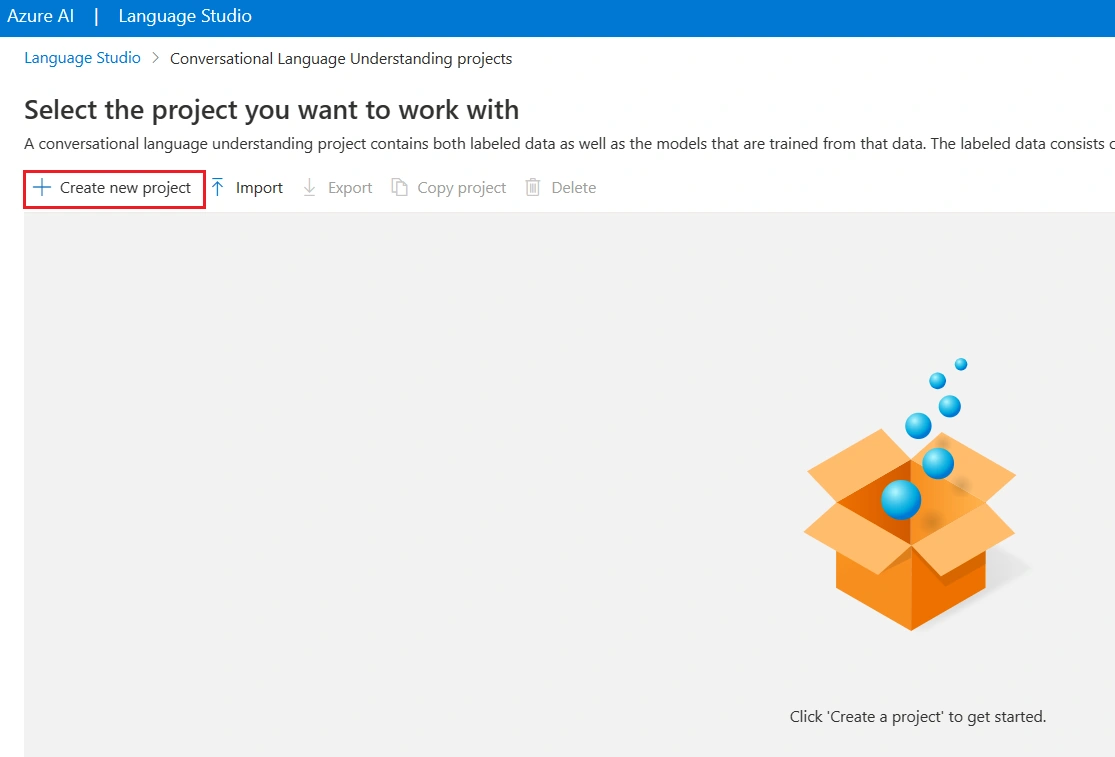
Click the Create new project button to create a new language project.
We can give a Name and Description for our project. Azure Language AI supports multiple languages in projects. If needed, you can enable it.
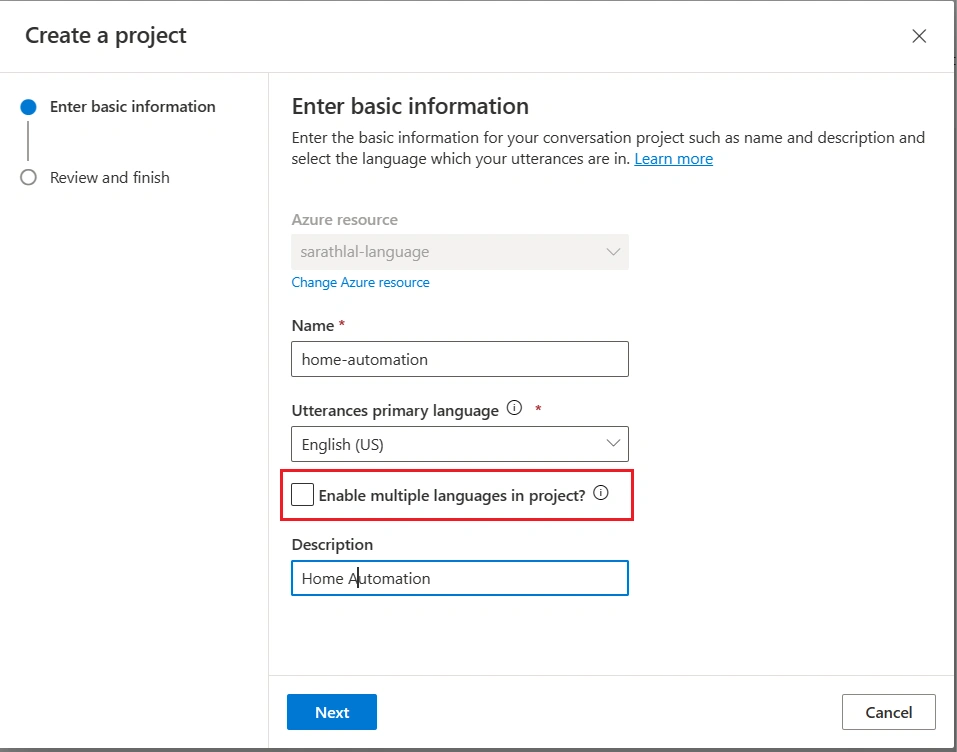
We are going to create a simple Home Automation project. This project will get input from the user to switch on / switch off light, fan and cooler. Conversational Language Understanding will be analyzing the user input and returning correct intents and entities. For that, we must train the model by giving more utterances and labeling the entities.
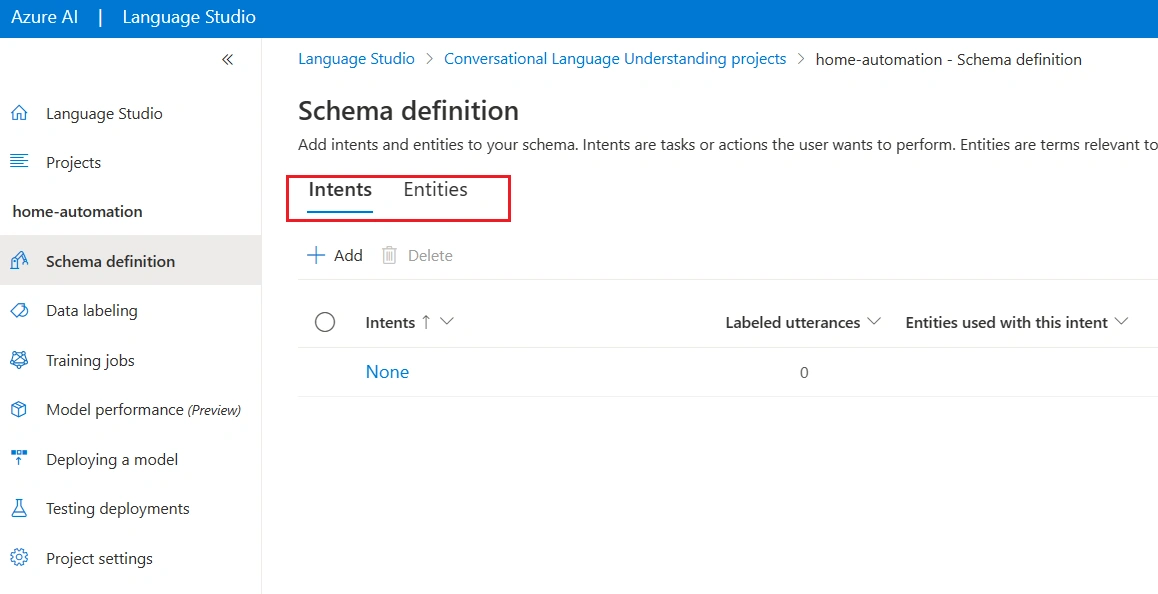
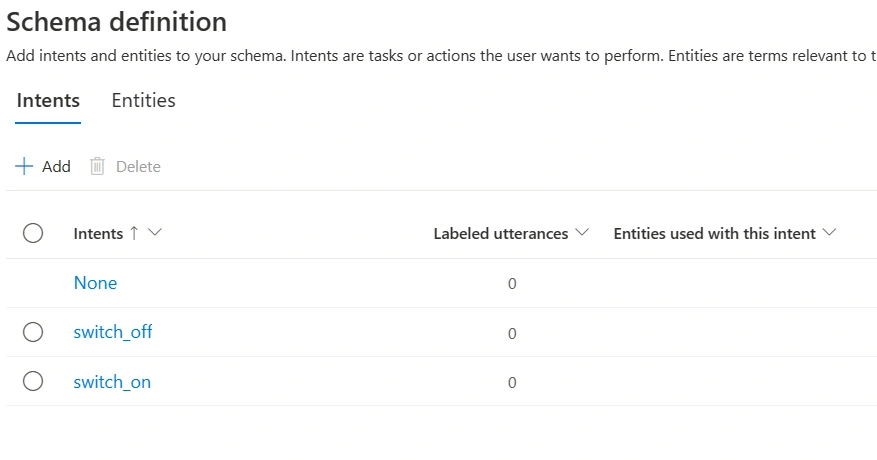
We can create two intents switch_on and swich_off for your testing purpose. You can create any number of intents.
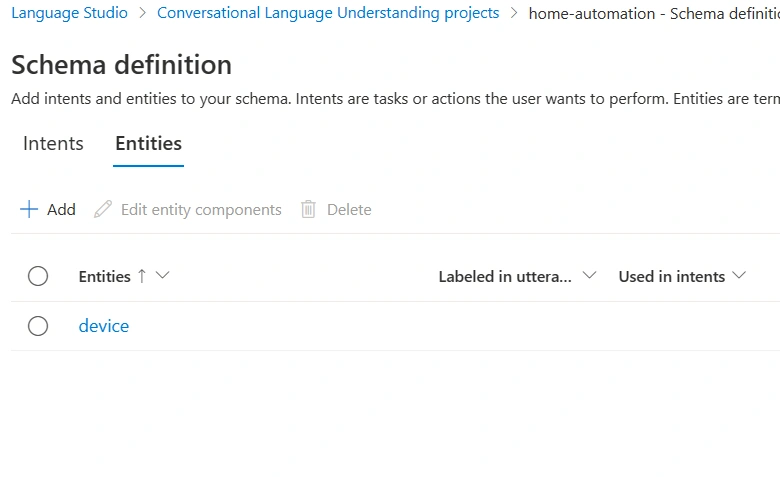
Create an entity. We have created only one entity for testing purposes.
We can now go to the crucial step training the model. It is called Data labeling.
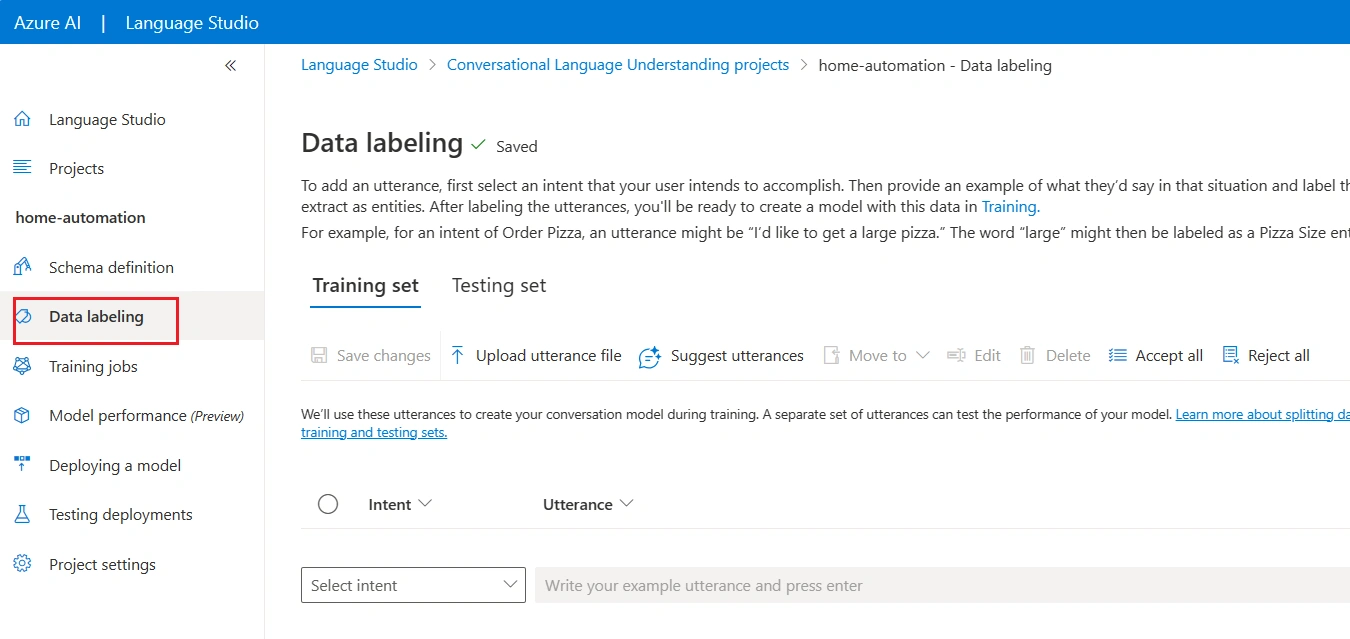
We can add our first utterance.

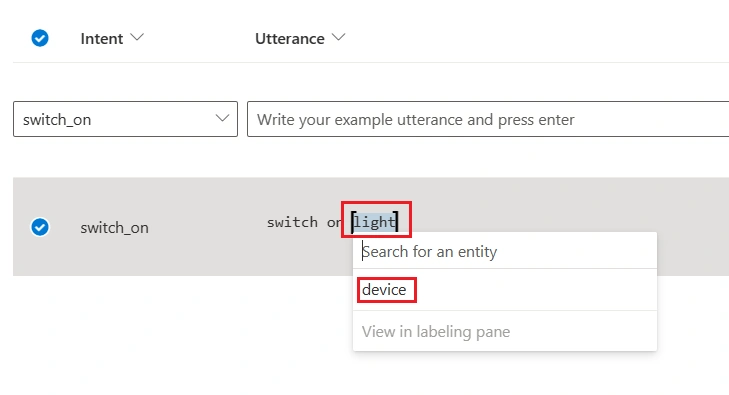
After creating the first utterance we can choose the utterance and add a label with the entity “device”.
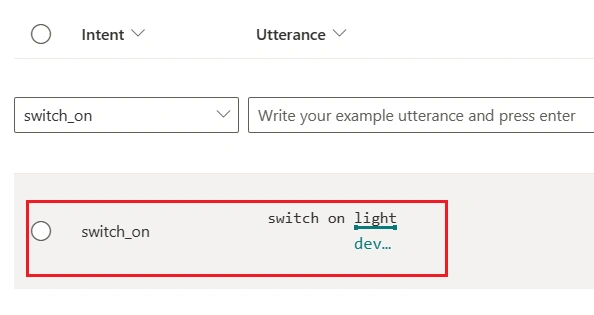
The saved entity in utterance looks like below.
We can add a few more utterances for intent swich_on and tag entity labels.
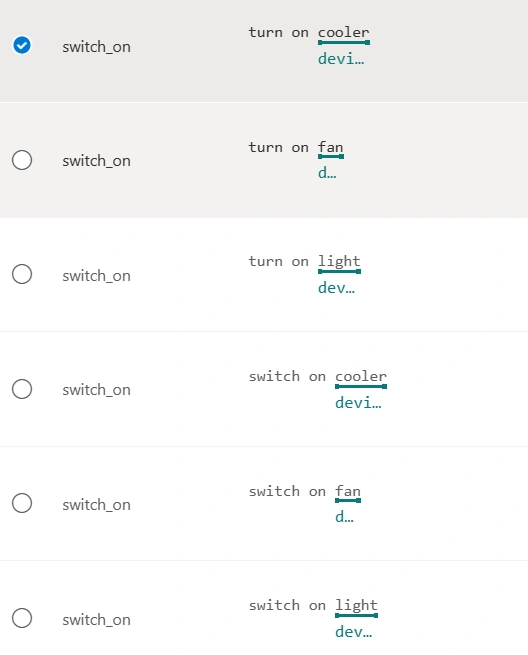
We have added two distinct types of utterances switch on and turn on for intent switch_on along with entity label “device”.
We can create six more utterances for switch_off intent as well.
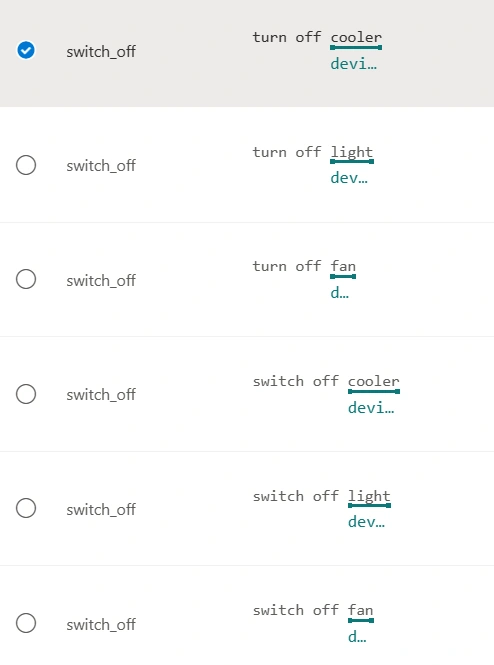
We can use the Testing set data also for testing the utterances.
We can start training for the job now.
You must give a valid and unique name for our model.
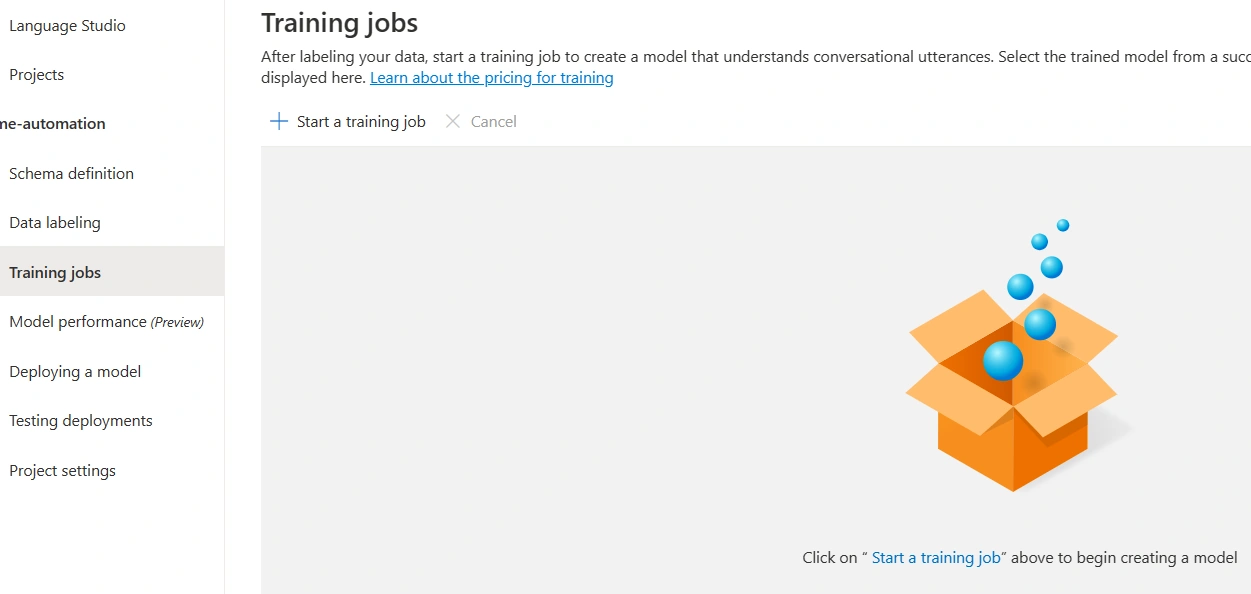
Click Start a training job link.
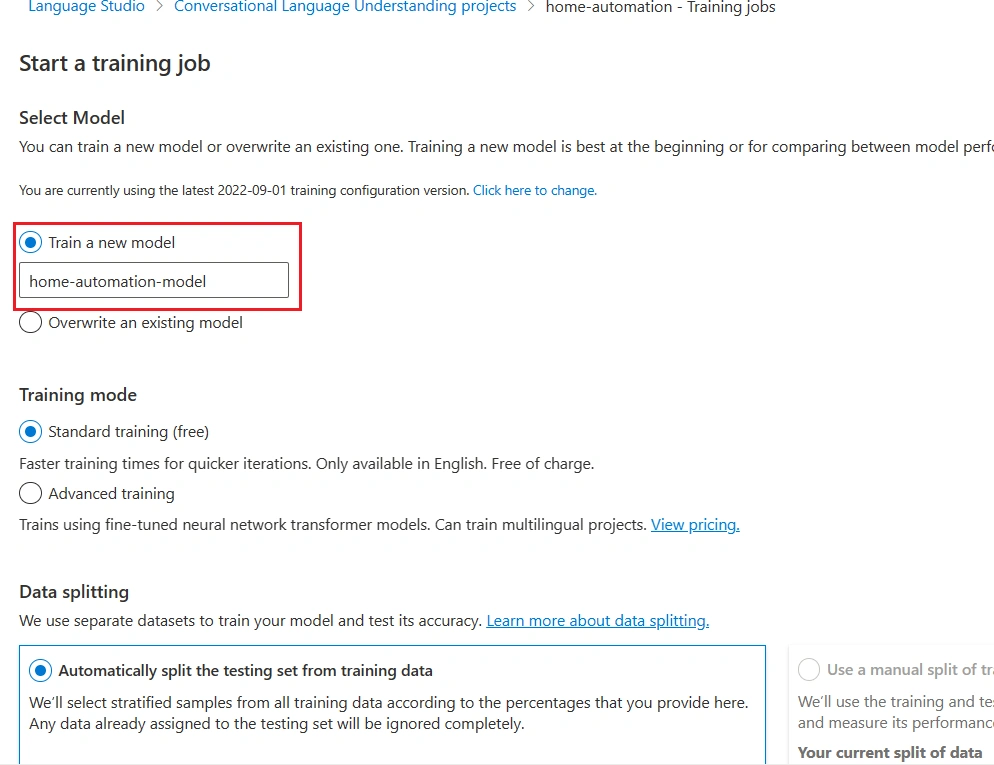
It will take a few moments to finish the training of model.
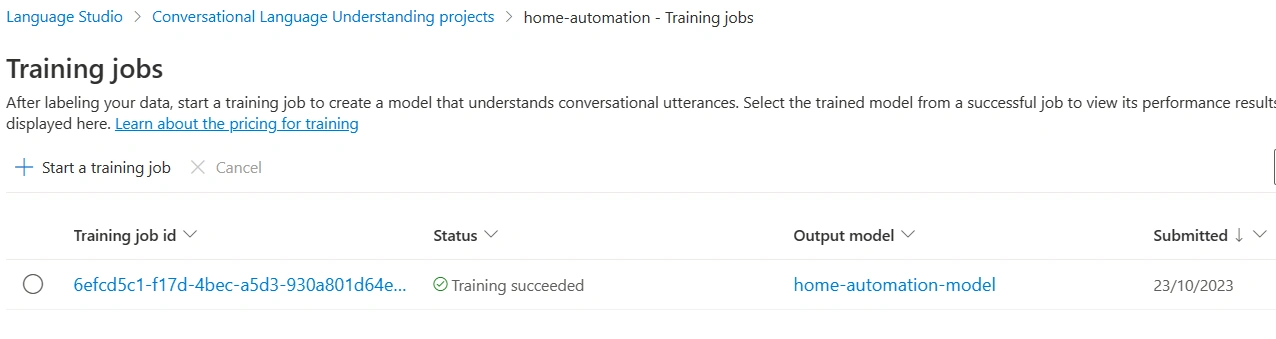
Every time we are training the same model, it will create a new training job id.
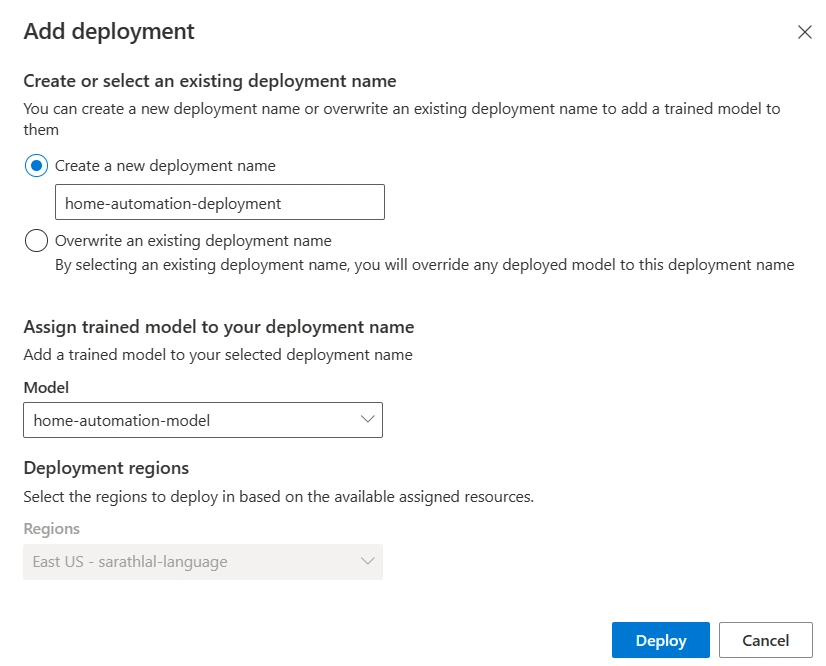
We can deploy our training model with a unique name.
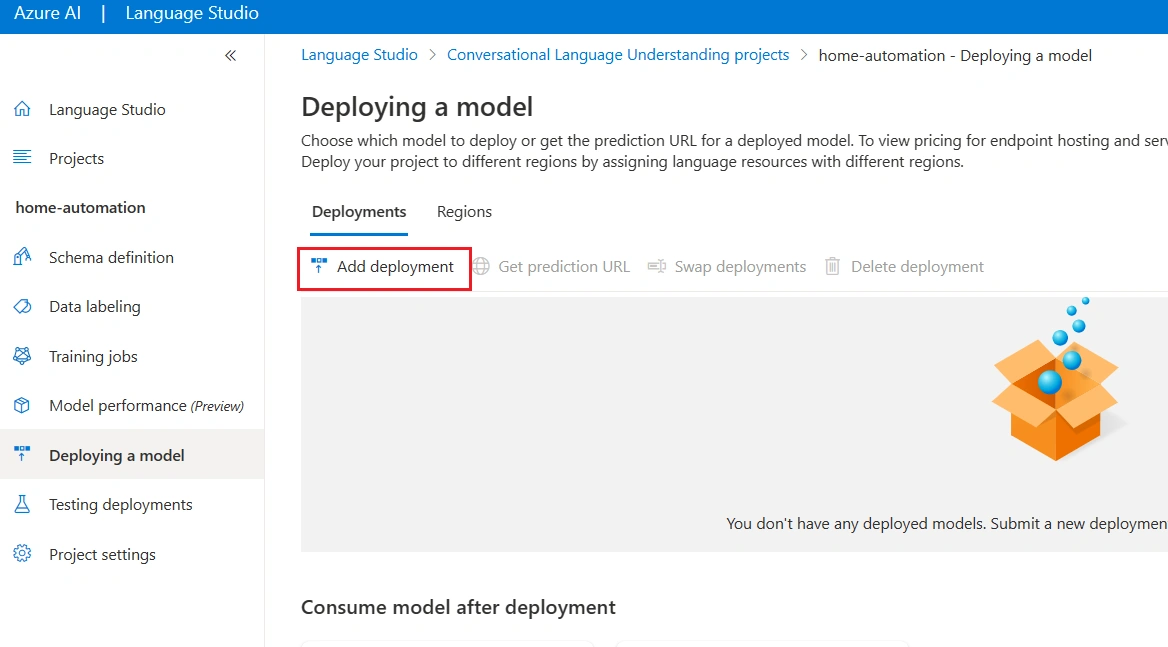
We can give a name for the deployment and select the existing training model.
We can test the deployment now.
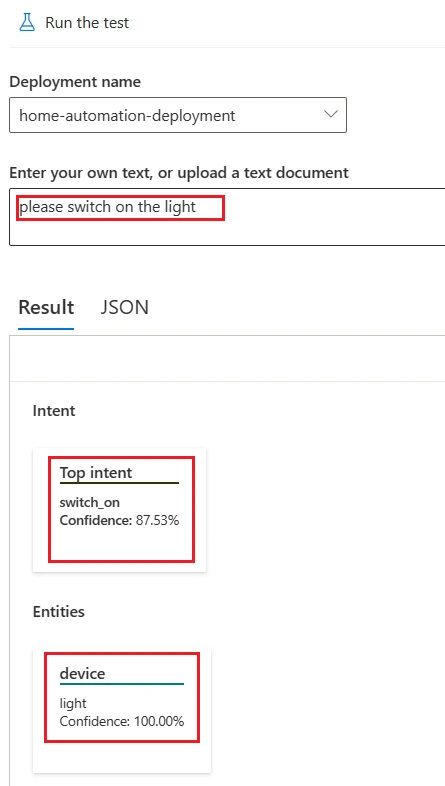
We have given the text as “please switch on the light”. Please note that we have already given similar utterance and labeled light as entity “device”. Hence both intent and device come with more confidence.
We can give one more text “please turn off computer”. Please note that in this utterance we have not yet trained in the model.
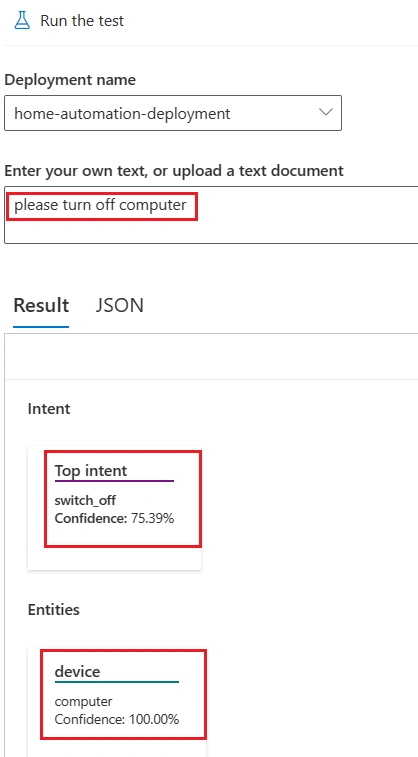
Though, we have not yet trained this utterance with computer Azure AI NLP will automatically detect and give the entity and intent correctly.
We can use CLU SDK to create a .NET 6 Web API and connect with our Language Studio project.
Create .NET 6 Web API with Visual Studio 2022
We can add NuGet package “Azure.AI.Language.Conversations” and add “Newtonsoft.Json”
Create a new API Controller ConversationController and add code given below.
We can go to Azure Language service resource and get package and endpoint details.
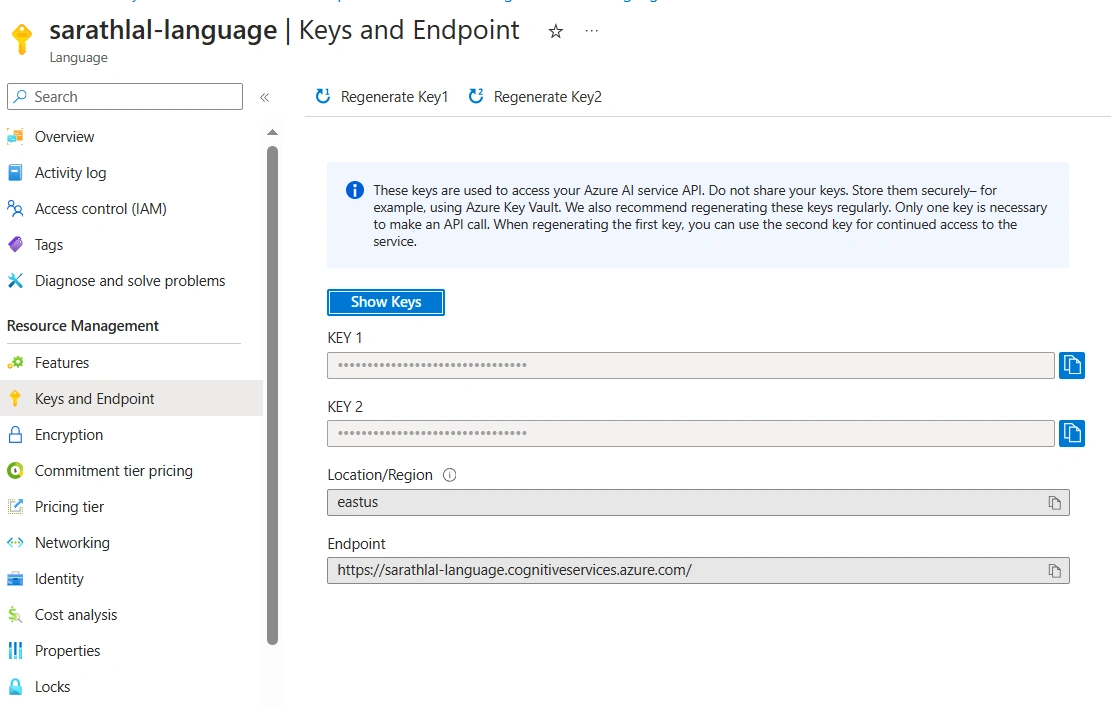
Use this key and endpoints inside our controller class. In future, we can refactor the code by creating a new service for all these operations. For code simplicity we are keeping in this way now.
ConversationController.cs
using Azure.AI.Language.Conversations;
using Azure.Core.Serialization;
using Azure.Core;
using Azure;
using Microsoft.AspNetCore.Mvc;
using Newtonsoft.Json;
using System.Text.Json;

namespace AzureLanguageStudio.Controllers
{
    [Route("api/[controller]")]
    [ApiController]
    public class ConversationController : ControllerBase
    {
        [HttpGet(Name = "GetPrediction/{userInput}")]
        public ActionResult<CLUOutput> Get(string userInput)
        {

            Uri endpoint = new("https://sarathlal-language.cognitiveservices.azure.com/");
            AzureKeyCredential credential = new("e5e404cd6a8644d69be6edae6bffb227");

            ConversationAnalysisClient client = new(endpoint, credential);

            string projectName = "home-automation";
            string deploymentName = "home-automation-deployment";


            var data = new
            {
                AnalysisInput = new
                {
                    ConversationItem = new
                    {
                        Text = userInput,
                        Id = "1",
                        ParticipantId = "1",
                    }
                },
                Parameters = new
                {
                    ProjectName = projectName,
                    DeploymentName = deploymentName,

                    // Use Utf16CodeUnit for strings in .NET.
                    StringIndexType = "Utf16CodeUnit",
                },
                Kind = "Conversation",
            };

            // Configure JsonSerializerOptions for camelCase
            var options = new JsonSerializerOptions
            {
                PropertyNamingPolicy = JsonNamingPolicy.CamelCase
            };

            var serializer = new JsonObjectSerializer(options);

            Response response = client.AnalyzeConversation(RequestContent.Create(serializer.Serialize(data)));

            dynamic outData = JsonConvert.DeserializeObject<dynamic>(response.Content.ToString());

            dynamic conversationPrediction = outData.result.prediction;

            CLUOutput output = new()
            {
                TopIntent = conversationPrediction.topIntent
            };

            List<Entity> entities = new();
            foreach (dynamic entity in conversationPrediction.entities)
            {
                entities.Add(new Entity { Category = entity.category, Text = entity.text, ConfidenceScore = entity.confidenceScore });
            }
            output.Entities = entities;
            return Ok(output);

        }
    }
}
We need two below models
Models.cs
namespace AzureLanguageStudio;

public class Entity
{
    public string? Category { get; set; }
    public string? Text { get; set; }
    public decimal ConfidenceScore { get; set; }
}

public class CLUOutput
{
    public string? TopIntent { get; set; }
    public List<Entity>? Entities { get; set; }
}
We can run the Web API and execute the API method in Swagger.
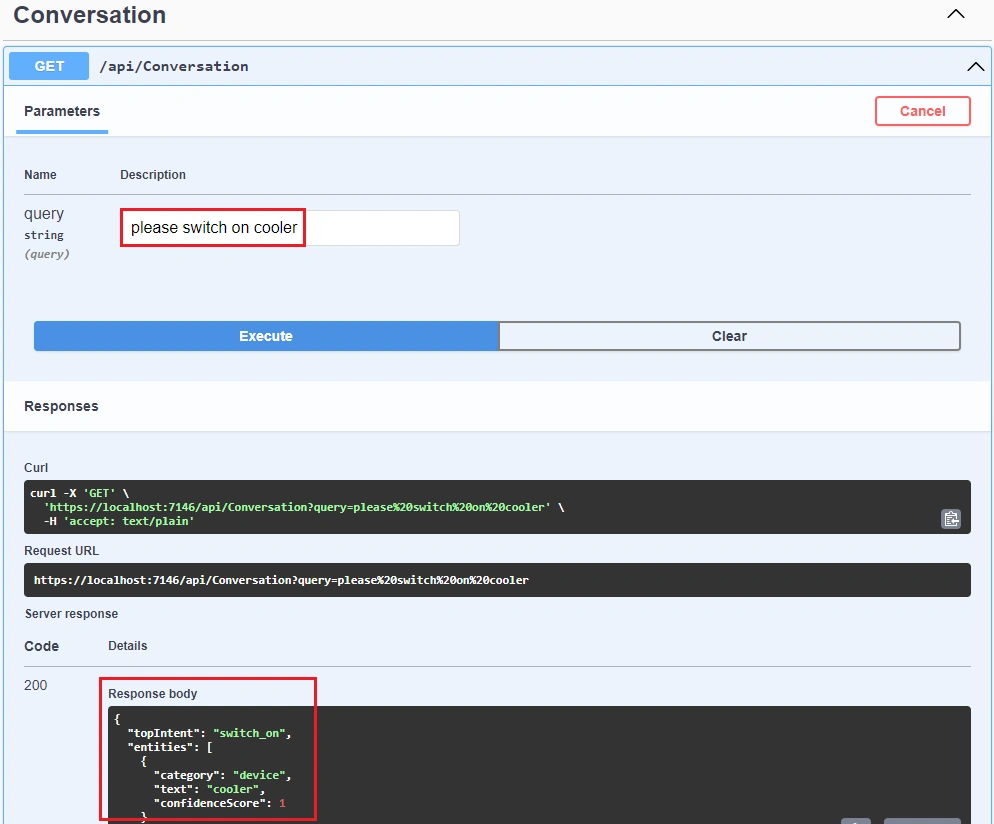
Please note that the utterance “please switch on cooler is giving device as entity and switch_on as intent with full confidence. Because we have already trained models with exact data.
Conclusion
In this article, we have seen what Azure AI Language studio is and what are the services available inside this umbrella service. We have chosen Conversational Language Understanding (CLU) service. CLU refers to the technology and methods used to enable computers to understand, interpret, and respond to human language in a natural and intuitive manner, particularly within the context of a conversation. This involves various components and challenges. We have seen how to create intents and entities and how to link each other. Later we trained our model and finally deployed it. After deployment, we tested the model with a few sample tests and got correct outcomes.
Join the conversation! Your thoughts help the community grow.