

Introduction
Here, we will learn about how we can dynamically add/remove rows of the grid using Angular 7. We have performed the same functionality with AngularJS also, you can refer to it from here.
Prerequisite
- Basic knowledge of Angular 7
- Any Editor likes Visual Studio Code
- Angular CLI must be installed
- Node JS must be installed
Let's get started
Open the Visual Studio code and open a new Terminal.
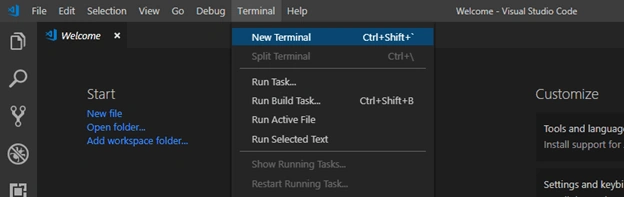
Type the following command in it.
- ng new dynamic-grid

We will also install the Bootstrap and Toaster as we are going to use it further.
- npm install bootstrap
- npm install ngx-toastr --save


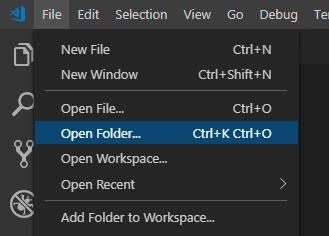
Open the project in Visual Studio Code by opening the folder.
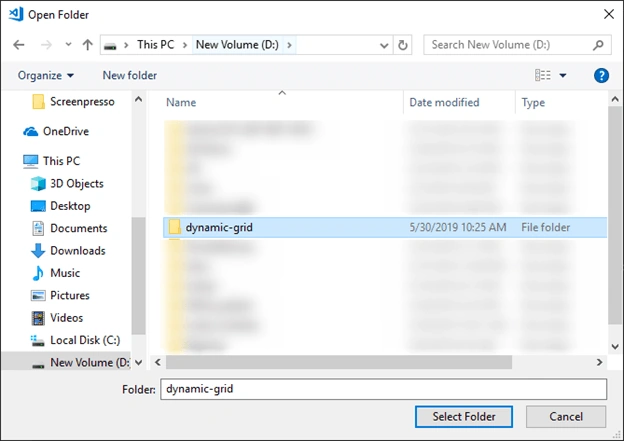
Choose the folder and open it.
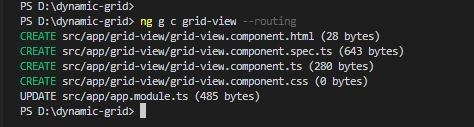
Now it's time to create the component for the project, so open the terminal and type the following command,
- ng g c grid-view --routing
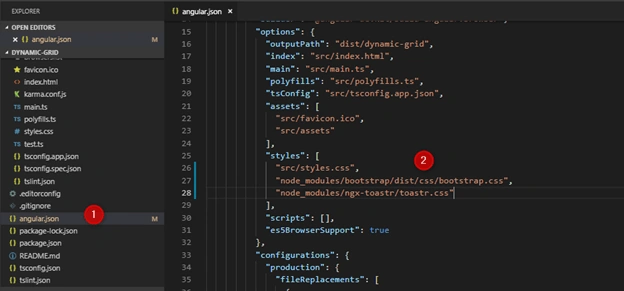
First, we will add the reference for bootstrap and toaster in the angular.json file.
Type the following command to generate the model file for the class.
- ng g class grid.model

We're all done with installation and project setup. Now we will code the project.
Open the app.module.ts file present in the root folder and add the references there.
- import { BrowserModule } from '@angular/platform-browser';
- import { NgModule } from '@angular/core';
- import { ToastrModule } from 'ngx-toastr';
- import { AppRoutingModule } from './app-routing.module';
- import { AppComponent } from './app.component';
- import { GridViewComponent } from './grid-view/grid-view.component';
- import { FormsModule } from '@angular/forms';
- import { BrowserAnimationsModule } from '@angular/platform-browser/animations';
- @NgModule({
- declarations: [
- AppComponent,
- GridViewComponent,
- ],
- imports: [
- BrowserModule,
- AppRoutingModule,
- FormsModule ,
- BrowserAnimationsModule,
- ToastrModule.forRoot()
- ],
- providers: [],
- bootstrap: [AppComponent]
- })
- export class AppModule { }
- <div class="container">
- <app-grid-view></app-grid-view>
- </div>
Open the index.html file and add the reference for font-awesome.
- <!doctype html>
- <html lang="en">
- <head>
- <meta charset="utf-8">
- <title>DynamicGrid</title>
- <base href="/">
- <meta name="viewport" content="width=device-width, initial-scale=1">
- <link rel="icon" type="image/x-icon" href="favicon.ico">
- <link rel="stylesheet" href="https://use.fontawesome.com/releases/v5.8.1/css/all.css" integrity="sha384-50oBUHEmvpQ+1lW4y57PTFmhCaXp0ML5d60M1M7uH2+nqUivzIebhndOJK28anvf" crossorigin="anonymous">
- </head>
- <body>
- <app-root></app-root>
- </body>
- </html>
Open the grid.model.ts file and add the class in it.
- export class DynamicGrid{
- title1:string;
- title2:string;
- title3:string;
- }
Open the grid-view.component.html file add the HTML code in it.
- <div class="container" style="margin-top: 5%">
- <table class="table table-striped table-bordered">
- <thead>
- <tr>
- <th>Action</th>
- <th>Title 1</th>
- <th>Title 2</th>
- <th>Title 3</th>
- </tr>
- </thead>
- <tbody>
- <tr *ngFor="let dynamic of dynamicArray; let i = index;">
- <td (click)="deleteRow(i)">
- <i class="fa fa-trash fa-2x"></i>
- </td>
- <td>
- <input [(ngModel)]="dynamicArray[i].title1" class="form-control" type="text" />
- </td>
- <td>
- <input [(ngModel)]="dynamicArray[i].title2" class="form-control" type="text" />
- </td>
- <td>
- <input [(ngModel)]="dynamicArray[i].title3" class="form-control" type="text"/>
- </td>
- </tr>
- <tr>
- <td (click)="addRow(i)">
- <i class="fa fa-plus fa-2x"></i>
- </td>
- </tr>
- </tbody>
- </table>
- </div>
Finally, write the below code for the grid-view.component.ts file.
- import { Component, OnInit } from '@angular/core';
- import { ToastrService } from 'ngx-toastr';
- import { DynamicGrid } from '../grid.model';
- @Component({
- selector: 'app-grid-view',
- templateUrl: './grid-view.component.html',
- styleUrls: ['./grid-view.component.css']
- })
- export class GridViewComponent implements OnInit {
- constructor(private toastr: ToastrService) { }
- dynamicArray: Array<DynamicGrid> = [];
- newDynamic: any = {};
- ngOnInit(): void {
- this.newDynamic = {title1: "", title2: "",title3:""};
- this.dynamicArray.push(this.newDynamic);
- }
- addRow(index) {
- this.newDynamic = {title1: "", title2: "",title3:""};
- this.dynamicArray.push(this.newDynamic);
- this.toastr.success('New row added successfully', 'New Row');
- console.log(this.dynamicArray);
- return true;
- }
- deleteRow(index) {
- if(this.dynamicArray.length ==1) {
- this.toastr.error("Can't delete the row when there is only one row", 'Warning');
- return false;
- } else {
- this.dynamicArray.splice(index, 1);
- this.toastr.warning('Row deleted successfully', 'Delete row');
- return true;
- }
- }
- }
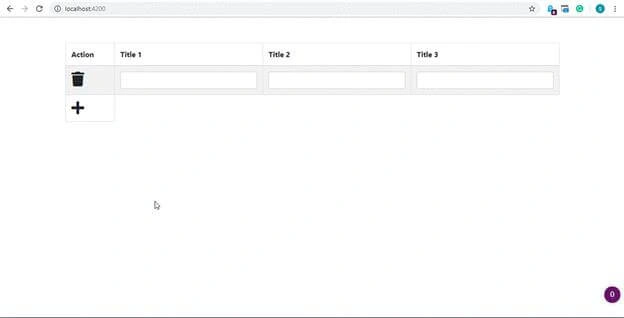
Output
Please give your valuable feedback/comments/questions about this article below. Please let me know how you like and understand this article and how I could improve it.
You can download the source code from here.
Hamid KhanPosted Oct 14, 2020, 5:19 AM
Good explanation ...........Thanks
Neeraj SinghPosted Jun 12, 2020, 2:40 PM
Very nice :)
deepak karmaPosted Apr 27, 2020, 6:41 AM
My view is not updating automatically
Yogesh vijayanPosted Sep 5, 2019, 10:40 AM
Please help me out to fetch user table data and save it to database
Yogesh vijayanPosted Sep 5, 2019, 9:49 AM
CAN YOU TELL HOW TO SAVE THE TABLE DATA IN DATABASE. (i.e) how to get user inputs in angular 7