

Introduction
n my previous article, I shared the basics of Amazon Web Services (AWS) and guided through the process of registering to AWS free tier. While working on how to deploy web applications to AWS, the first question comes to my mind is, “Wait, am I going to get billed for this"? The answer is No, if I stick to the "Free Tier" offerings. So don’t worry about the billing if you've chosen the free tier plan of AWS.
Getting ready
You will need the following to complete this tutorial:
- Introduction to AWS
- Subscription of AWS.
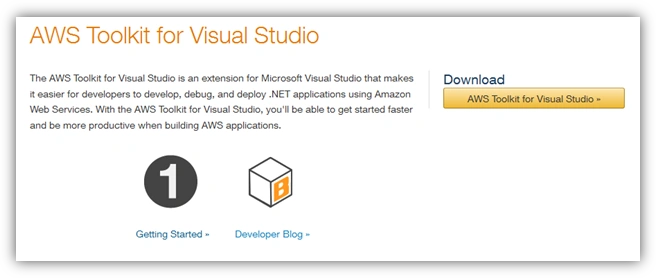
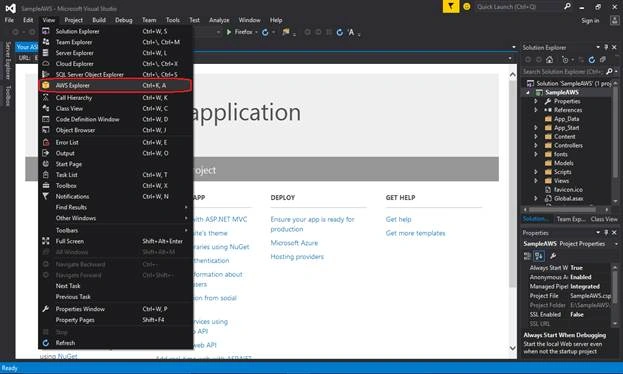
- AWS Toolkit for Visual Studio – I will explain how to get and set this later in this tutorial.
- Visual Studio – I will be using 2015. You can use any later versions as well.
Install AWS Toolkit for Visual Studio
Creating a Project in Visual Studio
Create a new MVC project.
Click on New Project > Web > ASP.NET Web Application.
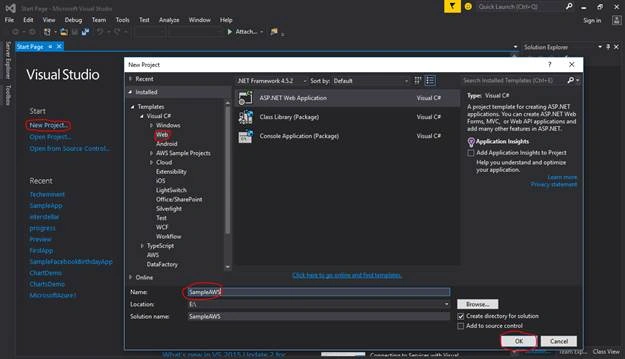 Rename the application and click on OK.
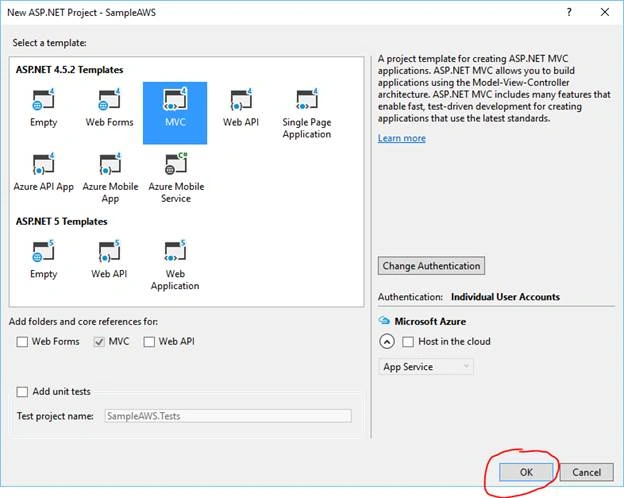
On the next screen you have the choice to choose the web application type. I am choosing MVC with No Authentication.
Rename the application and click on OK.
On the next screen you have the choice to choose the web application type. I am choosing MVC with No Authentication.
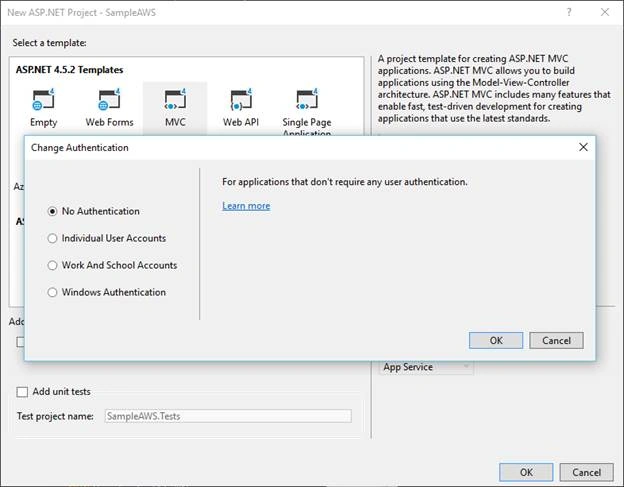 Choose your web application type and click on OK.
 The application is ready now.
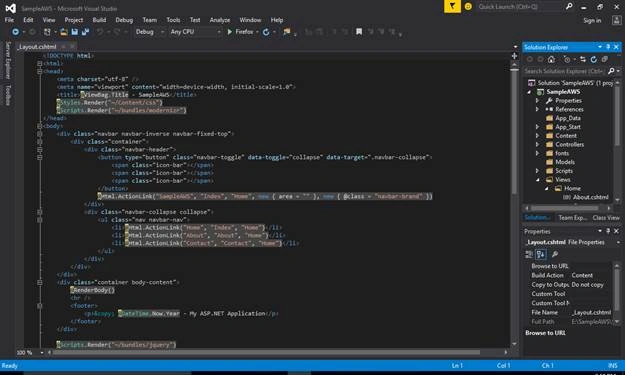 Do some editing if you want. I am a lazy guy so I am just leaving the application as it is and moving ahead to deployment part of the the application.
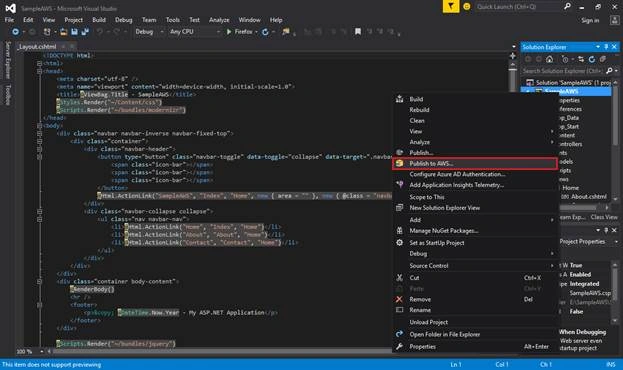
So, right-click on the project and click on Publish to AWS.
Do some editing if you want. I am a lazy guy so I am just leaving the application as it is and moving ahead to deployment part of the the application.
So, right-click on the project and click on Publish to AWS.
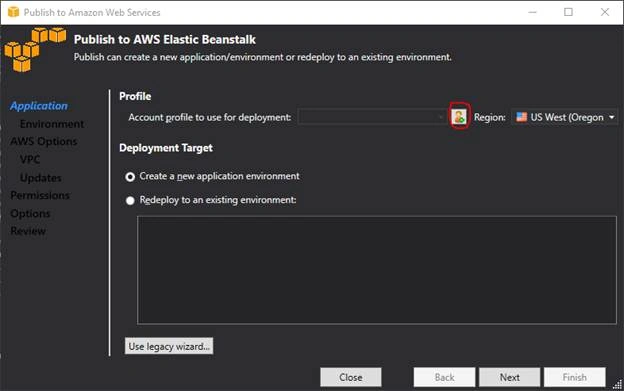
 On next screen is for publishing to AWS Elastic Beanstalk.
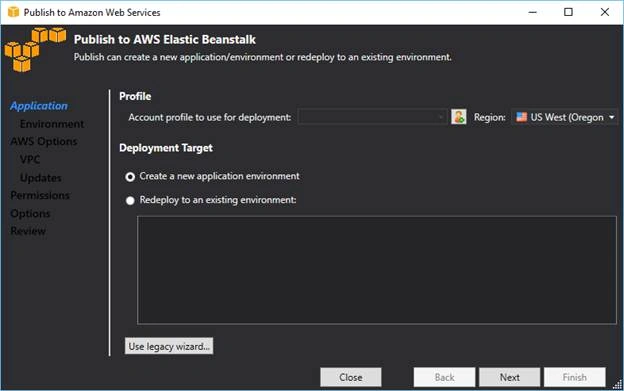 Currently there is no account profile so we have to create one first.
Creating Identity in AWS
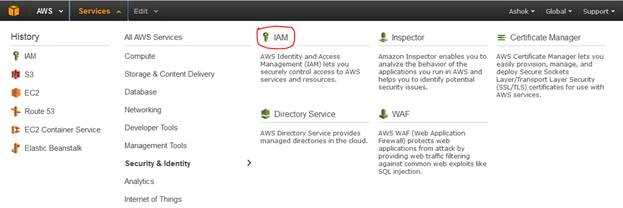
For that first, go to AWS dashboard and under Security & Identity category click on IAM,
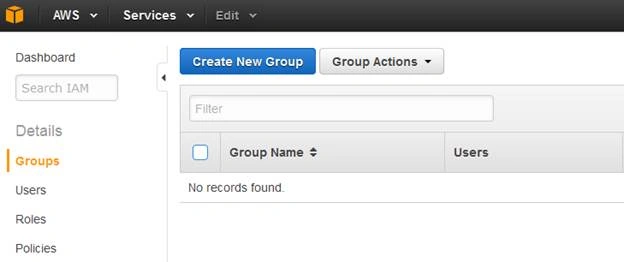
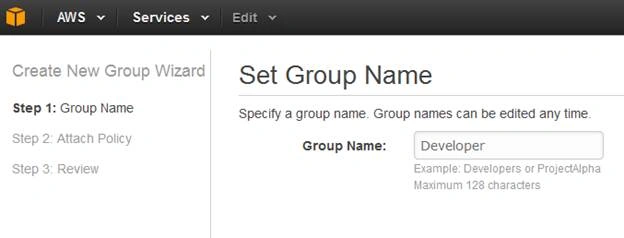
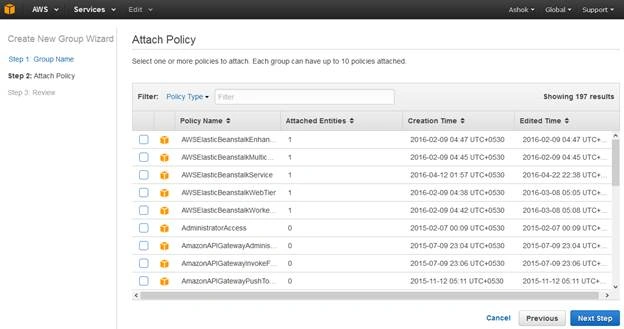
Don’t attach any policy to the group just click on Next Step.
 And create a group.
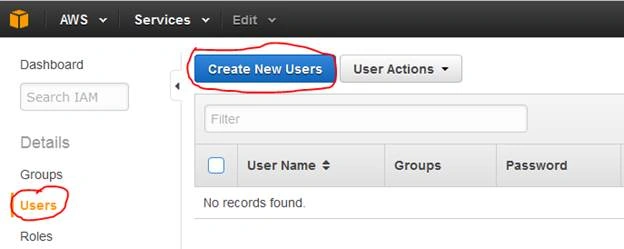
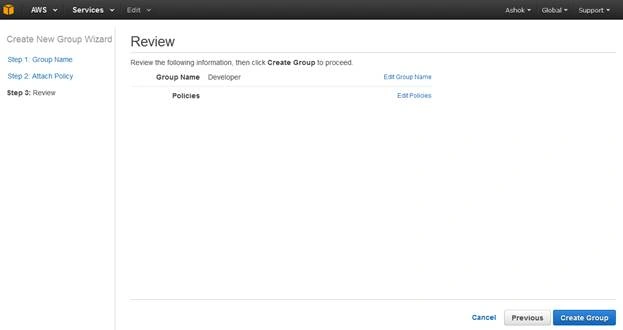 Ok now you have a group. Click on the group you just created. It will show that there are no users in the group. So we will be required to create a user. Click on Users, which is on the left-hand side menu. Then click on Create new users. If you already have users in your company account, you may see list of availalbe users.
 You can add multiple users at a time but I am just creating one. So just enter the user name and click on Create.
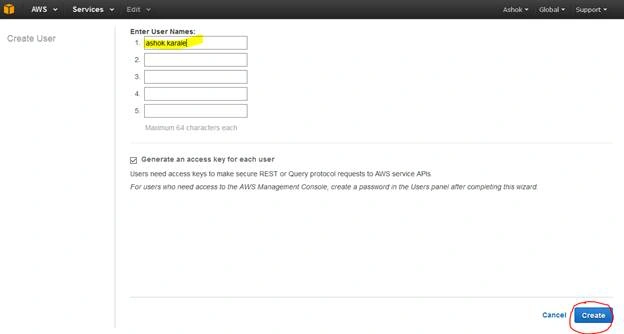 What this Create button does it, it creates an identity for the app, which is required when we publish/deploy this app to AWS.
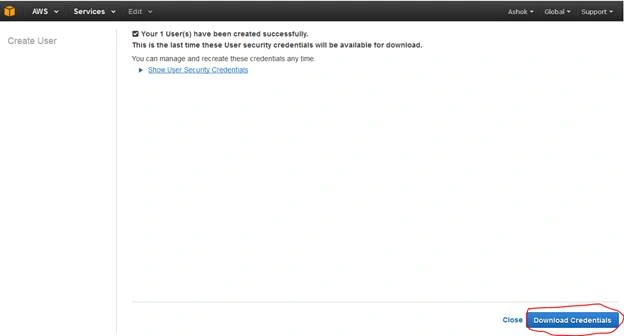
Download the credentials and save them at an accessible location.
See Download Credentials button below.

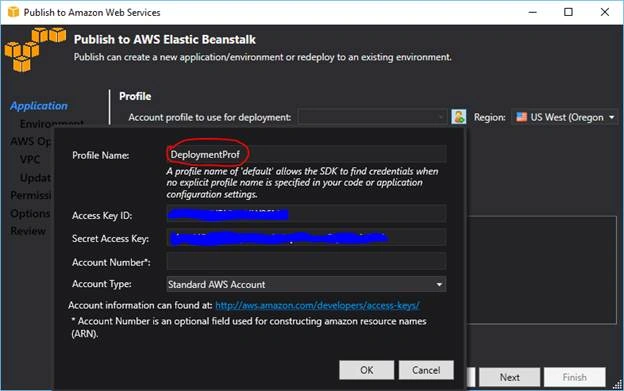
- Profile name – Give a app profile name. It can be anything.
- Access Key ID and Secret Access Key - Enter what we had just created in the previous step.
- Account number- optional.
- Account Type - Default is selected. You will see more if you've multiple account types.
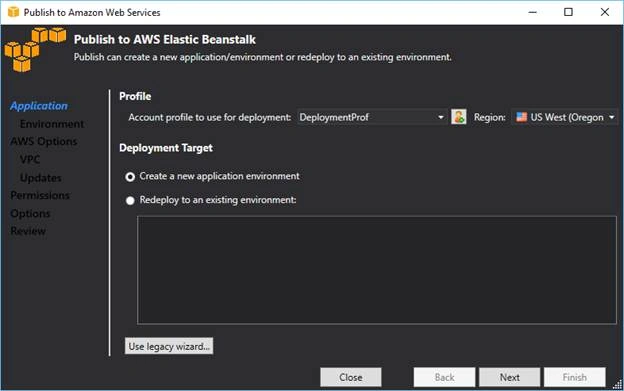
Now make sure the profile we have created is selected and Create a new application environment is selected. Click on next.
 On this screen, you have to select the environment or you can enter your own as per requirement. I am choosing a test as I am just testing this.
Now enter the URL. URL will be extended by AWS default URL .elasticbeanstalk.com. Your final public URL will be - YOURURL.elasticbeanstalk.com. This is similar to what we get for an Azure application.
You will notice that whatever unique URL you are entering, it will show an error, “Error during URL validation; check URL and try again”. It’s strange. I have spent so much time on this part and finally got the solution. I have intentionally let this error come to make you understand why this is happening.
On this screen, you have to select the environment or you can enter your own as per requirement. I am choosing a test as I am just testing this.
Now enter the URL. URL will be extended by AWS default URL .elasticbeanstalk.com. Your final public URL will be - YOURURL.elasticbeanstalk.com. This is similar to what we get for an Azure application.
You will notice that whatever unique URL you are entering, it will show an error, “Error during URL validation; check URL and try again”. It’s strange. I have spent so much time on this part and finally got the solution. I have intentionally let this error come to make you understand why this is happening.
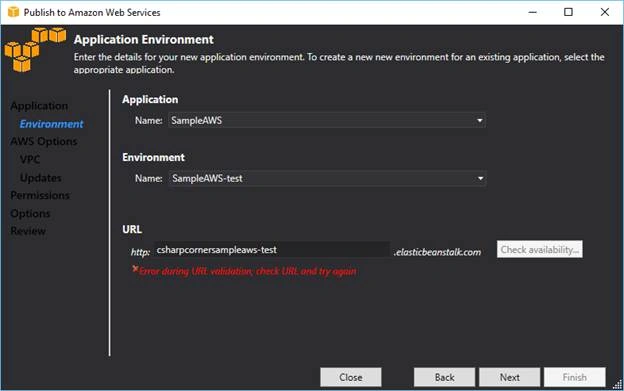 We are getting this error because of the missing settings while we created a new user on the AWS dashboard. So let’s fix it.
Go to the AWS dashboard – IAM – Users and click on the user you have created earlier.
We are getting this error because of the missing settings while we created a new user on the AWS dashboard. So let’s fix it.
Go to the AWS dashboard – IAM – Users and click on the user you have created earlier.
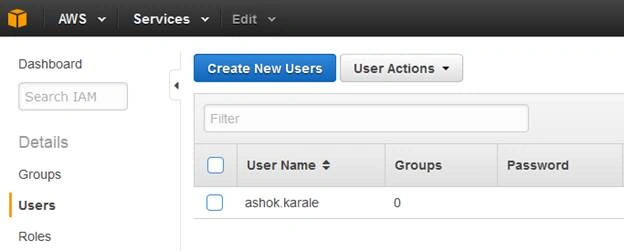 We are getting the error because we have created a user but didn’t assign any permissions or policies which are required for every user we will create. So keep that in mind!
Once you clicked on the user you have created it will take you to the user page like below.
We are getting the error because we have created a user but didn’t assign any permissions or policies which are required for every user we will create. So keep that in mind!
Once you clicked on the user you have created it will take you to the user page like below.
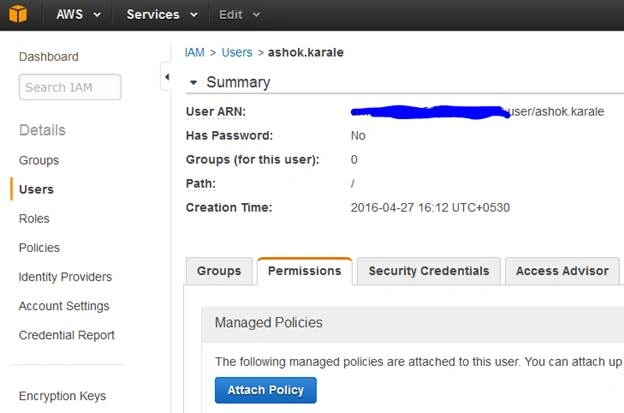 Click on Attach Policy.
We have to give full access to the user to AmazonEC2FullAccess & AWSElasticBeanstalkFullAccess.
Click on Attach Policy.
We have to give full access to the user to AmazonEC2FullAccess & AWSElasticBeanstalkFullAccess.
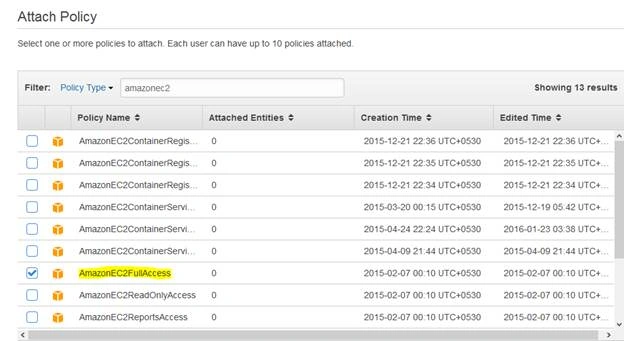
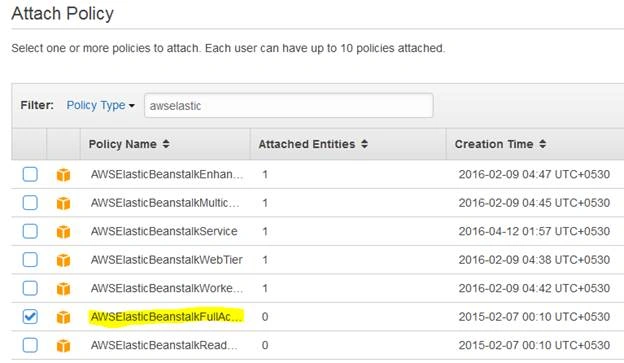 Once you select both the policies, click on Attach Policy.
 Finally, we have access to policies we need for the user.
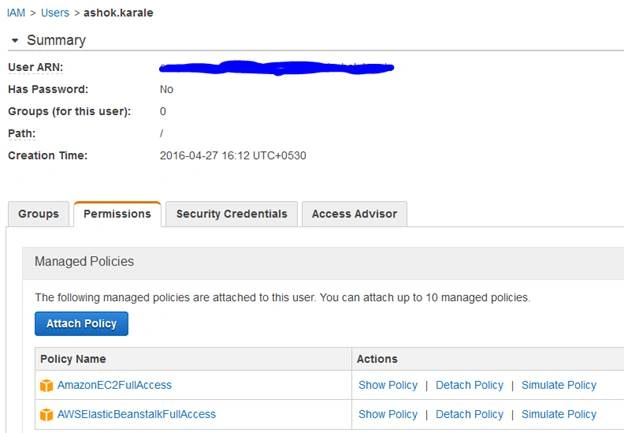 We are done with the AWS dashboard.
Now go back to Visual Studio screen where we had left and click on Back and Next buttons again.
You will notice URL is valid now.
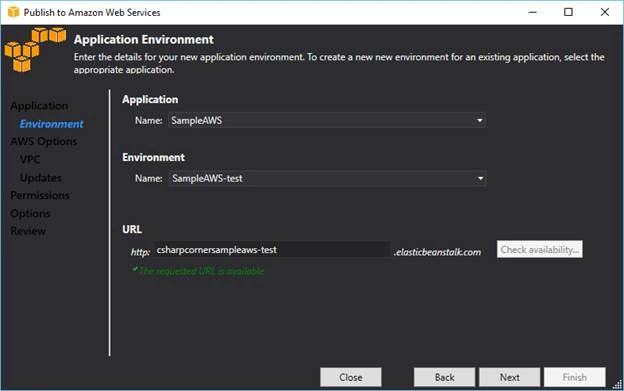 Just click on Next now.
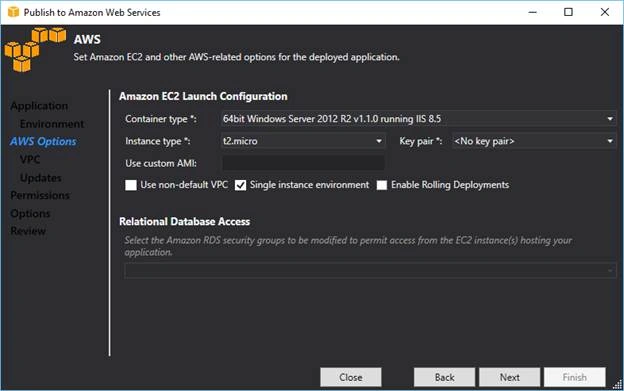 On this screen we are not doing anything for now. Just click Next.
On the next screen also we are not going to do anything as of now. Just click Next.
On this screen we are not doing anything for now. Just click Next.
On the next screen also we are not going to do anything as of now. Just click Next.
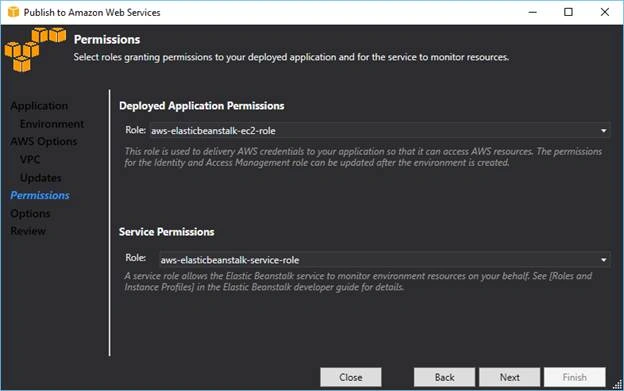 Again Click on Next.
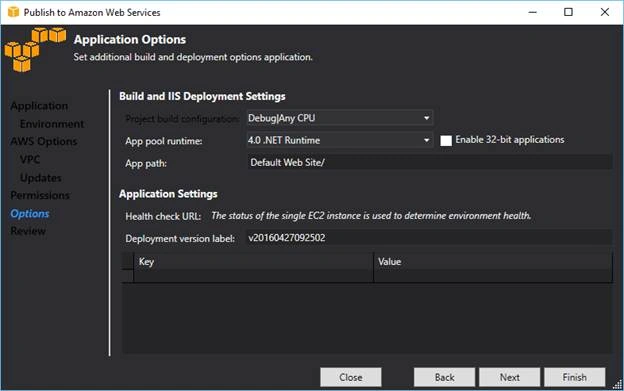 Click on Finish and on the next screen just click Deploy.
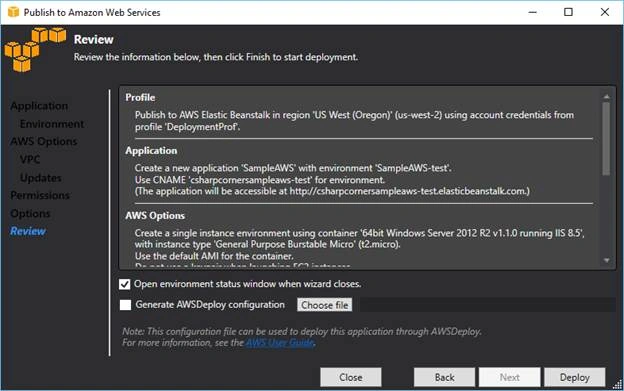 You are done. Now next everything will be done by AWS.
It will take time to finish the deployment. Every event will be shown to you like below.
You are done. Now next everything will be done by AWS.
It will take time to finish the deployment. Every event will be shown to you like below.
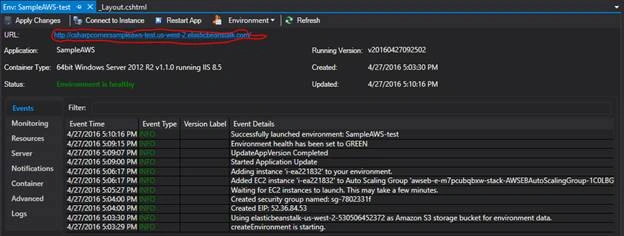
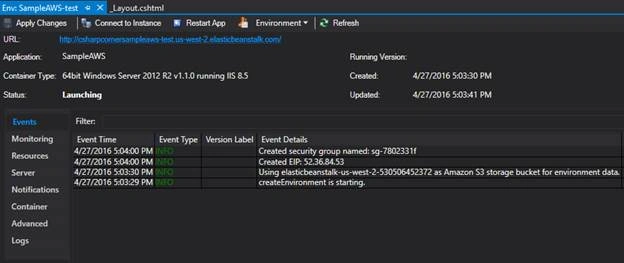 When AWS complete its work, it will show all event with its status and show below results with a link to our application.
Test the application
Go to the URL we had entered at the time of deployment.
It’s working!!
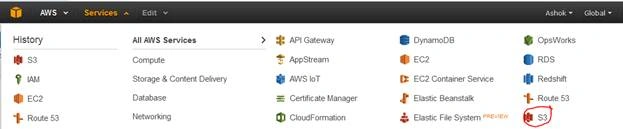
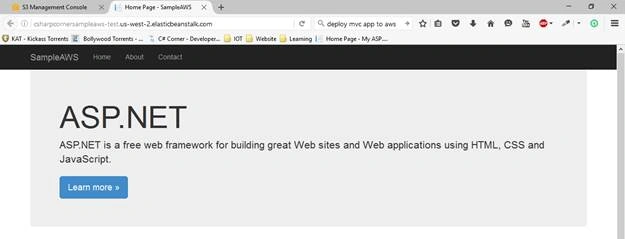 So finally, we have deployed an ASP.NET application to AWS. You can find your files uploaded on AWS on AWS dashboard – S3.
That is the URL you can type or copy in your browser to access the application we had just deployed.
Test the application
Go to the URL we had entered at the time of deployment.
Click on S3 below and you will see your application files there.

Read more articles on Visual Studio:
Brian CampassiPosted Jun 11, 2021, 4:44 PM
Thank you ! At the step "Now go back to the Visual Studio on Publish to AWS Elastic Beanstalk wizard and click on Add another account profile." after we created our user and obtained a key and secret, and you have us go back to VS. I have no choice for "Add another account profile". Is there a step where I need to connect my AWS account to VS?
Rikam PalkarPosted May 11, 2020, 11:24 PM
interesting.
Harshi PandeyPosted May 1, 2019, 10:06 AM
I already have an instance in my AWS account. Can i deploy a web api in that existing instance through aws toolkit?
Tarique SultanPosted Apr 16, 2018, 1:13 AM
Goo article and very helpful for free users
Deepak EPosted Mar 23, 2018, 7:50 AM
Nice one,Thanks for sharing
rajan aroraPosted Jan 17, 2018, 2:05 AM
Hi Ashok, I am able to do, as you suggested, but getting error 403 on browsing, after then i checked logs and found, it is due to below reason, could you please suggest Caught AmazonIdentityManagementServiceException whilst setting up role: User: arn:aws:iam::999988695347:user/Rajan is not authorized to perform: iam:GetInstanceProfile on resource: instance profile aws-elasticbeanstalk-ec2-roleCaught Exception whilst setting up service role: User: arn:aws:iam::999988695347:user/Rajan is not authorized to perform: iam:PutRolePolicy on resource: role aws-elasticbeanstalk-service-role....creating environment 'AWSMVCApp-test' with application version 'v20180117052822'
SubashPosted Oct 7, 2016, 1:51 AM
Good one
Ravi KandelPosted Jul 14, 2016, 11:43 AM
Nice share
Prasanna MuraliPosted May 20, 2016, 9:09 PM
Nice one...
Kuppurasu NagarajPosted Apr 30, 2016, 2:39 PM
Nice Sharing..
Pankaj Kumar ChoudharyPosted Apr 28, 2016, 8:10 PM
Great Information Sir,,,,,,,,,,,,
Vivek KumarPosted Apr 28, 2016, 2:38 PM
Good one
RakeshPosted Apr 28, 2016, 1:53 PM
Good info
Mohammed IbrahimPosted Apr 28, 2016, 12:09 PM
nice