

Introduction
In this article, we're going to take a look at Web Jobs and help you understand what they are, how they work, and how they can benefit you. We'll get started by taking a look at exactly what a Web Job is. We're going to take a look at utilizing the WebJobs SDK to both simplify the code that we write and extend the reach of our Web Jobs code. Then we'll see what the WebJobs SDK provides in terms of bindings to services, things like Azure Queues, Service Bus, Table and Blob Storage, the other messaging or data-related services. It's going to simplify the job we have of coding and configuring our Web Jobs so that we don't write a lot of the boilerplate code to connect to and access these resources.
Road Map
- What is an Azure WebJob
- Azure WebJob vs Azure Functions
- Installing WebJob SDK in Visual Studio
- Creating a WebJob using Azure WebJob SDK
- Configuring a Queue in Azure Storage to send message
- Create a new storage account
- Create a queue and send messages
- Running the WebJob
- Sending a message to trigger the Job
- Working with Bindings and Triggers
- Use Cases
What is an Azure WebJob?
In their simplest form, Azure Web Jobs allows you to write background code that executes in the context of your web application or website. That means they're not dependent on user interaction, but they are able to access the file system and other things that are available on your website. There's lots of work that needs to happen behind the scenes when a user is not interacting with the site. And that's where Web Jobs come in. A Web Job could run in the background of your application, and it can then access things like your database, the files, either temporary files, log files, or source files, for your application, and because it's running in there, you can also have access to the various pieces of your application back end.
Azure WebJob vs Azure Functions
Azure Functions is a service that you can use to run code in Azure without provisioning any servers or other infrastructure. Because a Function can run on a schedule or continuously, you can use them instead of WebJobs to execute background tasks. You can think of Azure Functions as the logical successor to WebJobs for most workloads. In fact, Azure Functions is built on the WebJobs SDK.
For most automated tasks, build Functions because they are more flexible than WebJobs. For example, you can develop and test Functions entirely in the browser, and Functions can automatically scale in response to demand.
However, code deployed as a WebJob can be developed and maintained alongside the code for the website it is associated with. A website with its WebJobs can be easily packaged, deployed, and managed together, as a single solution. By contrast, Azure Functions are separate from the App Service and must be managed separately.
Installing Azure WebJobs SDK
Write the following command in the NuGet package manager console in your Visual Studio,
Install-Package Microsoft.Azure.WebJobs –Version 2.2.0

Creating a WebJob project
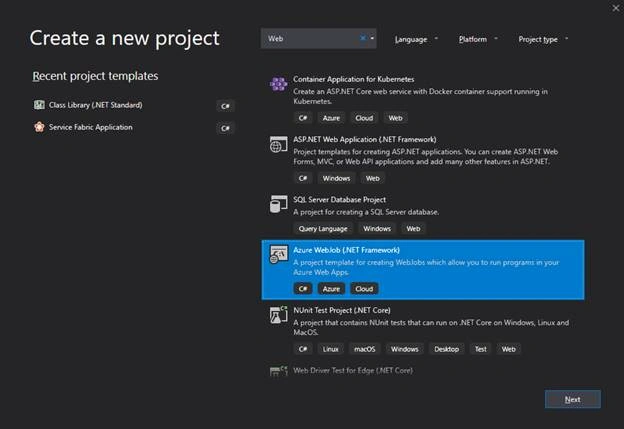
Now create a webjob project from Visual Studio as shown. Assume that we are writing a job just to print a message it gets.
- Create a new project and choose Azure WebJob
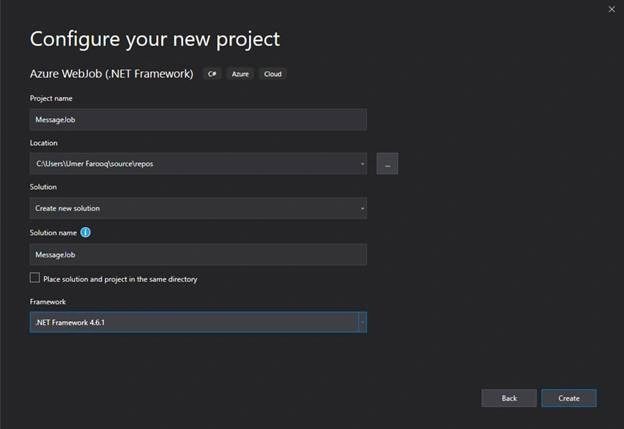
- Choose a name for it and press Create
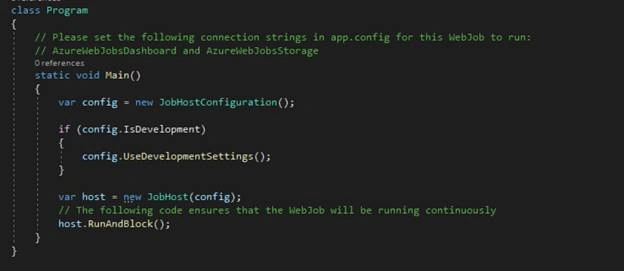
If we look at the Program.cs file we will see a static void Main, and we have this config and the JobHost. These are all part of the WebJobs SDK. That JobHost is going to be responsible for running and blocking inside my console application, and then it's going to be hosting other functions.
The Code below is automatically generated by the project, you don’t have to write it.
So if we go look at our functions.cs here, notice that we have a specific signature on this method, static void method, and then the parameters, but there's this attribute called QueueTrigger on the message.
The Code below is automatically generated by the project, you don’t have to write it.
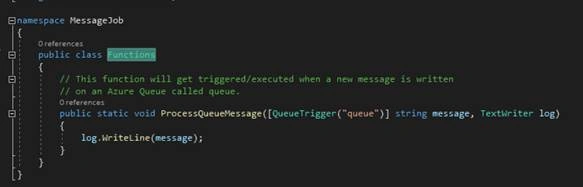
Again, this is part of that WebJobs SDK, and what that says is, go look at a queue, in this case, called queue, and when messages arrive, pull them off, pull the string out, and invoke this method, passing in the message. Now let’s create a messaging queue in the Azure portal to send messages. But first, we will have to create a storage account.
Configuring a Queue in Azure Storage to send message
For this, we will have to create a storage account in the Azure portal.
- Login to portal.azure.com
- In the dashboard click Create a resource
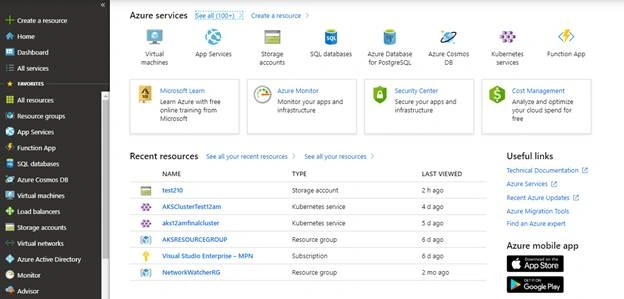
- Scroll down the list and click on Storage
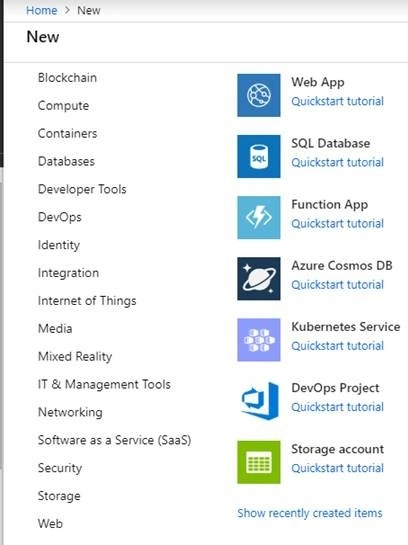
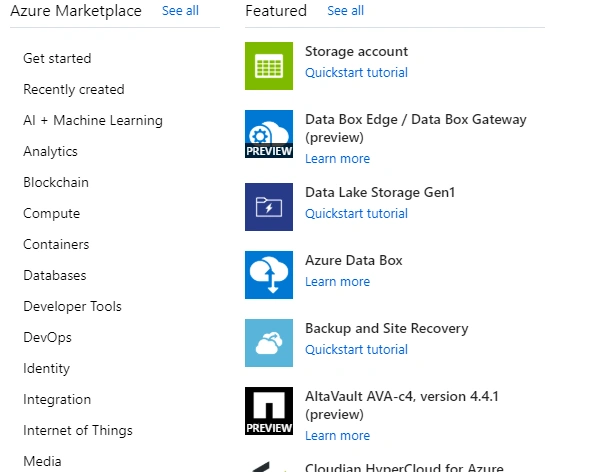
- Click on Storage Account
- Fill in the details,
- Choose subscription
- Select the resource group or create a new resource
- Choose the name for storage. It must be unique
- Choose the desired region
- Leave the other options as default and click Review+Create
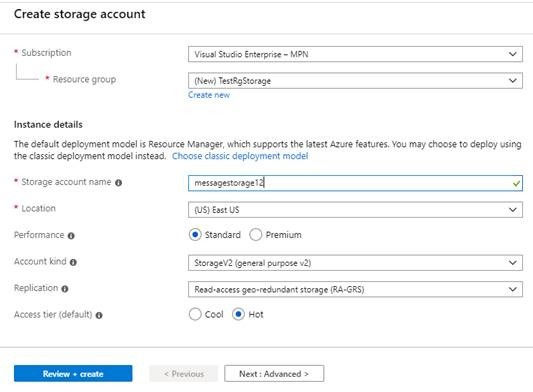
- After the validation is passed click Create
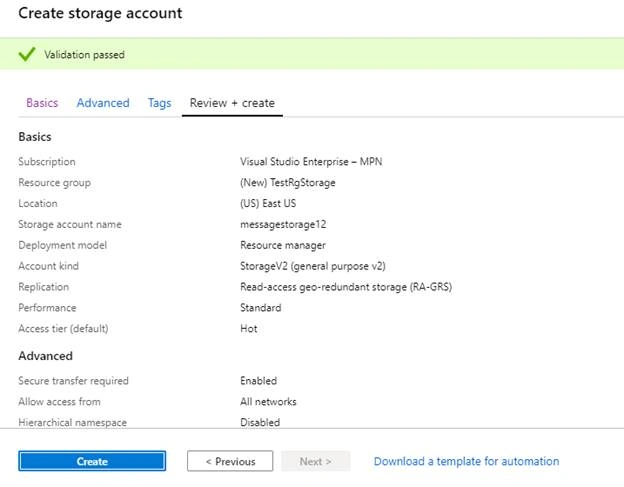
- It will take some time and the resource will be deployed successfully.
- After the resource is created, go to the resource and click on Queues
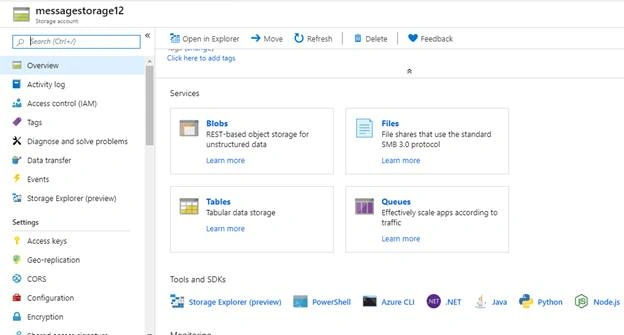
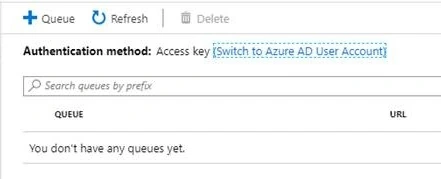
- Add a new Queue
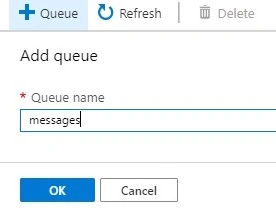
- Add a name and press OK
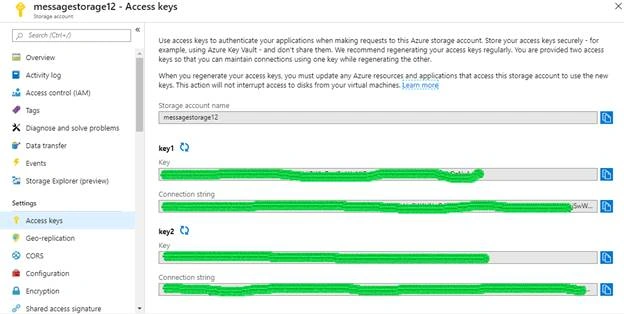
- Click on Access Keys and copy the connection string
Running the WebJob
Now go back to the WebJob project and make some changes.
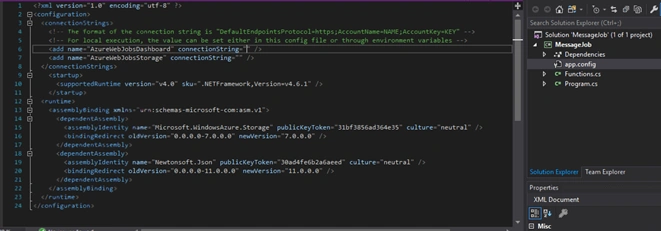
- Go to the app. config file in the project directory and paste the connection string in the following,
- AzureWebJobsDashboard
- AzureWebJobsStorage
- The Code below is automatically generated by the project, you don’t have to write it.
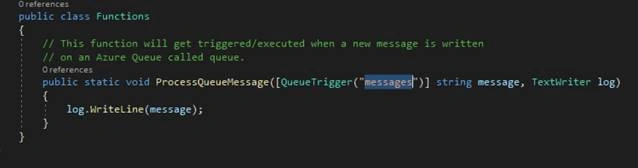
- Change the name of the queue in the cs file with the name of your queue.
- public static void ProcessQueueMessage([QueueTrigger(“messages”)] string message, TextWriter log)
- Run the app, you will see the following console

Sending Messages to trigger the WebJob
- Now go to the portal, and navigate to the queues.
- Click on Add Message
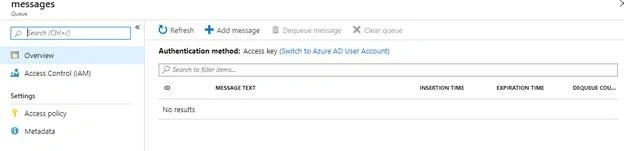
- Type anything a click OK
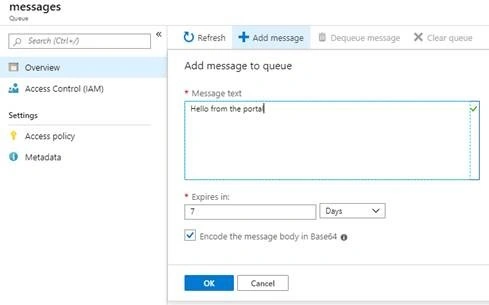
- Now go back to the console and you will see the new Message there.

And that’s how you can use WebJob SDK to receive upcoming messages from the storage queue. Similarly instead of displaying a simple message you can do a heavy background task based on any trigger.
Working with Bindings and Triggers
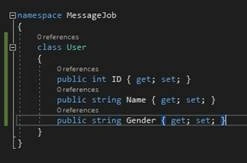
We've seen a basic example of just reading a string of the queue and writing it out to the console, but let's take this a step further. I've created a User class here in my WebJobs project that just has a Name, an ID, and a Gender. And what I want to be able to do is get that particular user off the queue.
- Create a new User class as follows
class User
{
    public int ID { get; set; }
    public string Name { get; set; }
    public string Gender { get; set; }
}
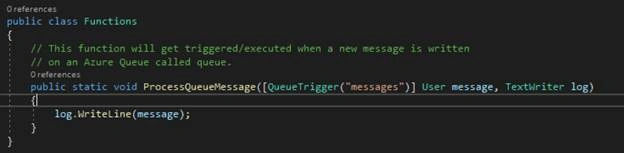
- So if we go back to our Function, we're going to change this from a string message to a User message. And that's going to cause the WebJobs SDK to try to deserialize some JSON that we're going to put on the queue into this class.
- Change the message from string to User
- The Code below is automatically generated by the project, you don’t have to write it.
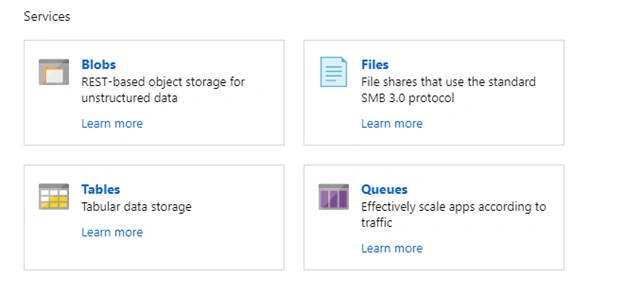
- Create a Blob in the same way as a queue in the Azure portal.
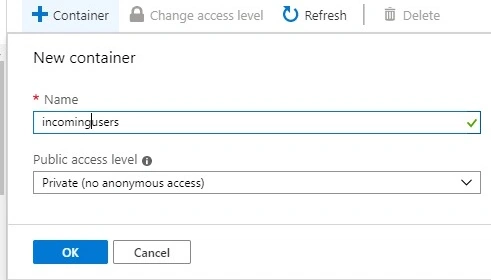
- Now I'm going to add another thing here as an output, and I'm going to put a Blob output on this. Now for the blob, we have a variety of different types we can actually use here for the parameter, like any azure storage. This is a binding, a queue is a trigger, which means it will initiate this. This is a binding, meaning that we're going to just have some parameter here, and this binding is going to take care of connecting that up to the resource.
- Now go to the functions. cs and change the ProcessQueueMessage method as follows,
public static void ProcessQueueuMessage([QueueTrigger("messages")] User message, [Blob("incomingusers/userlog.txt", FileAccess.Write)] TextWriter bidWriter, TextWriter log)
{
    bidWriter.WriteLine($"New User added {message.ID} with Name of {message.Name} Having gender {message.Gender}");
    log.WriteLine(message);
}
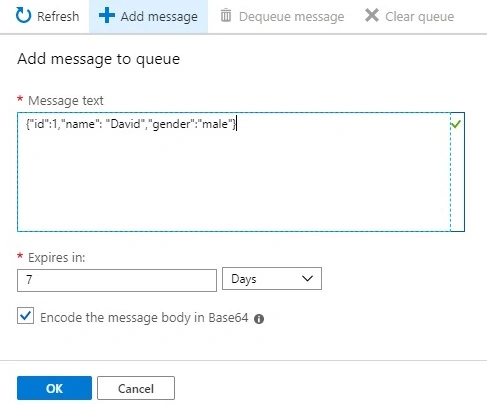
- And now that we have that, if we go back to our portal, remember, we can go to our queue, view that, and create a new message.
- Create a new message as a JSON user object and click OK.
{
  "id": 1,
  "name": "David",
  "gender": "Male"
}
- Now if we go look at our container over here and view the container, you can see there's my userlog.txt.
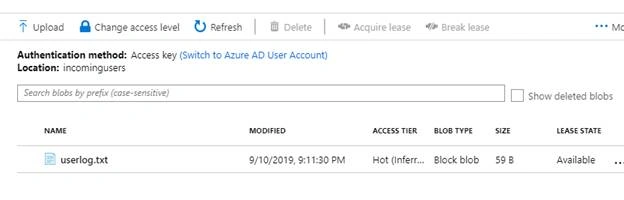
- If I click that, download it, and open it, you will see the data we stored in this.


- If we continue to send messages, then we'd write those to that log file. So it's a very powerful model with these triggers and bindings that allows us to write less code, to take advantage of event-based processing.
Similarly, instead of Blob storage, we can use tables to store our data.
Use Cases
- For running background tasks based on some triggers
- Can be used with websites unlike Azure Functions
- Can be used to write data to DB based on an event
- Can also be used to run continuously in the background
ashish fPosted Oct 6, 2020, 10:46 AM
This is very useful. my question is how to send a message from my Program.cs to queue. so architecture is like. I want to perform some calculation in Program.cs by calling websocket api continuously if condition true then send a message into queue so that Function.cs code trigger automatically and do separate operation in another thread . please guide thanks .
Shivanand KoliPosted Feb 29, 2020, 3:50 AM
Thanks Usman. Awesome work.
Rushi MehtaPosted Jan 6, 2020, 12:15 AM
Useful Article