

Introduction
In this article, we'll learn how to upload multiple files using Angular 5 and ASP.NET Core 2.1. The purpose of the article is to demonstrate multiple file upload with progress bar without using any Angular third-party plug-in.
Prerequisite :
The source code is available on GitHub here.
In Angular 5, Http Client module has been introduced and Http module deprecated. The Http Client module has introduced a few nice features which help in achieving the goal of this article.
Http Client Module API
- import { HttpClientModule } from '@angular/common/http';
Http Client Features
- Progress Events for both Request upload and Response Download
- JSON parsing by default , no need to explicitly json parsing.
- Immutable Request/Response objects.
- Performance Improvements
A glimpse of Angular Http Events. You have to subscribe HTTP client request for events after that you will get all the events notification like HttpEventType enum below
HttpProgressEvent Interface
Progess event type is either upload or download,
- /**
- * Base interface for progress events.
- *
- * @stable
- */
- export interface HttpProgressEvent {
- /**
- * Progress event type is either upload or download.
- */
- type: HttpEventType.DownloadProgress | HttpEventType.UploadProgress;
- /**
- * Number of bytes uploaded or downloaded.
- */
- loaded: number;
- /**
- * Total number of bytes to upload or download. Depending on the request or
- * response, this may not be computable and thus may not be present.
- */
- total?: number;
- }
HttpEventType enum
Type enumeration for the different kinds of `HttpEvent`
- /**
- * Type enumeration for the different kinds of `HttpEvent`.
- *
- * @stable
- */
- export declare enum HttpEventType {
- /**
- * The request was sent out over the wire.
- */
- Sent = 0,
- /**
- * An upload progress event was received.
- */
- UploadProgress = 1,
- /**
- * The response status code and headers were received.
- */
- ResponseHeader = 2,
- /**
- * A download progress event was received.
- */
- DownloadProgress = 3,
- /**
- * The full response including the body was received.
- */
- Response = 4,
- /**
- * A custom event from an interceptor or a backend.
- */
- User = 5,
- }
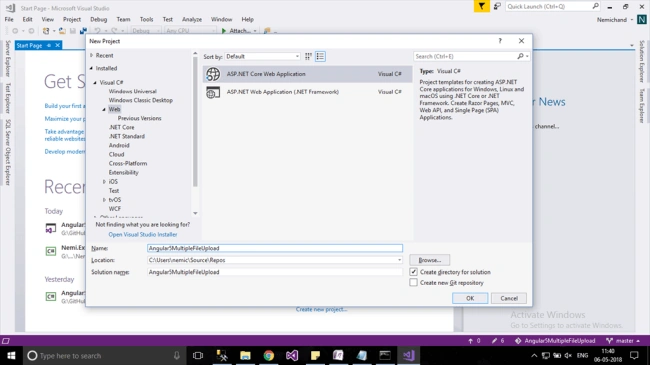
Let's get started the things in action. Let’s open the visual studio and create the new ASP.NET Core Web Application project. See the below screen
After that first, you have to select .NET Core version from top of the dropdown list so I have selected 2.1 version then choose the angular template which we want to create. See the below screen
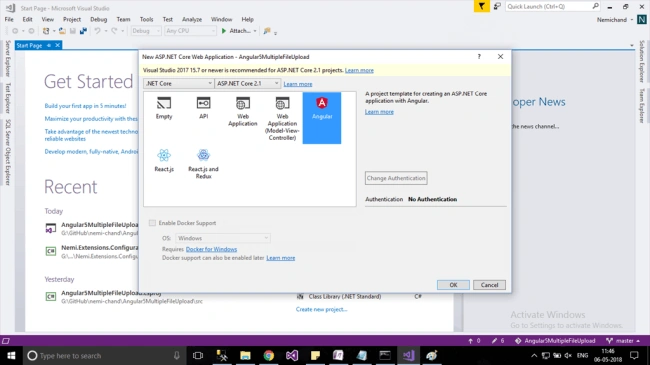
We have created angular template project successfully. The latest version of visual studio automatically creates the Angular 5 template so need to explicit update or install. Build the project so that it will download all node modules.
Let's open the command prompt and browse the clientApp folder in CMD
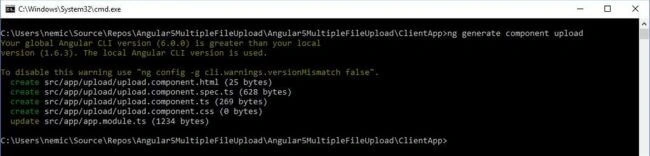
Create new Component using Angular cli. You have to start command with ng for all angular CLI commands
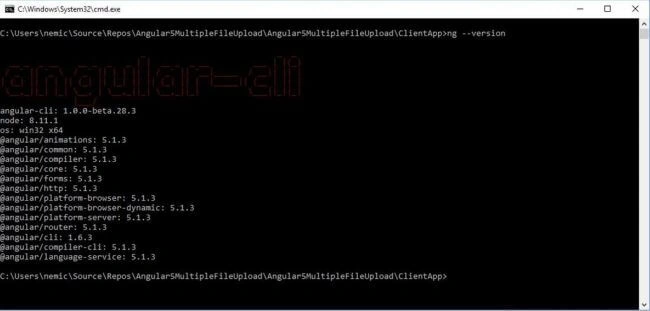
To check the versions,
Command
ng --version
Command
ng generate component upload
Upload Component code
- import { Component } from '@angular/core';
- import { HttpClient, HttpRequest, HttpEventType, HttpResponse } from '@angular/common/http'
- import { Uploader } from '../entities/uploader';
- import { UploadQueue } from '../entities/uploadqueue';
- @Component({
- selector: 'app-upload',
- templateUrl: './upload.component.html'
- })
- export class UploadComponent {
- //getter : get overall progress
- get progress(): number {
- let psum = 0;
- for (let entry of this.uploader.queue) {
- psum += entry.progress;
- }
- if (psum == 0)
- return 0;
- return Math.round(psum / this.uploader.queue.length);
- };
- public message: string;
- public uploader: Uploader = new Uploader();
- constructor(private http: HttpClient) {
- this.message = '';
- }
- onFilesChange(fileList: Array<File>) {
- for (let file of fileList) {
- this.uploader.queue.push(new UploadQueue(file));
- };
- }
- onFileInvalids(fileList: Array<File>) {
- //TODO handle invalid files here
- }
- onSelectChange(event: EventTarget) {
- let eventObj: MSInputMethodContext = <MSInputMethodContext>event;
- let target: HTMLInputElement = <HTMLInputElement>eventObj.target;
- let files: FileList = target.files;
- let file = files[0];
- if (file) {
- this.uploader.queue.push(new UploadQueue(file));
- //console.log(file);
- console.log('Total Count:' + this.uploader.queue.length);
- }
- }
- // upload
- upload(id) {
- if (id == null)
- return;
- let selectedFile = this.uploader.queue.find(s => s.id == id);
- if (selectedFile) {
- const formData = new FormData();
- formData.append(selectedFile.file.name, selectedFile.file);
- const uploadReq = new HttpRequest('POST', `api/upload`, formData, {
- reportProgress: true,
- });
- this.http.request(uploadReq).subscribe(event => {
- if (event.type === HttpEventType.UploadProgress) {
- selectedFile.progress = Math.round(100 * event.loaded / event.total);
- }
- else if (event.type === HttpEventType.Response)
- selectedFile.message = event.body.toString();
- });
- }
- }
- //upload all selected files to server
- uploadAll() {
- //find the remaning files to upload
- let remainingFiles = this.uploader.queue.filter(s => !s.isSuccess);
- for (let item of remainingFiles) {
- this.upload(item.id);
- }
- }
- // cancel all
- cancelAll() {
- //TODO
- }
- }
Now, I'm going to create some entities/poco classes just to make the separation of things
- Uploader - contains the queue of uploadqueue
- Uploadqueue - contains the property of uploading queue like a file, progress, issue, success etc.
- Guid - to generate random guid string
Command
ng generate class uploadqueue

- import { Guid } from '../entities/guid';
- /**
- * Represents an UploadQueue
- */
- export class UploadQueue {
- id: string;
- file: File;
- progress: number;
- message: string;
- isCancel: boolean;
- isError: boolean;
- get isSuccess(): boolean {
- if (this.progress == 100)
- return true;
- return false;
- };
- constructor(file: File) {
- this.file = file;
- this.progress = 0;
- this.id = Guid.newGuid();
- this.message = '';
- this.isCancel = false;
- this.isError = false;
- }
- }
Similar other classes like uploader and guid, you will find in entities folder.
Now, I'm going to create an Angular directive for drag and drop support so that you can directly drop the files and also you can allow/restrict the file name extensions.
Commands: ng generate a directive upload.

Now we have to add the upload link to route root and nav bar so that we can browse the uplaod template and see the things in action
Add root in App module,
- { path: 'upload', component: UploadComponent }
Create the new controller called 'upload' controller
- using System;
- using System.Collections.Generic;
- using System.IO;
- using System.Linq;
- using System.Net.Http.Headers;
- using System.Threading.Tasks;
- using Microsoft.AspNetCore.Hosting;
- using Microsoft.AspNetCore.Mvc;
- namespace Angular5MultipleFileUpload.Controllers
- {
- [Produces("application/json")]
- [Route("api/[controller]")]
- public class UploadController : Controller
- {
- private IHostingEnvironment _hostingEnvironment;
- public UploadController(IHostingEnvironment hostingEnvironment)
- {
- _hostingEnvironment = hostingEnvironment;
- }
- [HttpPost]
- public IActionResult Index()
- {
- try
- {
- var file = Request.Form.Files[0];
- string folderName = "Upload";
- string webRootPath = _hostingEnvironment.WebRootPath;
- string newPath = Path.Combine(webRootPath, folderName);
- if (!Directory.Exists(newPath))
- {
- Directory.CreateDirectory(newPath);
- }
- if (file.Length > 0)
- {
- string fileName = ContentDispositionHeaderValue.Parse(file.ContentDisposition).FileName.Trim('"');
- string fullPath = Path.Combine(newPath, fileName);
- using (var stream = new FileStream(fullPath, FileMode.Create))
- {
- file.CopyTo(stream);
- }
- }
- return Json("Upload Successful.");
- }
- catch (Exception ex)
- {
- return Json("Upload Failed: " + ex.Message);
- }
- }
- }
- }
Demo Screens
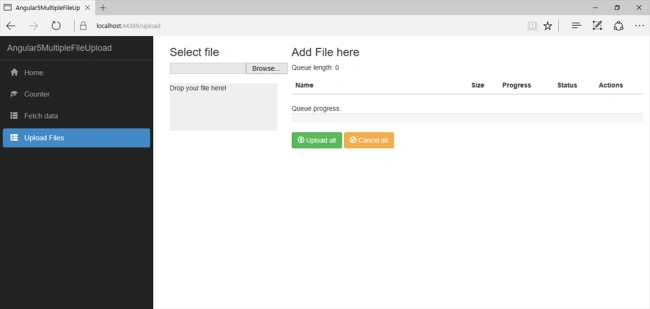
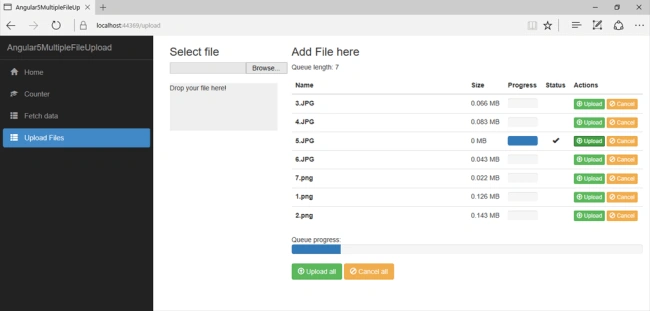
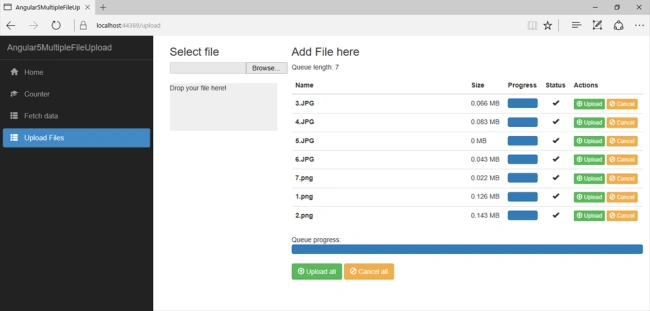
Summary
In this article, we have learned how to create multiple upload files using angular 5 and asp.net core 2.1
We have learned below Angular CLI commands
- Generate : this command is used to create the new components, routes, services, and pipes
- Class : to create a new class
- Directive : to create the new directive
- Component : to create the new component
References
- https://www.microsoft.com/net/download
- https://update.angular.io/
- https://angular.io/api/common/http
- https://angular.io/api/common/http/HttpEventType
- https://github.com/nemi-chand/Angular5MultipleFileUpload
Saravana kumarPosted May 22, 2019, 12:06 AM
Hi Nemi sir, how to preview selected image in table view and cancel button code . Please send me a code . I'm new in angular 6 . So please help me
smichaels66Posted Aug 8, 2018, 9:34 AM
Can't select multiple files. Only one at a time then the upload handles multiple files. How do I get to choose multiple files from file browse and then upload?
Muhammad YasseinPosted Jul 24, 2018, 10:30 PM
Hi Nemi, could you please discuss how to cancel uploading and remove files from the list
Prashant RewatkarPosted May 7, 2018, 9:59 AM
I got a message as "Unable to find "@angular/cli" in devDependencies." when I am trying to generate component.