

Overview
This tutorial shows how to configure the Mobile backend using Azure Mobile App Serice with the Xamarin.Forms app to store the data and we can connect the Azure mobile app using Visual Studio 2017 RC too. Follow the steps to create Azure mobile app.
- Active Azure Account
- Visual Studio RC 2017
- Xamarin Studio must be installed
Step 1
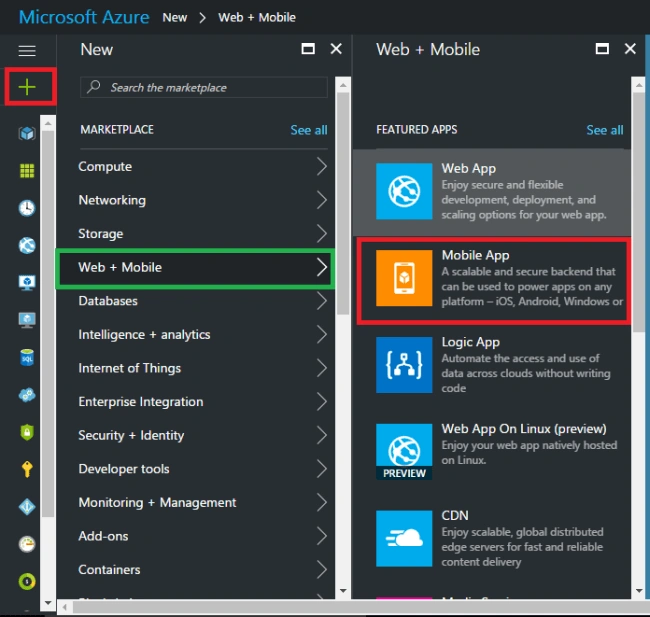
Log on to the Azure portal and create a new mobile app from Web+Mobile.
Note
You must have an active Azure account.
Step 2
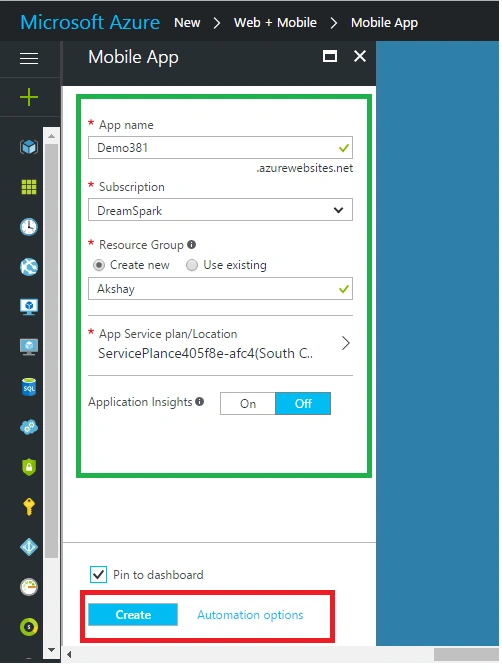
And then, it will ask for App name and Resource Group name, along with subscription for usage. Fill all the required fields and press "Create our App". I have named my app as Demo381.
Note
App name must be unique.
Step 3
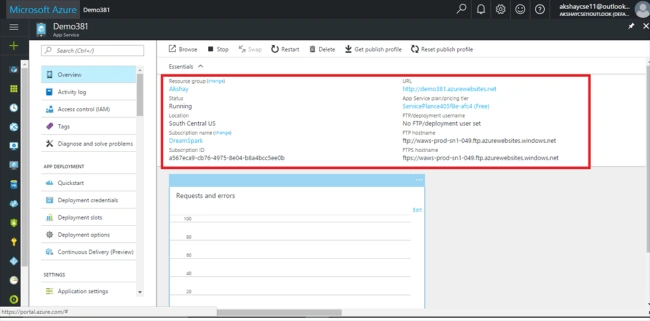
Once deployment has been successful, it will show the overview of Demo381 Mobile App. Here, we can create and manipulate our mobile app in this Azure App Service.
Step 4
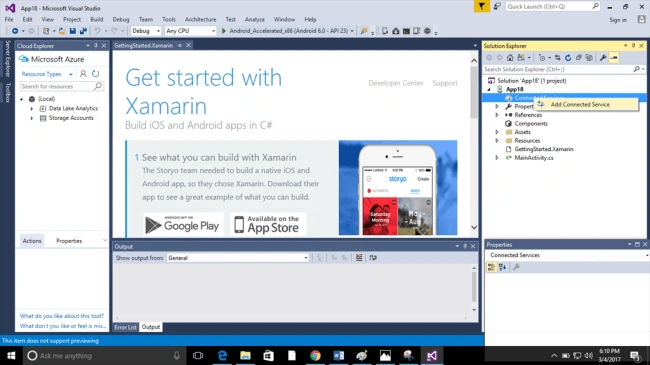
Then, go to Visual Studio and create a Xamarin.Forms application. Once the project is created successfully, open Solution Explorer and right click the "Connected Services" to add the required Mobile Service.
Note
You need to add active Azure account to Visual Studio.
Step 6
Select Mobile Azure Back-end Services as the Services to be added to our Project and then, select the services we have created in Azure Mobiles Service. It will automaticaly show the created Service and once we have added it, the required files willl be installed in our project to write our back-end code for accesing the data.
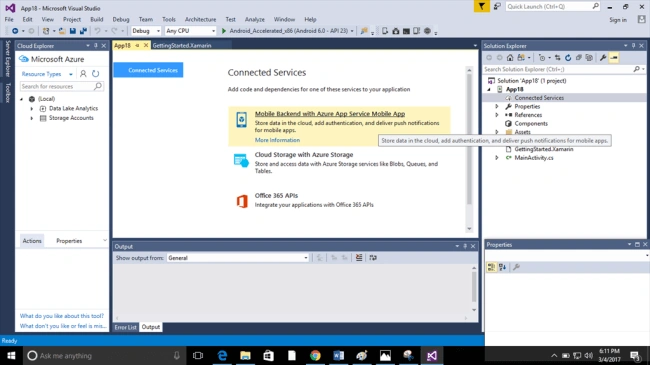
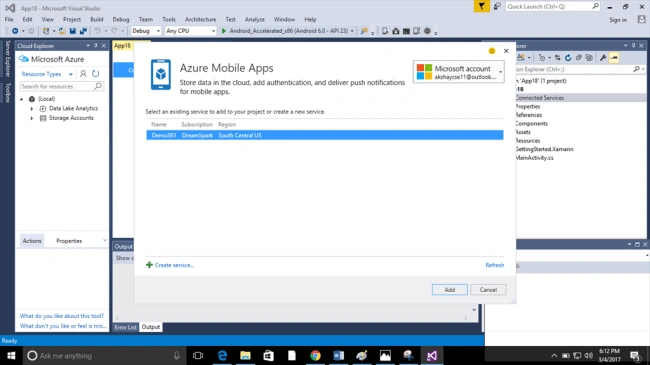
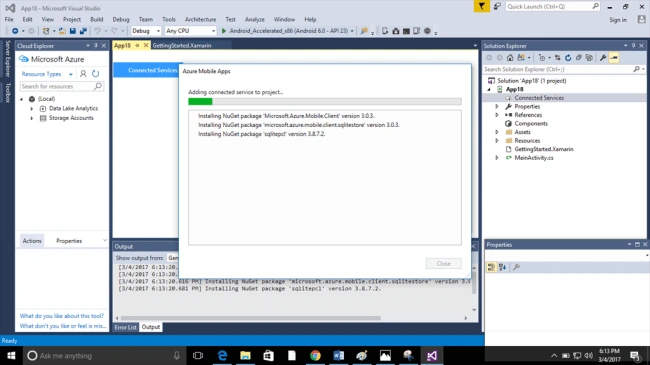
Thus, add the following code in ConnectedService.json to add the Table API. We have created the project succesfully. Just run and debug it.
- using System;
- using Microsoft.WindowsAzure.MobileServices;
- using Newtonsoft.Json;
- namespace Demo381
- {
- public class TodoItem
- {
- string id;
- string name;
- bool done;
- [JsonProperty(PropertyName = "id")]
- public string Id
- {
- get { return id; }
- set { id = value;}
- }
- [JsonProperty(PropertyName = "text")]
- public string Name
- {
- get { return name; }
- set { name = value;}
- }
- [JsonProperty(PropertyName = "complete")]
- public bool Done
- {
- get { return done; }
- set { done = value;}
- }
- [Version]
- public string Version { get; set; }
- }
- }
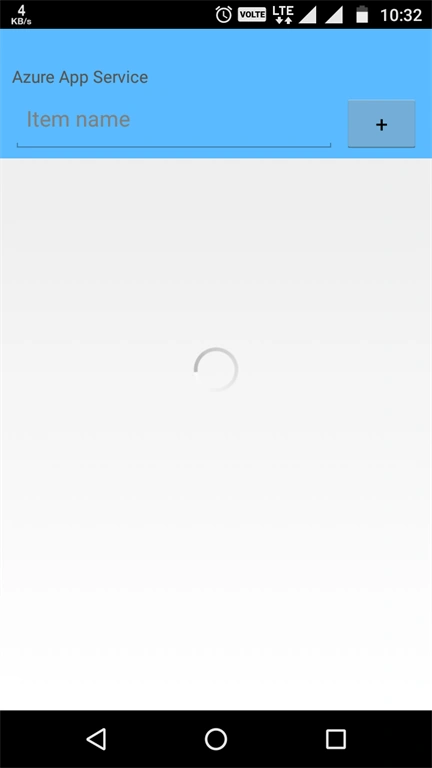
Finally, you have learned how to add mobile back-end services to Xamarin.Forms. In upcoming articles, I am going to show Azure Web+Mobile Services tutorials. Thank you for reading!!!
Ravi KandelPosted Mar 8, 2017, 8:37 AM
Awesome Thanks for sharing
Thiruppathi RPosted Mar 5, 2017, 11:38 PM
Nice Article. Thank you for sharing..