

Introduction
In a real-world scenario, your physical machine is running out of storage. You need to buy a physical hard drive to store a small amount of data for a small duration of time you spend more money.
Read my previous article:
At the same time you’re running a virtual machine in Azure, that virtual machine needs additional storage, what can you do? You cannot buy and install hard disk from locally. Azure can provide a storage disk to store data in a cloud-like physical hard drive.
A storage disk is the same concept as a physical hard disk, it's available in two types:
-
HDD (Hard Disk Drive)
-
SSD (Solid State Drive)
By reading this article, you will learn about how to create and add a storage disk in virtual machine.
Prerequisites:
-
Azure cloud account
-
Edge (or) other browsers
-
Stable internet connection
-
Windows Virtual machine in Azure (Running state)
Creating a Storage Disk
Step 1
Login to Azure Portal
Step 2
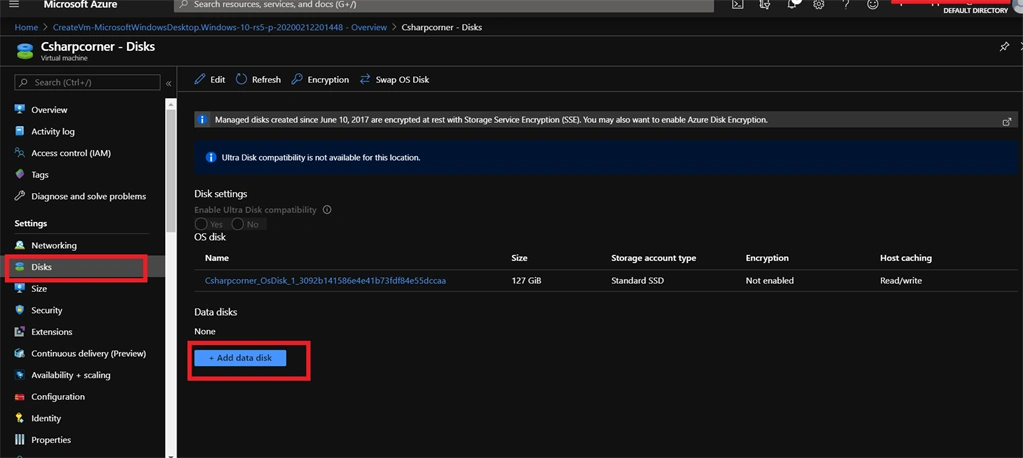
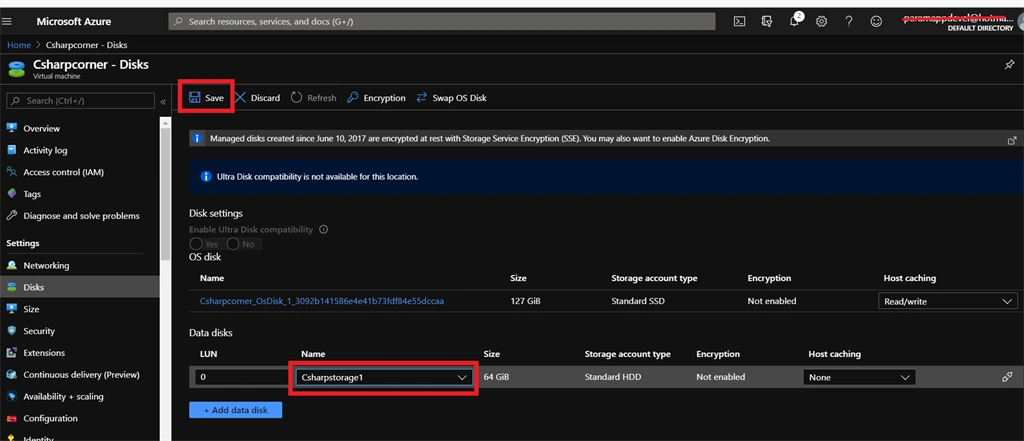
Go to the virtual machine dashboard, select “Disks” and then click the “Add” button.
Step 3
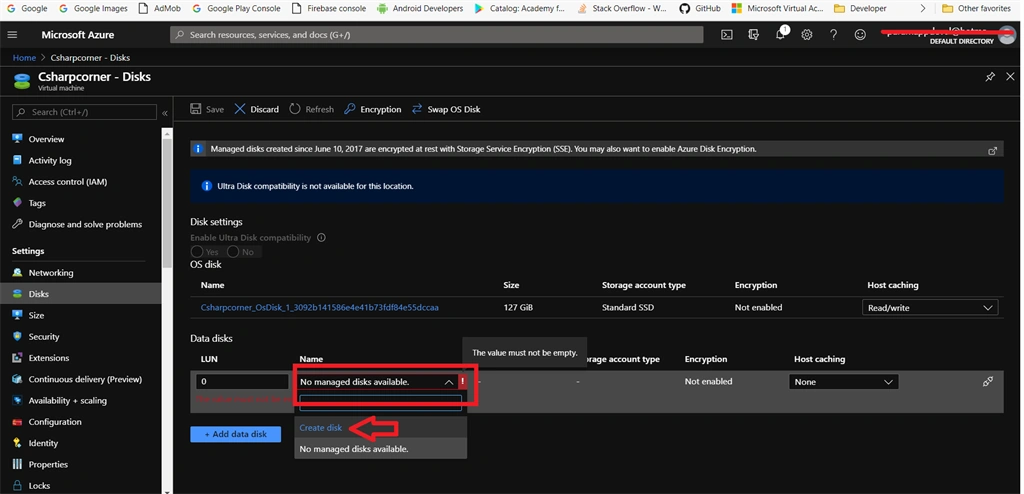
Click the “Name” dropdown list and then select the “Create Disk” option.
Step 4
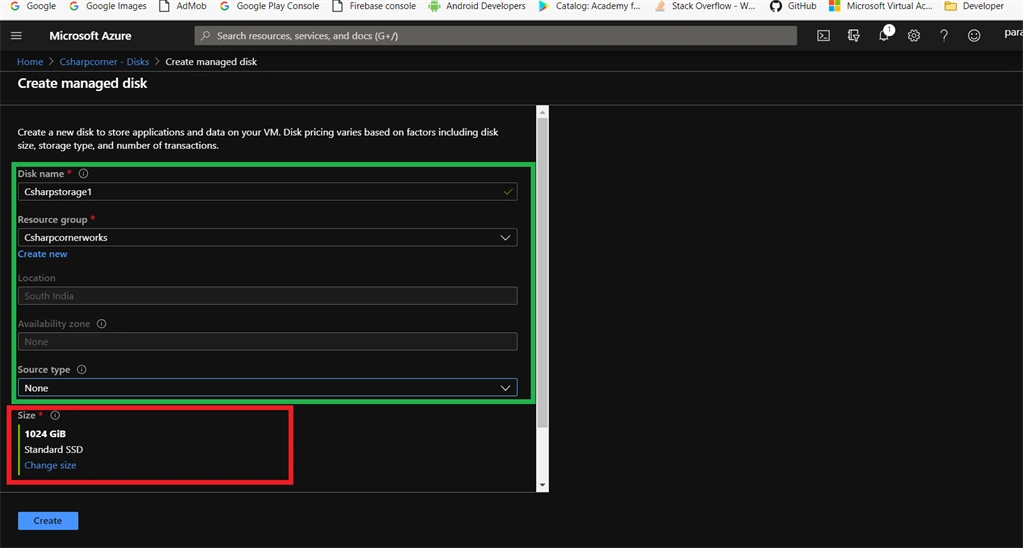
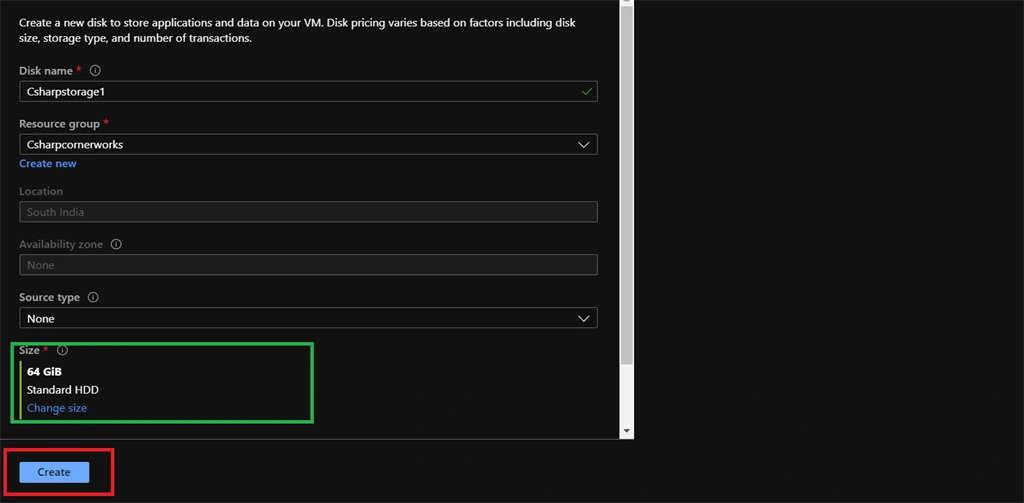
In “Create a Managed disk” page, fill the disk name, resource group name. Next, click the “Change Size” option to select the disk type and size.
Step 5
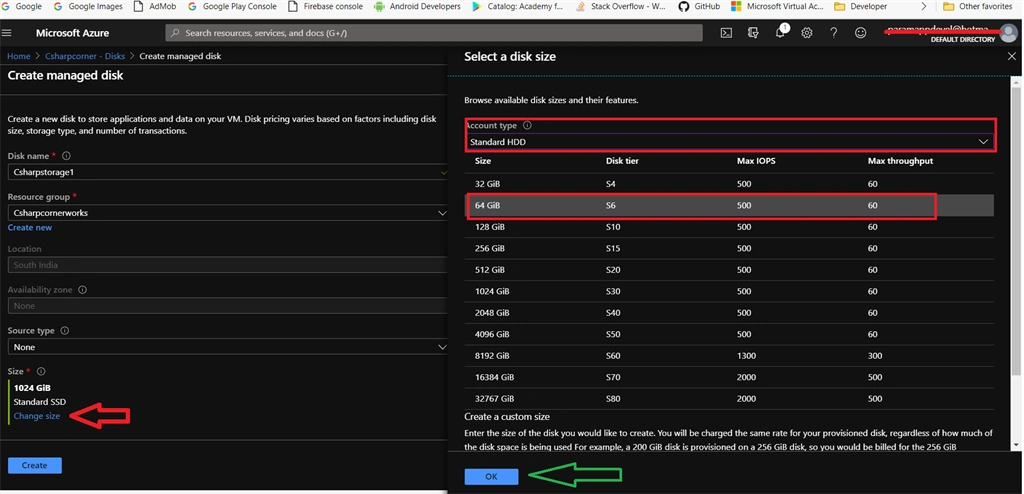
In “Select Disk Size pane”, first select the “Account type” as the standard HDD.
Azure can provide many disk size variants, now I am selecting 64 GB disk and finally, click the OK button.
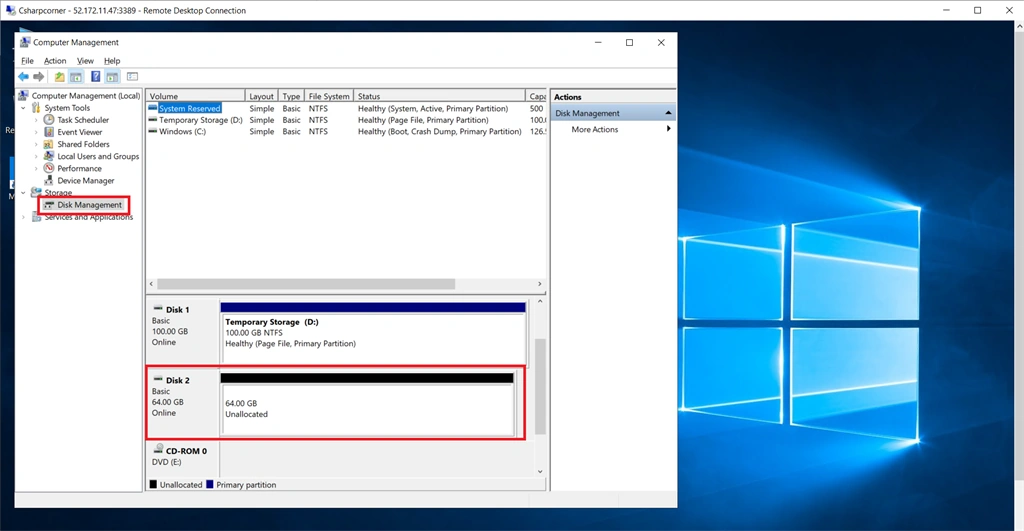
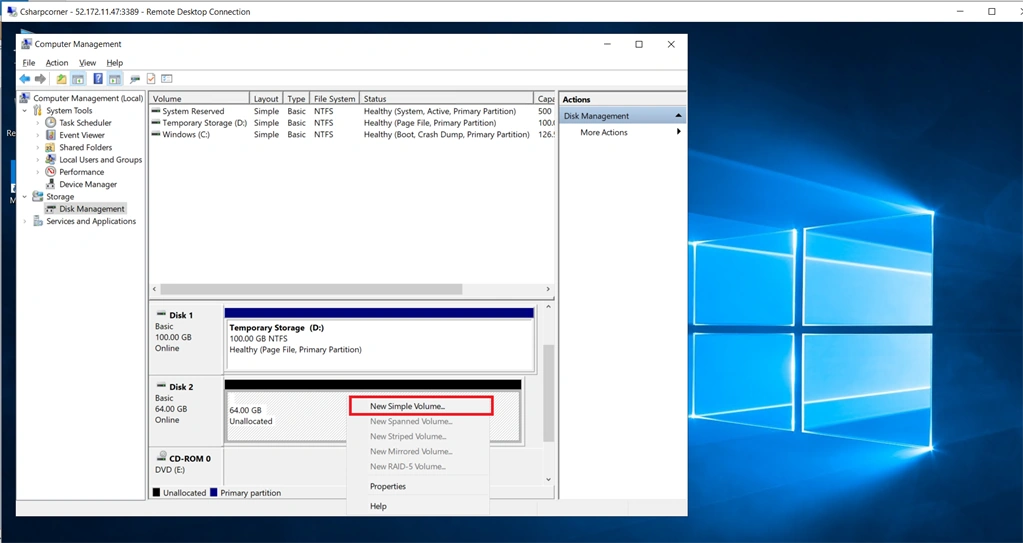
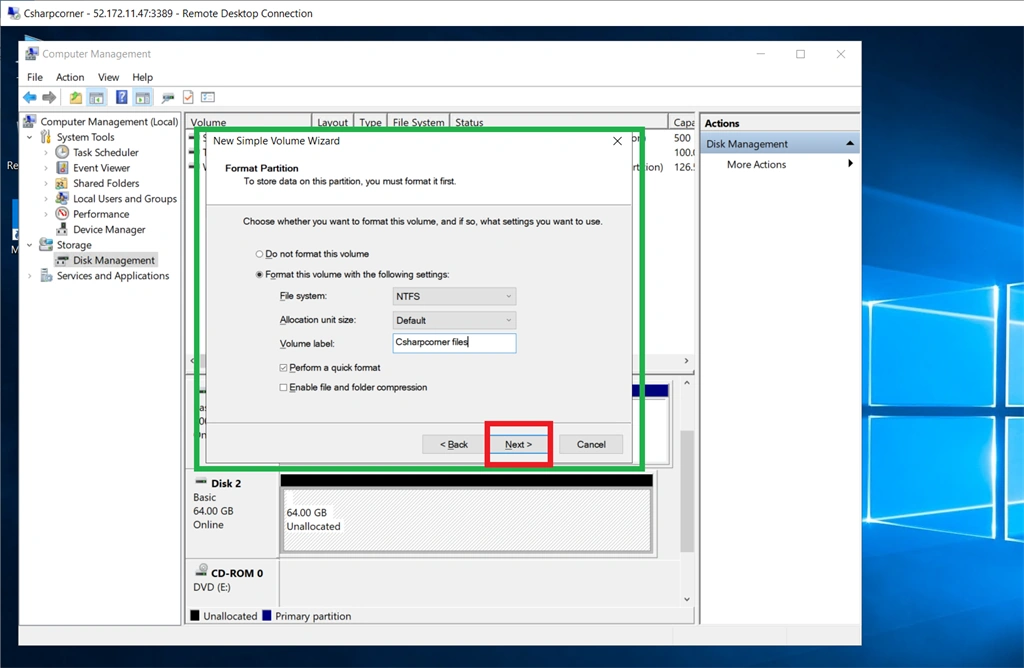
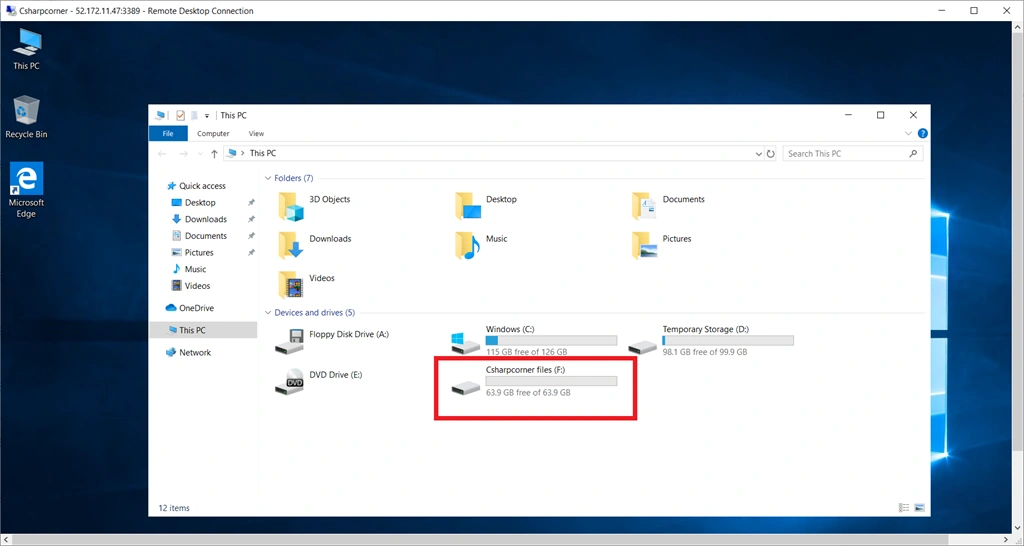
Dipa MehtaPosted Feb 19, 2020, 5:48 PM
Good one Naveen.