

This article is a part of a series of articles related to one of the Azure Compute options, “Cloud Services”.
- Azure Cloud Service Introduction
- Azure Cloud Services - Create Hello World Cloud Service Using Visual Studio
- Azure Cloud Service Examine Files
- Azure Cloud Service – Add existing Web Application to Cloud Service
- Azure Cloud Service – Compute Emulator
- Azure Cloud Service - Create Package using Visual Studio
- Azure Cloud Service – Create a new Cloud Service using Azure Management Portal
- Azure Cloud Service – Deploy Cloud Service using Azure Management Portal
- Azure Cloud Service – Create Staging Slot using Azure Management Portal
- Azure Cloud Service – VIP Swap using Azure Management Portal
- Azure Cloud Service – Delete Slot using Azure Management Portal.
- Azure Cloud Service – Scale up Instance Size
- Azure Cloud Service – Scale Out Instances using Visual Studio
- Azure Cloud Service – Enable Remote Desktop using Visual Studio
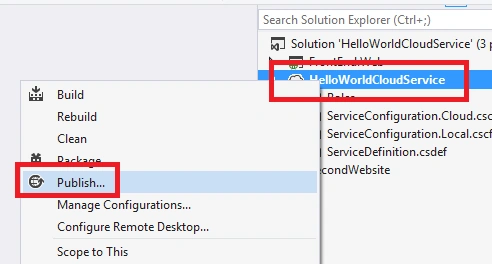
1. Navigate to your Cloud Service project, right click on its name, and click on “Publish”, as shown below.
2. Clicking on the Publish button will open the “Publish Azure Application” window. Go to Sign In tab.
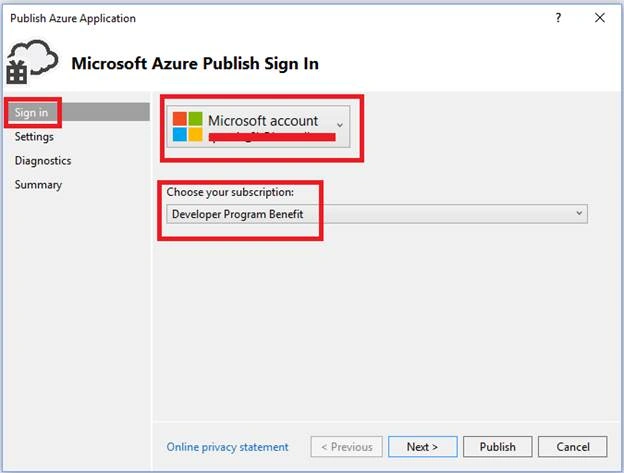
3. In the “Sign In” tab, you would need to log into your Azure Account . Here, select your subscription type and click on “Next”.
4. In the “Settings” tab, select the following.
- Cloud Service- You need to choose the right Cloud Service to where you would like to deploy the application.
- Environment- Currently, Cloud Service supports “Production” and “Staging” slots. Select the right slot to where you would like to deploy the application.
- Build Configuration- Obviously, you would choose “Release” mode for building the application while publishing the same.
- Service Configuration- As we have already learned about different types (Development/Staging/Production) of Service Configuration files, you need to choose the right one before publishing the application.
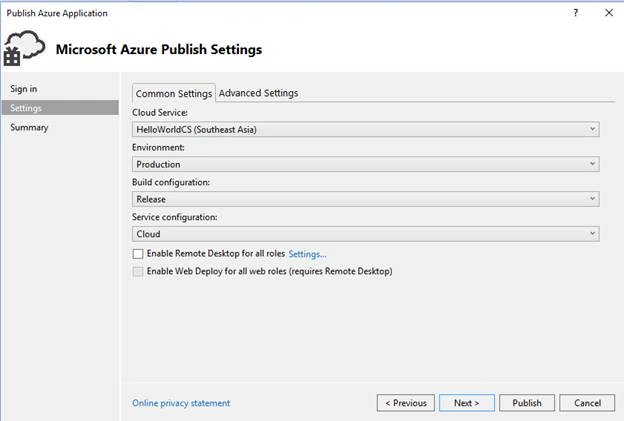
5. Now, click on “Next” to navigate to the following step where you need to uncheck the “Send Diagnostic data to Application insights” option.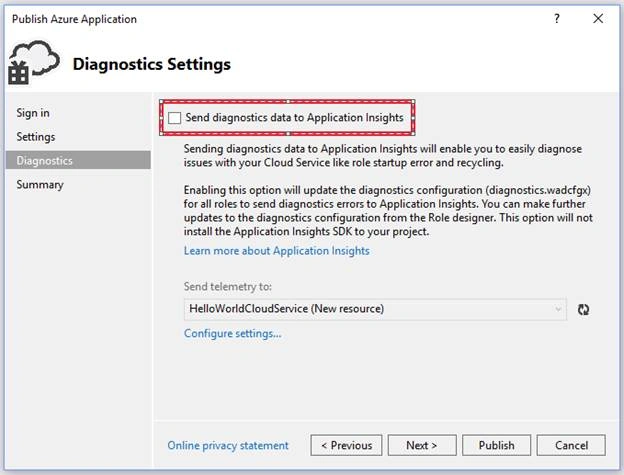
It doesn’t matter much whether you select or de-select it. It depends on your choice of handling the issues, if any occur.
6. Now, click “Next” to review all the configuration settings, as shown below.
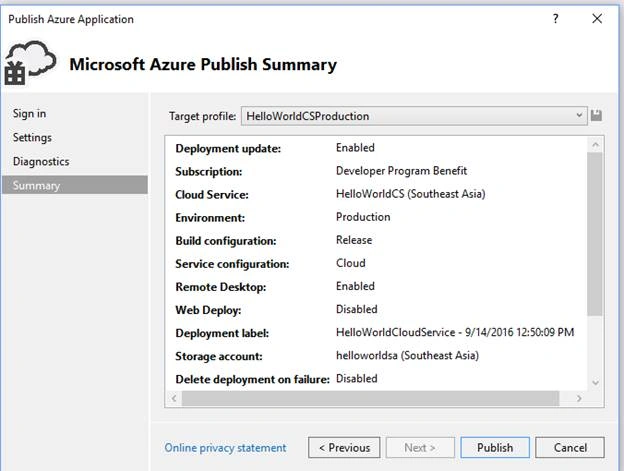
7. After you have reviewed all the required steps, click on “Publish” button to create the "Cloud Service Package" file. After a few seconds, Visual Studio will build all the Roles and create the Package file with its dependencies. You can review the deployment process and its progress in the “Microsoft Azure Activity Log” as shown below.
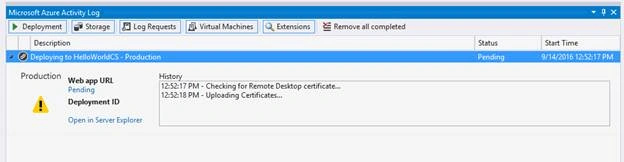
After a few minutes (time depending on the number of Roles and its instances that you have in your Cloud Service), the application will be deployed to your Cloud Service on Azure.
Once everything is complete, you will see the status as “Completed”.
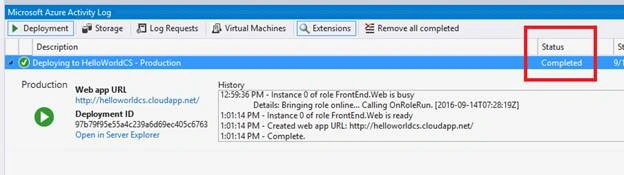
Below is the screen capture of the deployed application in Azure along with the Roles that are running.
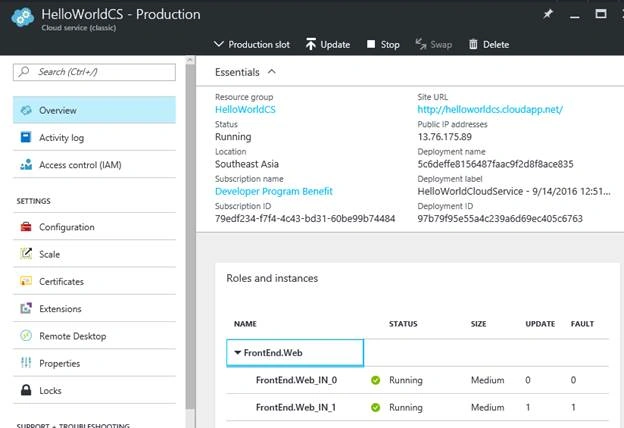
Hope you enjoyed reading the article. Your feedback is highly appreciated.
7. After you have reviewed all the required steps, click on “Publish” button to create the "Cloud Service Package" file. After a few seconds, Visual Studio will build all the Roles and create the Package file with its dependencies. You can review the deployment process and its progress in the “Microsoft Azure Activity Log” as shown below.
After a few minutes (time depending on the number of Roles and its instances that you have in your Cloud Service), the application will be deployed to your Cloud Service on Azure.
Once everything is complete, you will see the status as “Completed”.
Below is the screen capture of the deployed application in Azure along with the Roles that are running.
Hope you enjoyed reading the article. Your feedback is highly appreciated.
Join the conversation! Your thoughts help the community grow.