

Introduction
Ninety percent of people use Android smartphones. I will show you how to create an addition application for Android using Android studio. Android is a kernel based operating system. It allows the user to modify the GUI components and source code.
Requirements
- Android studio
- Little bit of XML and JAVA Knowledge.
Download link (android studio) https://developer.android.com/studio/
Steps should be followed
Carefully follow my steps on how to create the addition application for android using android studio and I have included the source code below.
Step 1
Open Android studio start the new project.
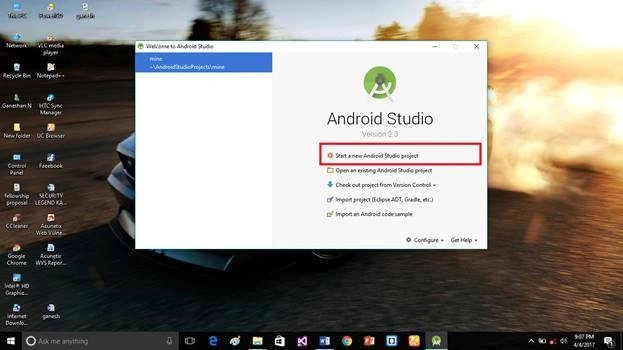
Step 2
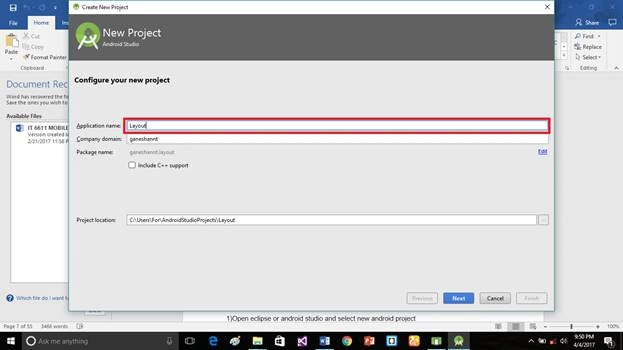
Put the application name and company domain. If you wish to use c++ for code the project, Include c++ support then click next.
Step 3
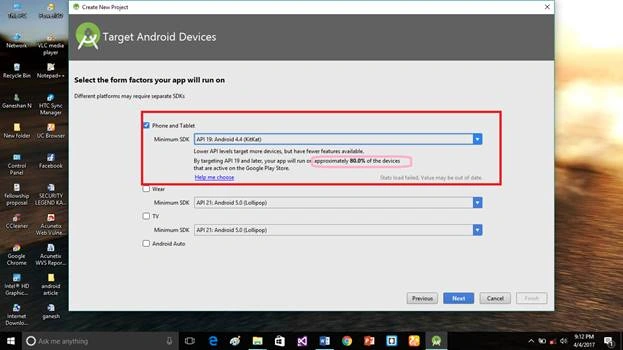
Select the android minimum SDK. After you chose the minimum SDK it will show approximate percentage of people who use that sdk then click next.
Step 4
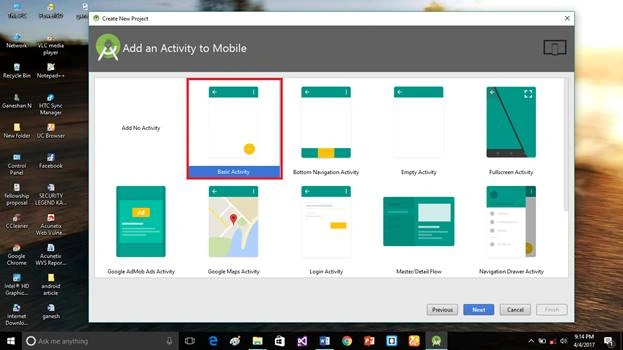
Choose the basic activity then click next
Step 5
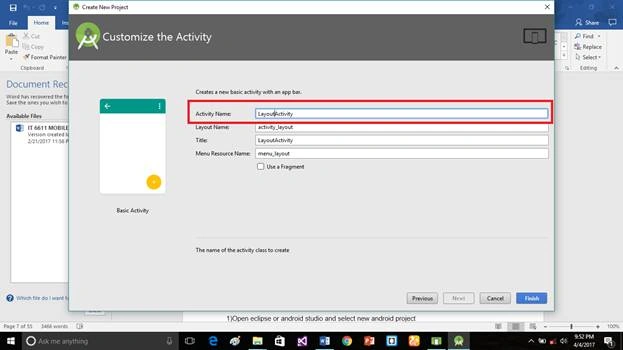
Put the activity name and layout name. Android studio basically takes the java class name from what you provide as the activity name.
Step 6
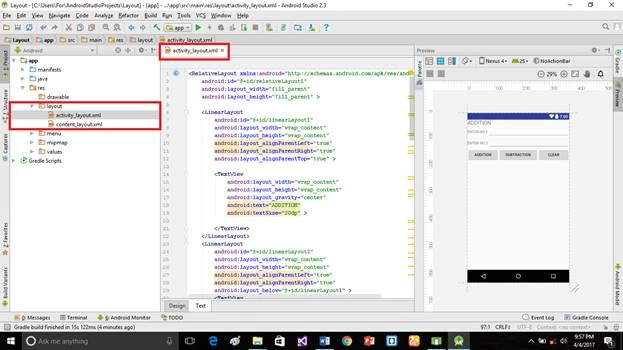
Goto activity_layout.xml then click the text bottom. Into the activity_layout.xml copy and paste the below code.
activity_layout.xml code
- <RelativeLayout xmlns:android="http://schemas.android.com/apk/res/android"
- android:id="@+id/relativeLayout1"
- android:layout_width="fill_parent"
- android:layout_height="fill_parent" >
- <LinearLayout
- android:id="@+id/linearLayout1"
- android:layout_width="wrap_content"
- android:layout_height="wrap_content"
- android:layout_alignParentLeft="true"
- android:layout_alignParentRight="true"
- android:layout_alignParentTop="true" >
- <TextView
- android:layout_width="wrap_content"
- android:layout_height="wrap_content"
- android:layout_gravity="center"
- android:text="ADDITION"
- android:textSize="20dp" >
- </TextView>
- </LinearLayout>
- <LinearLayout
- android:id="@+id/linearLayout2"
- android:layout_width="wrap_content"
- android:layout_height="wrap_content"
- android:layout_alignParentLeft="true"
- android:layout_alignParentRight="true"
- android:layout_below="@+id/linearLayout1" >
- <TextView
- android:layout_width="wrap_content"
- android:layout_height="wrap_content"
- android:text="ENTER NO 1" >
- </TextView>
- <EditText
- android:layout_width="wrap_content"
- android:layout_height="wrap_content"
- android:layout_weight="0.20"
- android:id="@+id/edittext1"
- android:inputType="number">
- </EditText>
- </LinearLayout>
- <LinearLayout
- android:id="@+id/linearLayout3"
- android:layout_width="wrap_content"
- android:layout_height="wrap_content"
- android:layout_alignParentLeft="true"
- android:layout_alignParentRight="true"
- android:layout_below="@+id/linearLayout2" >
- <TextView
- android:layout_width="wrap_content"
- android:layout_height="wrap_content"
- android:text="ENTER NO 2" >
- </TextView>
- <EditText
- android:layout_width="wrap_content"
- android:layout_height="wrap_content"
- android:layout_weight="0.20"
- android:id="@+id/edittext2"
- android:inputType="number">
- </EditText>
- </LinearLayout>
- <LinearLayout
- android:id="@+id/linearLayout4"
- android:layout_width="wrap_content"
- android:layout_height="wrap_content"
- android:layout_alignParentLeft="true"
- android:layout_alignParentRight="true"
- android:layout_below="@+id/linearLayout3" >
- <Button
- android:layout_width="wrap_content"
- android:id="@+id/button1"
- android:layout_height="wrap_content"
- android:text="Addition"
- android:layout_weight="0.50" />
- <Button
- android:layout_width="wrap_content"
- android:id="@+id/button3"
- android:layout_height="wrap_content"
- android:text="subtraction"
- android:layout_weight="0.50" />
- <Button
- android:layout_width="wrap_content"
- android:id="@+id/button2"
- android:layout_height="wrap_content"
- android:text="CLEAR"
- android:layout_weight="0.50" />
- </LinearLayout>
- <View
- android:layout_height="2px"
- android:layout_width="fill_parent"
- android:layout_below="@+id/linearLayout4"
- android:background="#DDFFDD"/>
- </RelativeLayout>
Step 7
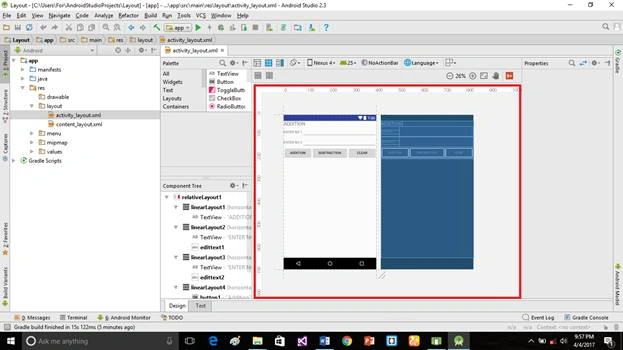
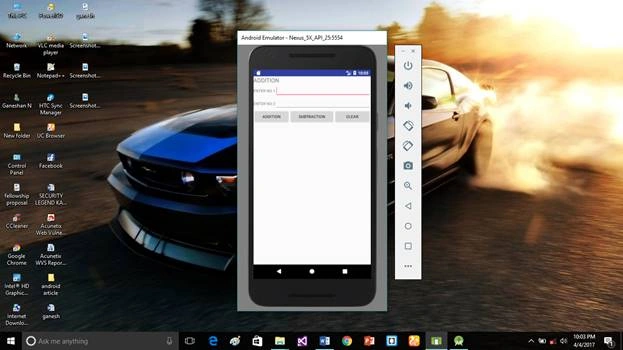
This is our user interface of the application
Step 8
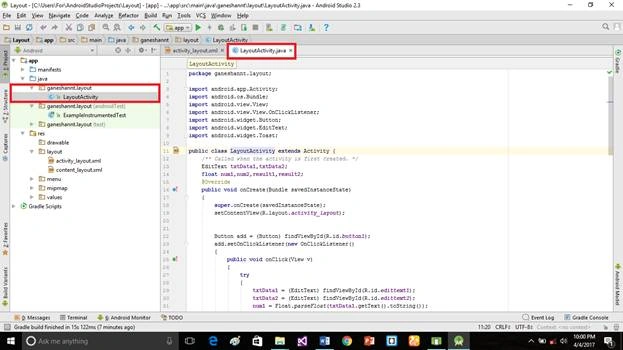
Go to LayoutActivity.java then click the text bottom. Into the LayoutActivity.java copy and paste the below code. Do not replace your package name.
LayoutActivity.java code
- package ganeshannt.layout;
- import android.app.Activity;
- import android.os.Bundle;
- import android.view.View;
- import android.view.View.OnClickListener;
- import android.widget.Button;
- import android.widget.EditText;
- import android.widget.Toast;
- public class LayoutActivity extends Activity {
- /** Called when the activity is first created. */
- EditText txtData1,txtData2;
- float num1,num2,result1,result2;
- @Override
- public void onCreate(Bundle savedInstanceState)
- {
- super.onCreate(savedInstanceState);
- setContentView(R.layout.activity_layout);
- Button add = (Button) findViewById(R.id.button1);
- add.setOnClickListener(new OnClickListener()
- {
- public void onClick(View v)
- {
- try
- {
- txtData1 = (EditText) findViewById(R.id.edittext1);
- txtData2 = (EditText) findViewById(R.id.edittext2);
- num1 = Float.parseFloat(txtData1.getText().toString());
- num2 = Float.parseFloat(txtData2.getText().toString());
- result1=num1+num2;
- Toast.makeText(getBaseContext(),"ANSWER:"+result1,Toast.LENGTH_SHORT).show();
- }
- catch(Exception e)
- {
- Toast.makeText(getBaseContext(), e.getMessage(),
- Toast.LENGTH_SHORT).show();
- }
- }
- });
- Button sub = (Button) findViewById(R.id.button3);
- sub.setOnClickListener(new OnClickListener()
- {
- public void onClick(View v)
- {
- try
- {
- txtData1 = (EditText) findViewById(R.id.edittext1);
- txtData2 = (EditText) findViewById(R.id.edittext2);
- num1 = Float.parseFloat(txtData1.getText().toString());
- num2 = Float.parseFloat(txtData2.getText().toString());
- result2=num1-num2;
- Toast.makeText(getBaseContext(),"ANSWER:"+result2,Toast.LENGTH_SHORT).show();
- }
- catch(Exception e)
- {
- Toast.makeText(getBaseContext(), e.getMessage(),
- Toast.LENGTH_SHORT).show();
- }
- }
- });
- Button clear = (Button) findViewById(R.id.button2);
- clear.setOnClickListener(new OnClickListener()
- {
- public void onClick(View v)
- {
- try
- {
- txtData1.setText("");
- txtData2.setText("");
- }
- catch(Exception e)
- {
- Toast.makeText(getBaseContext(), e.getMessage(),
- Toast.LENGTH_SHORT).show();
- }
- }
- });
- }
- }
Step 9
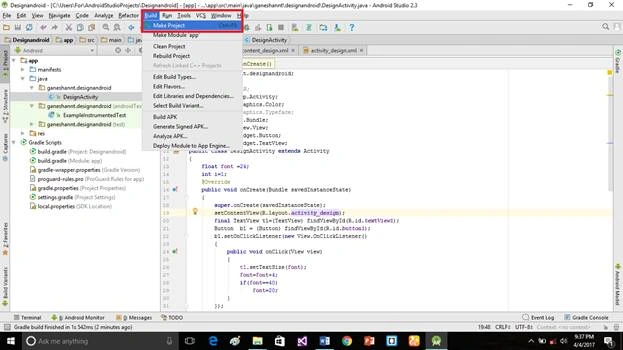
Click the build bottom and make the project. Now your project compilation process is going on. It will show you any error found in your project
Step 10
Click run bottom. Your emulator will start then run your application.
Deliverables
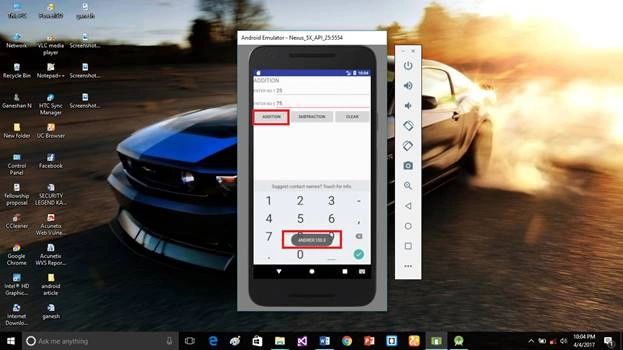
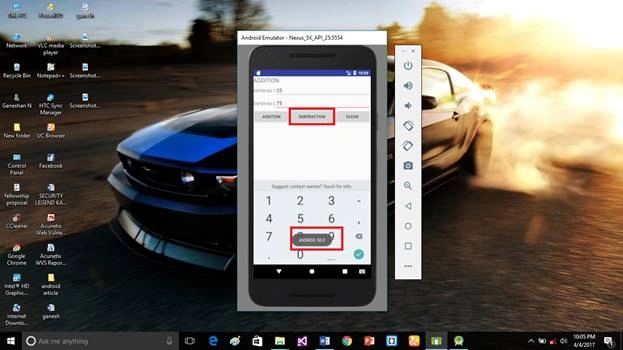
Here we have successfully created addition application for android using android studio
Don’t forgot to like and follow me. If you have any doubts just comment below.
Ganeshan NPosted Apr 8, 2017, 12:51 AM
Thanks ....i will do in my best
Vidyadharran GPosted Apr 7, 2017, 12:32 PM
It's cool keep posted..............................
Akshayrao VPosted Apr 6, 2017, 2:19 PM
Super keep it up Good