

Microsoft Azure Websites supports the Role-Based Access Control feature and allows you to have much greater control over whom you allow access to your resources and what level of access each person has.
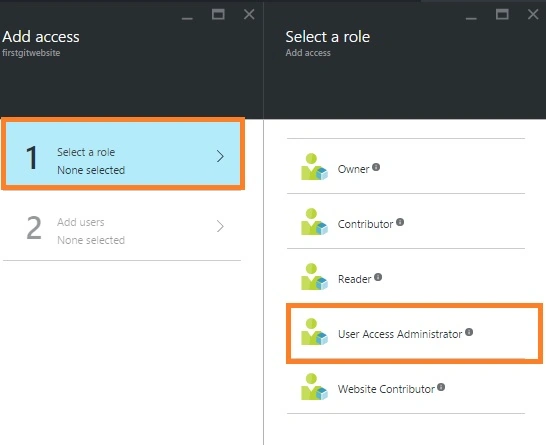
Five levels of Role
- Owner Role – Has full admin access to the site and can perform all operations.
- Contributor Role – Can deploy code, start/stop the site, swap deployments, delete the site, etc. Cannot change pricing plan or perform some other admin functions.
- Reader Role – Can view the website in the portal, but cannot make any changes to it.
- User Access Administrator - Can manage user access to Azure resources.
- Website Contributor - Can manage websites, but not the web plans to which they are connected.
You can see my previous articles for creating Azure Website:
Prerequisites
· Azure account.
Now let's get started with the following steps:
Add Azure Managing User Access Control to Azure Websites
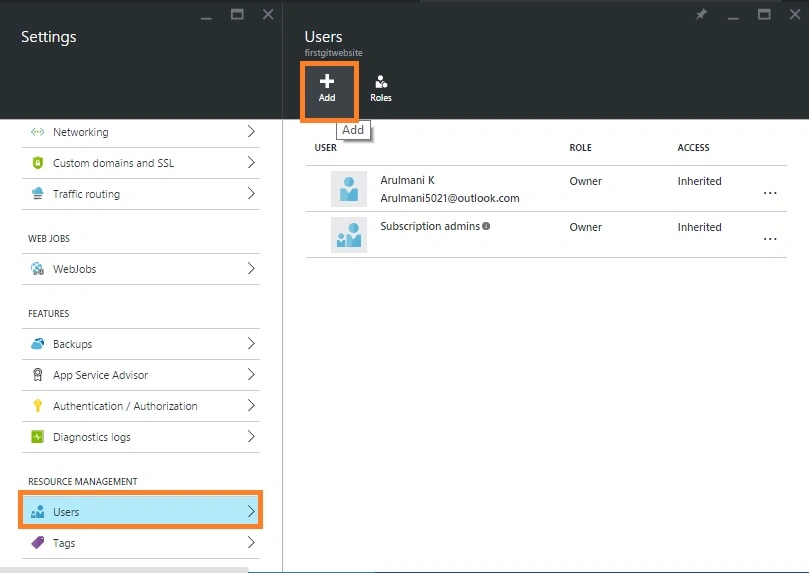
Sign in to the online Microsoft Azure Portal. Then In your web app's blade in the Portal, click Settings > User, and click to Add Button.
Then select the role that you wish to assign,
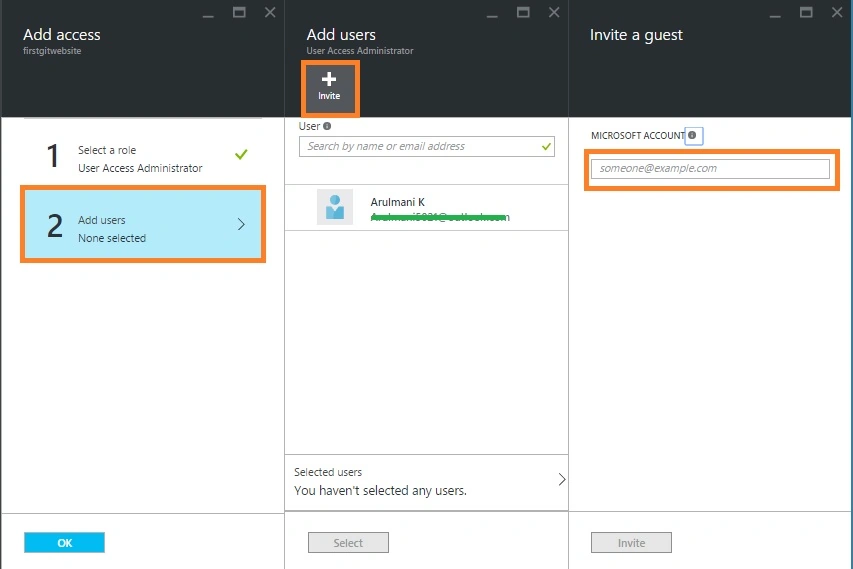
Select the user in the Add User blade or you can invite new user also.
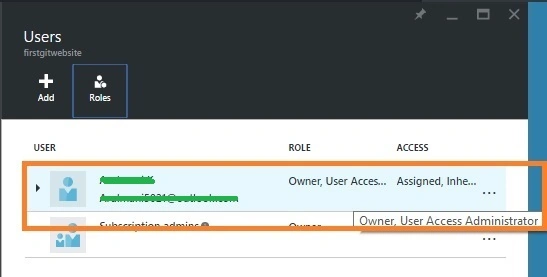
After selecting user click Ok Button for assign role that particular user.
Read more articles on Azure:
Rahul Kumar SaxenaPosted Apr 29, 2016, 6:48 AM
Good One
Bhushan GawalePosted Apr 25, 2016, 11:10 AM
Thanks for sharing, Given that your azure resources are created using latest deployment model of Azure i.e. ARM.
Vignesh ManiPosted Apr 25, 2016, 8:13 AM
Nice one Sir
Gowtham RajamanickamPosted Apr 25, 2016, 2:36 AM
very good article