

This article will guide you, on how to add a custom domain name and verify it for use with your Azure Active Directory,
Azure Active Directory tenants come with an initial domain name, “domain-name.onmicrosoft.com”. You can't change or delete the initial domain name, but you can add your organization's names. Adding custom domain names helps you to create user names that are familiar to your users, such as [email protected]
Important: (You must include .com, .net, or any other top-level extension for this to work. When adding a custom domain, the Password Policy values will be inherited from the initial domain.)
Before you can add a custom domain name, create your domain name with a domain registrar such as Google domain, GoDaddy, Namecheap, and Bluehost ext.
Step 1. Add your custom domain to Azure AD
- Go to Azure portal then Sign in to the Azure portal.
- Then Select Azure Active Directory
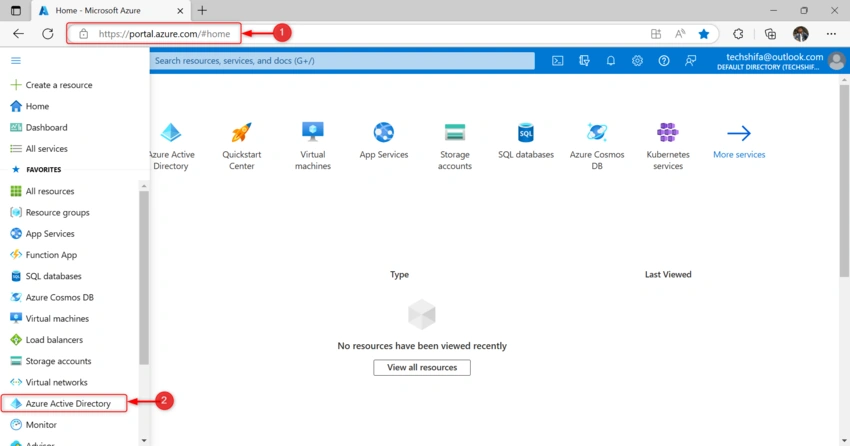
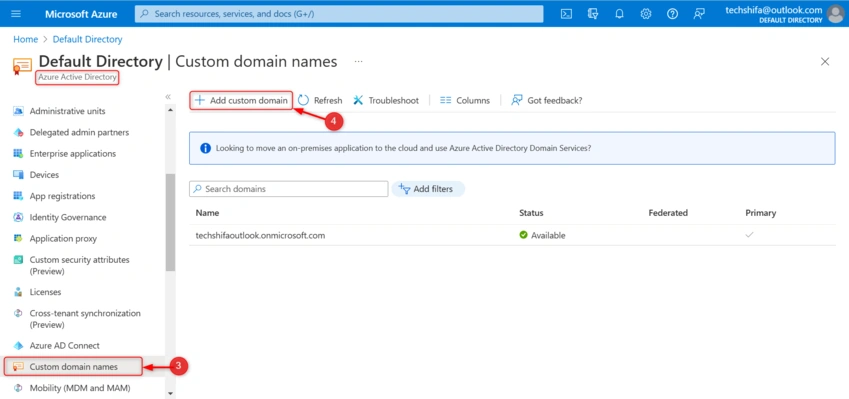
- Select "Custom Domain Name" from Azure Active Directory,
- And then Click "Add custom domain".
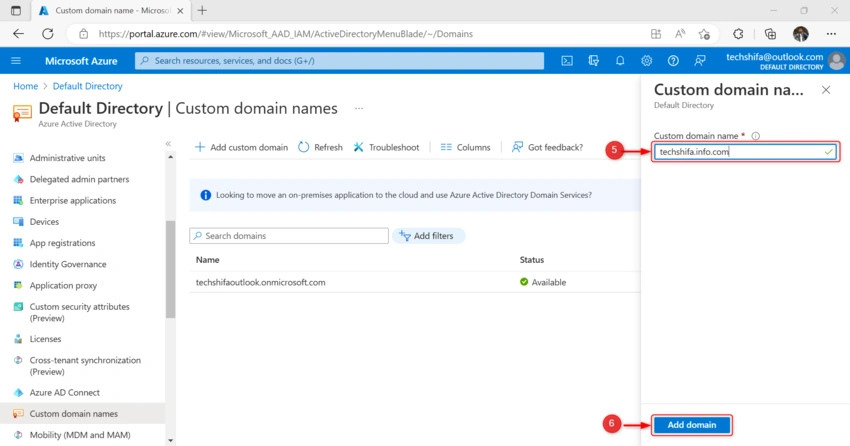
You must include .com, .net, or any other top-level extension for this to work. When adding a custom domain, the Password Policy values will be inherited from the initial domain. - In the Custom domain name field, enter your registered domain name. example, techshifa.com.
- And then select "Add domain"
The unverified domain is added. The techshifa.com page appears showing your DNS information. You need it later to create a TXT record to configure DNS.
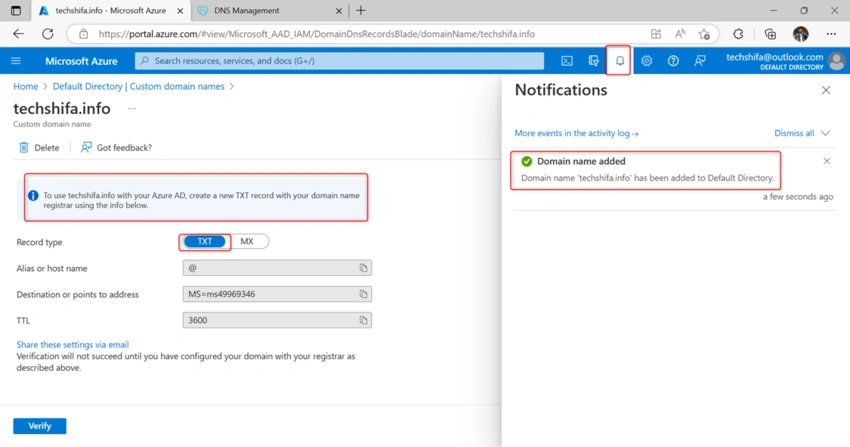
Step 2. Configure DNS with a TXT Record
After the domain is added you need to verify the domain, you will need to configure DNS with a TXT record, via the domain registrar,
In this case, I registered the domain with the GoDaddy domain provider.
If you are registered with GoDaddy, you can follow these steps to add the TXT DNS record to your domain DNS
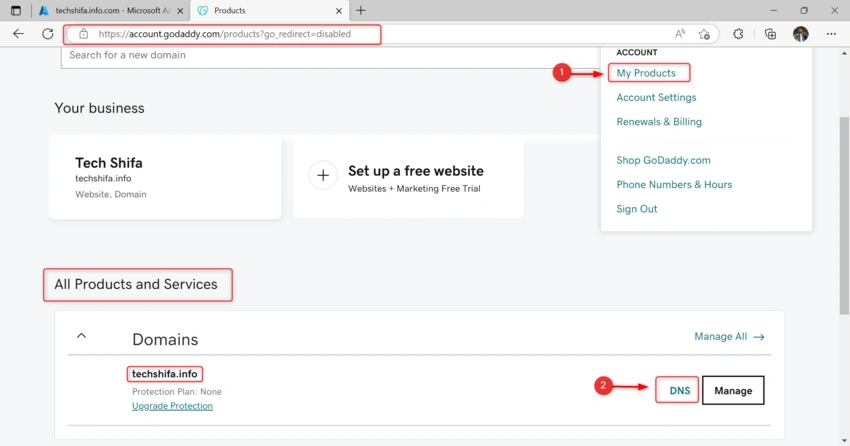
- Log in to your GoDaddy account
- Then Select "My Product" and then click "DNS"
- Then click "Add" to add a TXT record then add Record
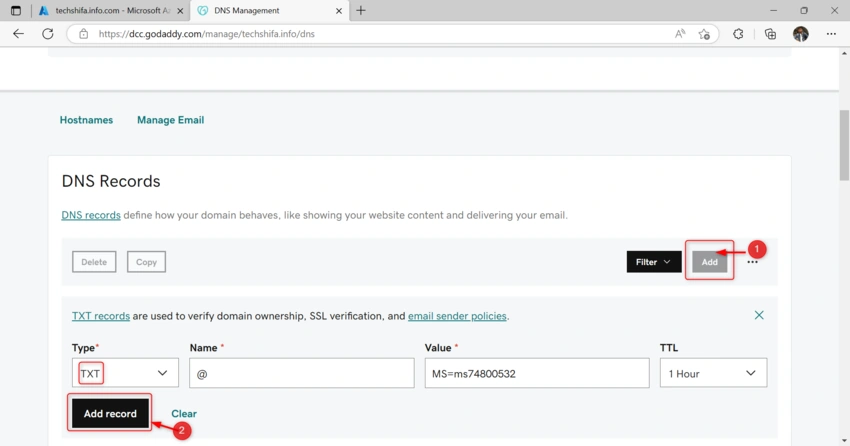
After successfully TXT record is added, you can verify your custom domain name!
Step 3. Verify your custom domain name
- Go to Azure Portal
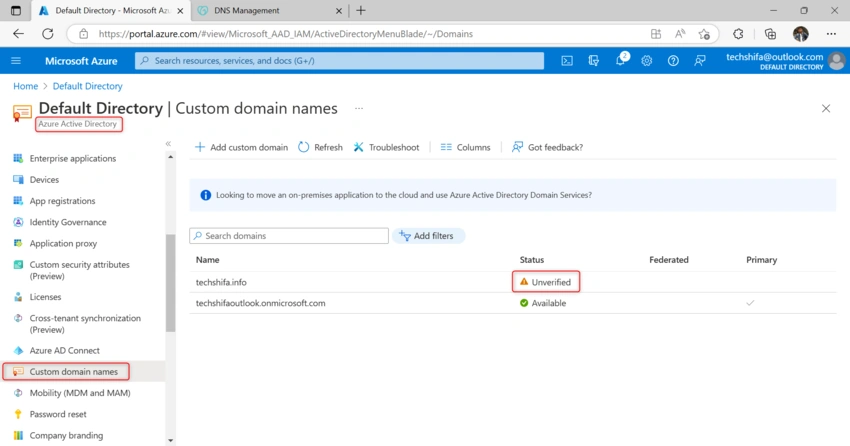
- From the "azure active Directory" Select "Custom Domain Name"
- Then select your unverified Domain Name to verify
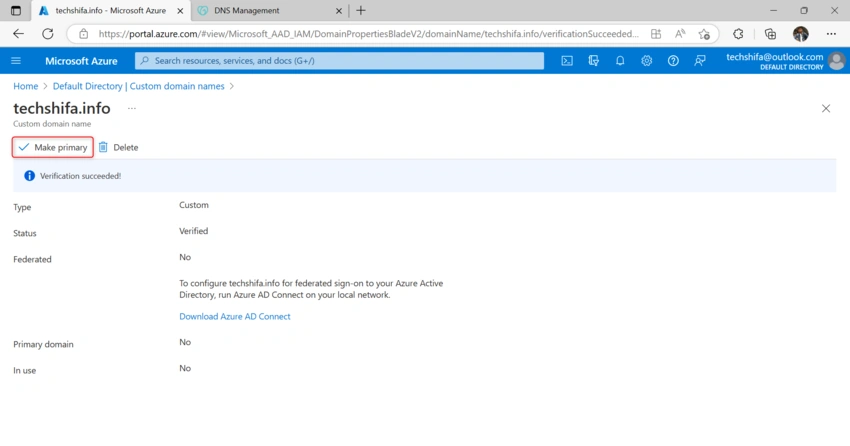
- On the techshifa.info page, select Verify
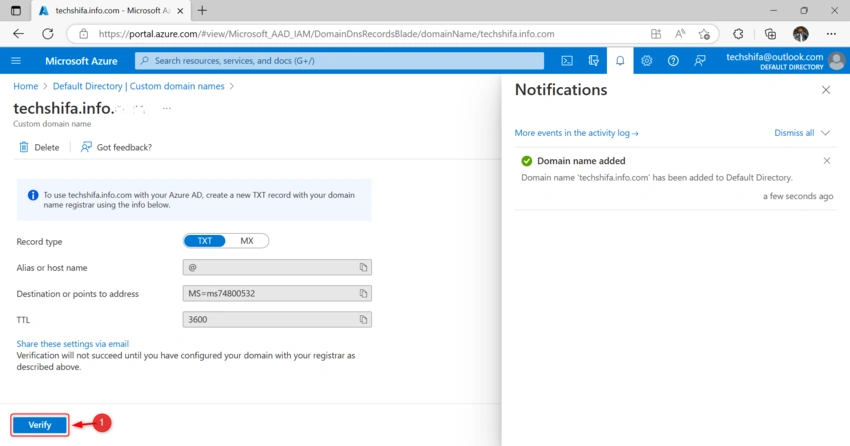
- The Custom Domain Name is successfully verified, If you want to make the custom domain your primary domain, select the custom domain, and select Make primary.
Viknaraj ManogararajahPosted Jan 31, 2023, 10:27 AM
Nice Article!