

Welcome to Flutter Bootcamp’s second session. In this day, you will learn how to set up physical device and emulator, and how to create a new empty flutter project and folder structure of Flutter.
Let’s start with creating a new Flutter project.
Step 1
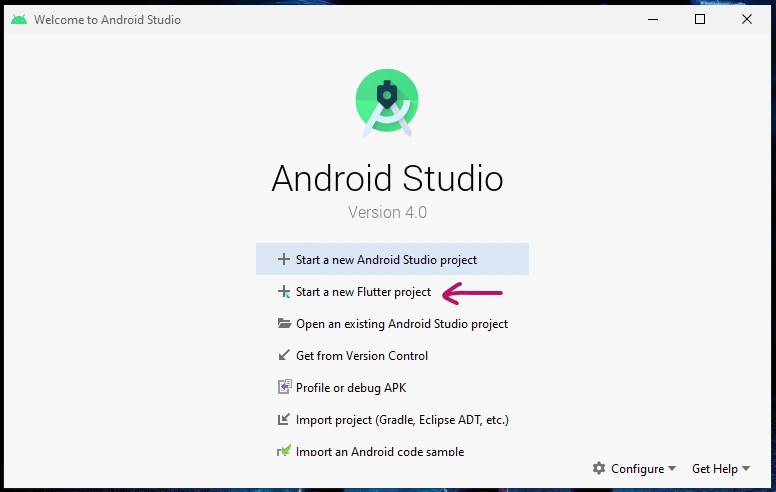
Fire up Android Studio and Select an option “Start a new Flutter project”
Step 2
As we are going to create an end-user application, select “Flutter Application” and “Next” button.
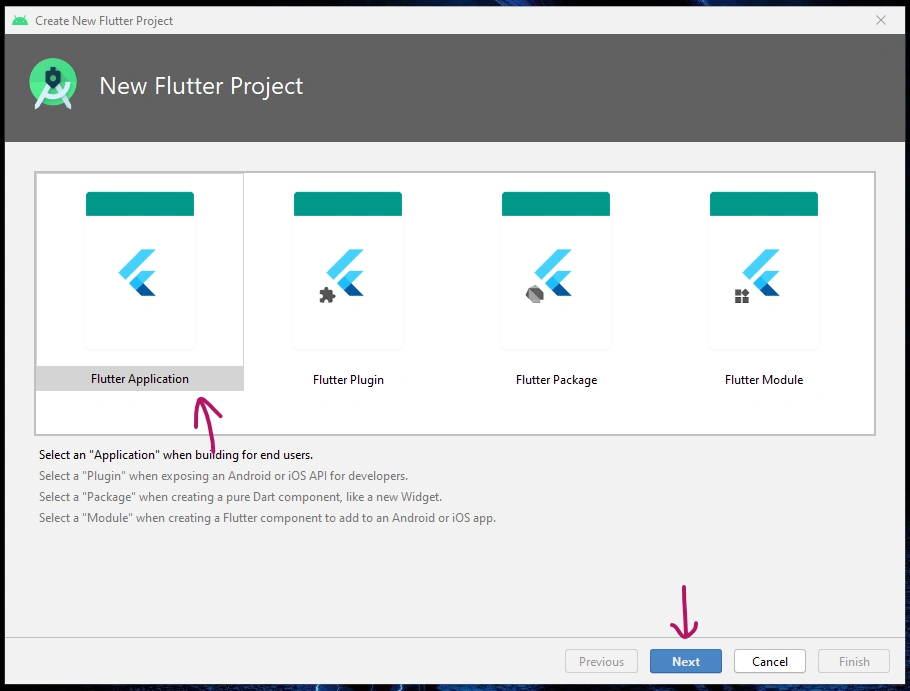
- Flutter Application
When you want to develop an end-user Android or iOS mobile application.
- Flutter Plugins
When exposing an Android or iOS API for developers, in sort if you want to make native functionality for Flutter.
- Flutter Package
When you want to create a widget using pure dart programming.
- Flutter Module
When creating a Flutter component to add to your application.
Step 3
Configure the new Flutter Application,
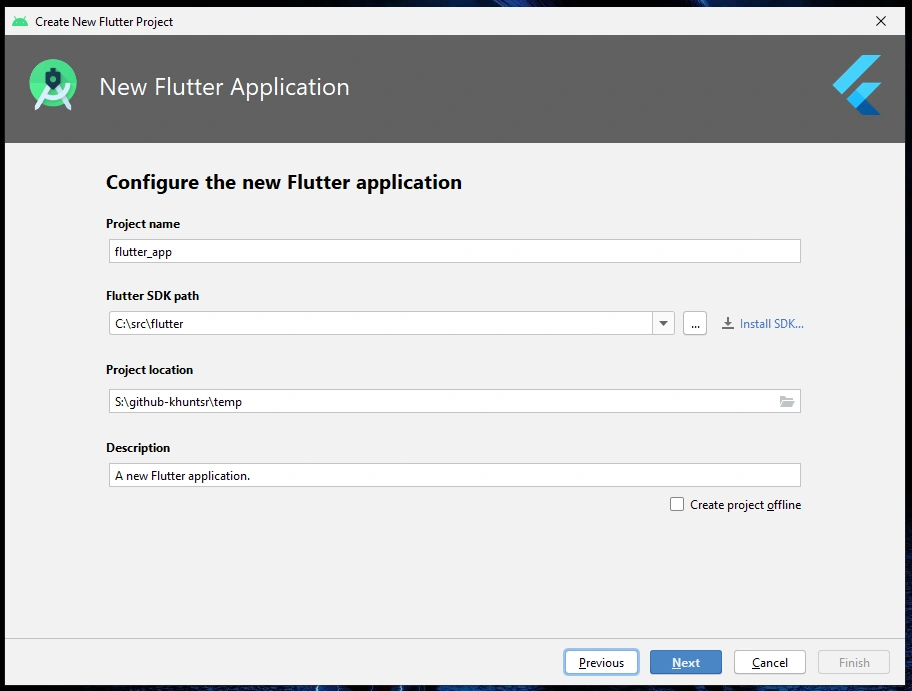
- Project Name
Name of your project
- Flutter SDK path
This is the folder path where we put the flutter SDK earlier
- Project Location
This part tells you where your project gone be saved
- Description
About text for your application
Set the package information
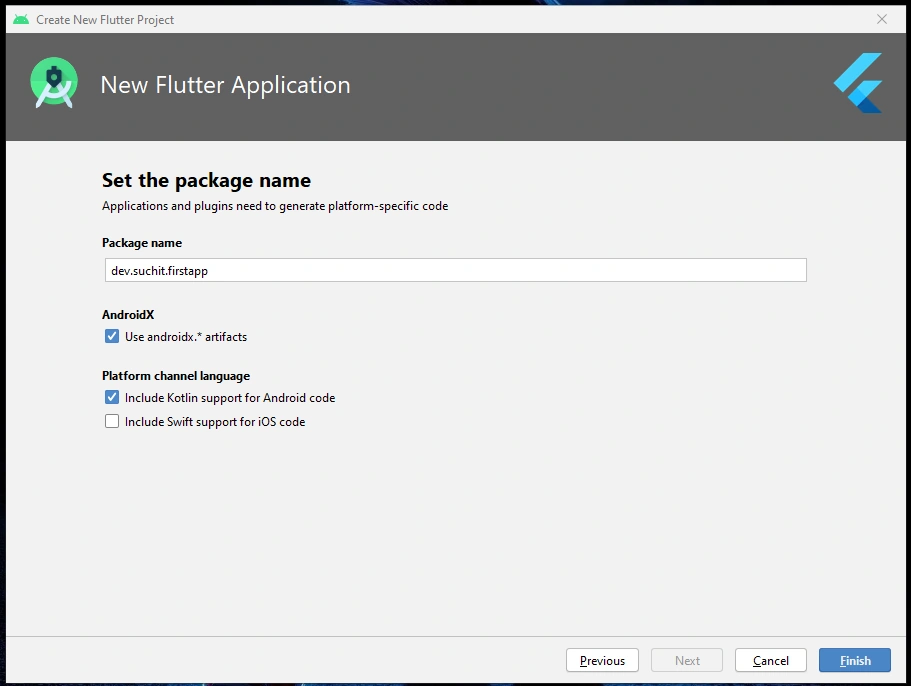
- Package name
It helps to create a package name by combining the company domain and name of your project for unique identification. Play store can identify unique app with this package name.
How to create emulator in Android studio?
Before starting make sure that we have pre-installed all drivers.
Step 1
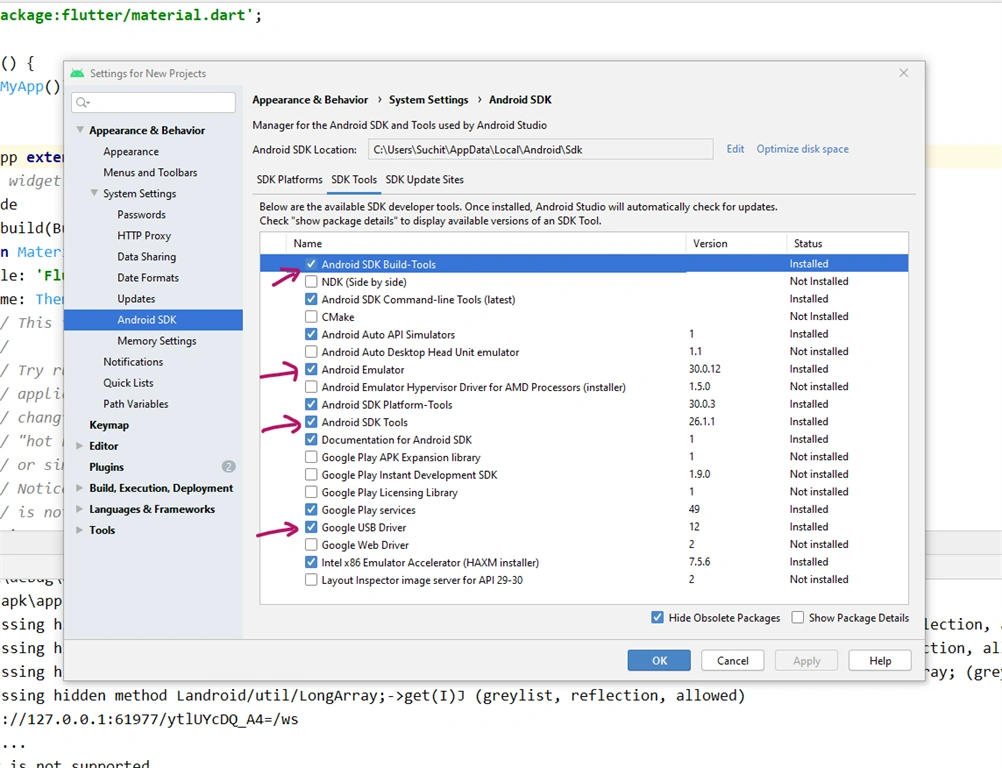
Open SDK Manager (Tools > SDK Manager) and check that you have installed below required things.
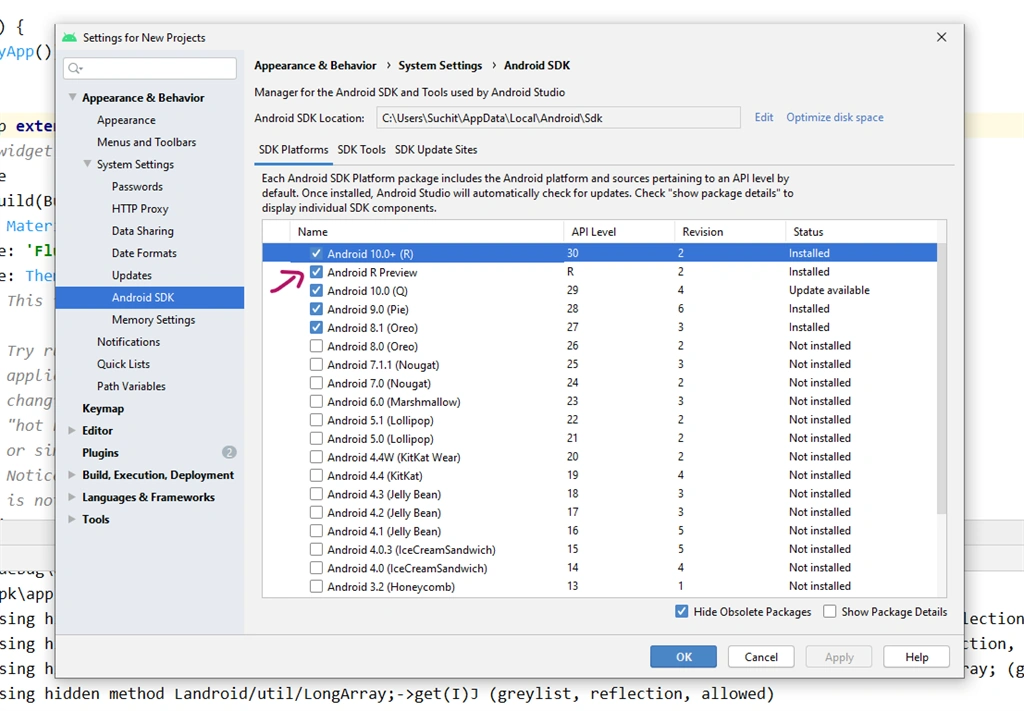
- SDK Platforms > One of the SDK Platforms.
- SDK Tools > Android SDK Build-Tools
- SDK Tools > Google USB Driver
- SDK Tools > Android SDK Tools
- SDK Tools > Android Emulator
Step 2
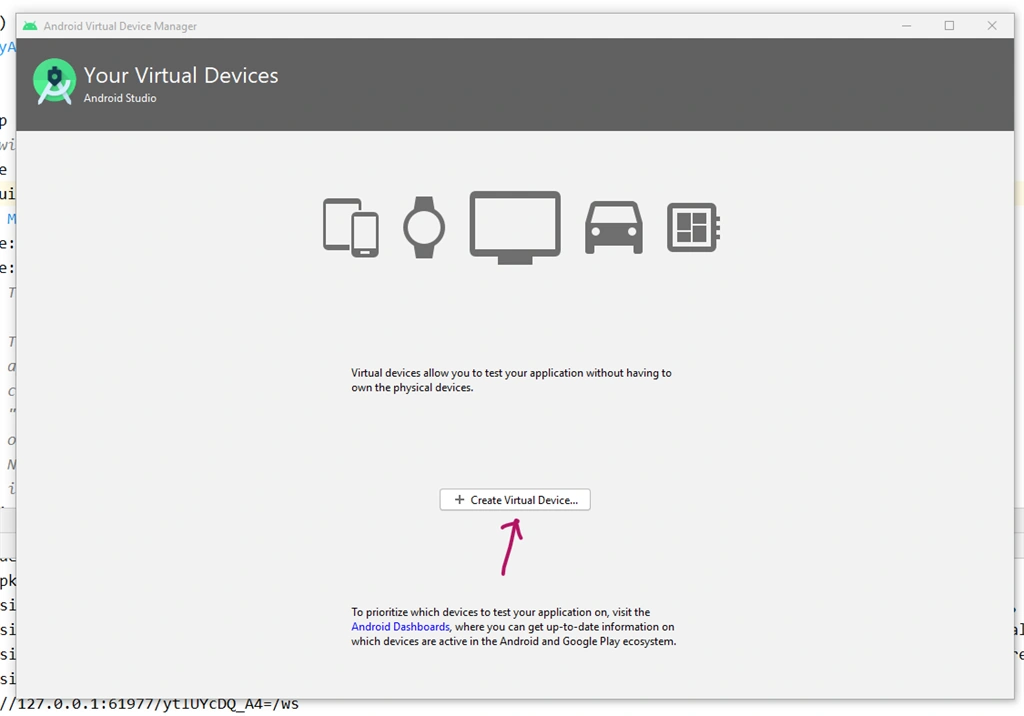
Open AVD Manager (Tools > AVD Manager)
Click on “+ Create Virtual Device…”
Click on “+ Create Virtual Device…”
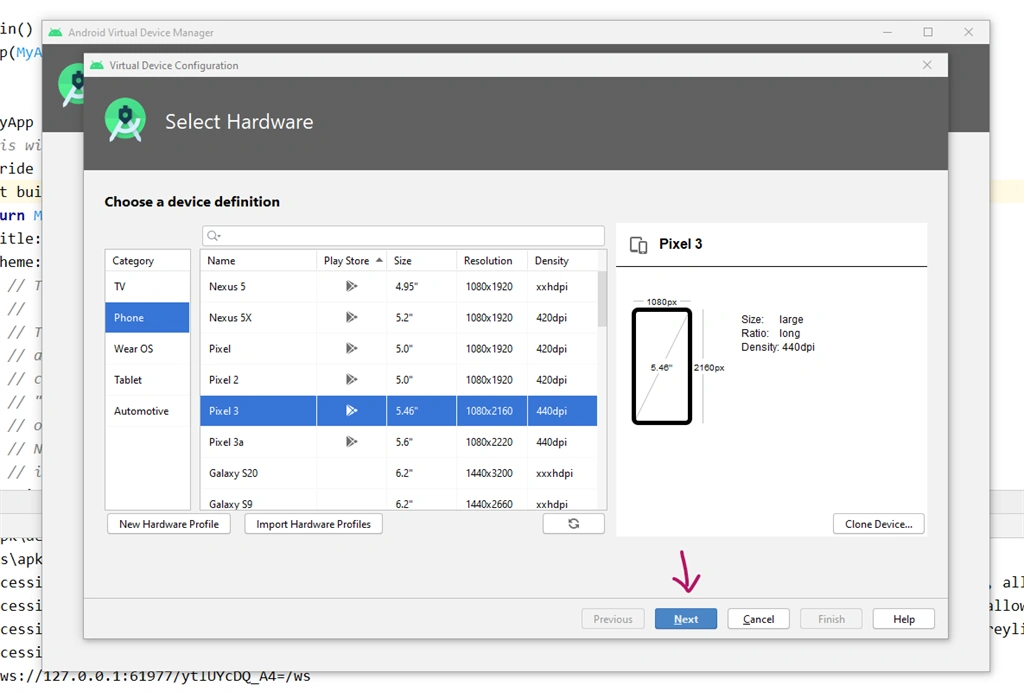
Select your preferred device and then click on “Next”
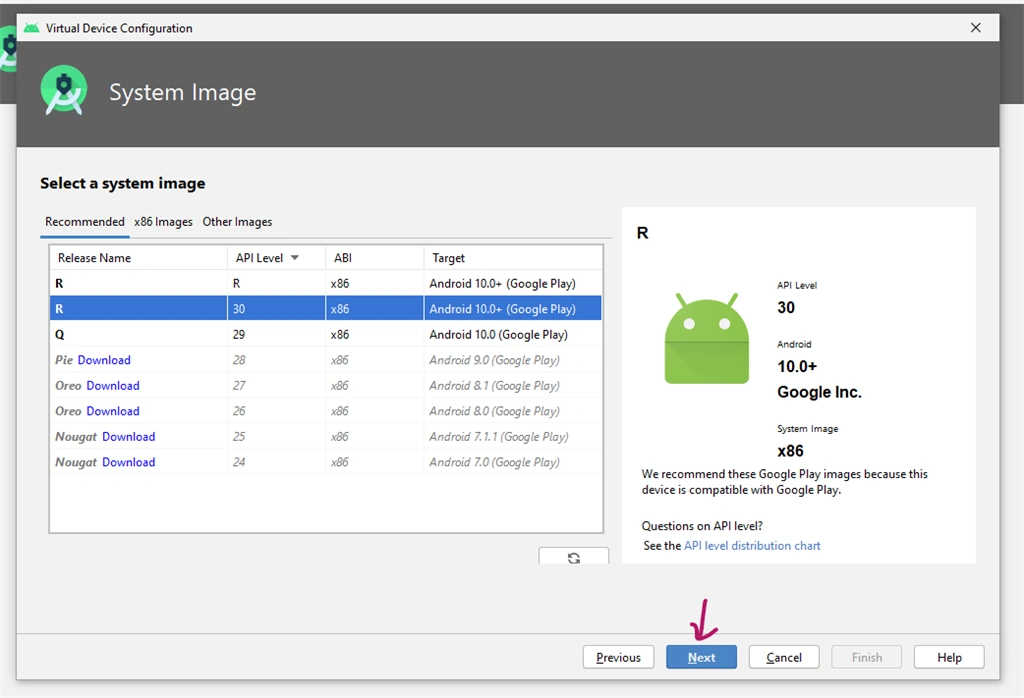
Select your preferred system image and click on “Next” and then click on “Finish”. I suggest to chose x86 Images for fast performance on testing and debugging.
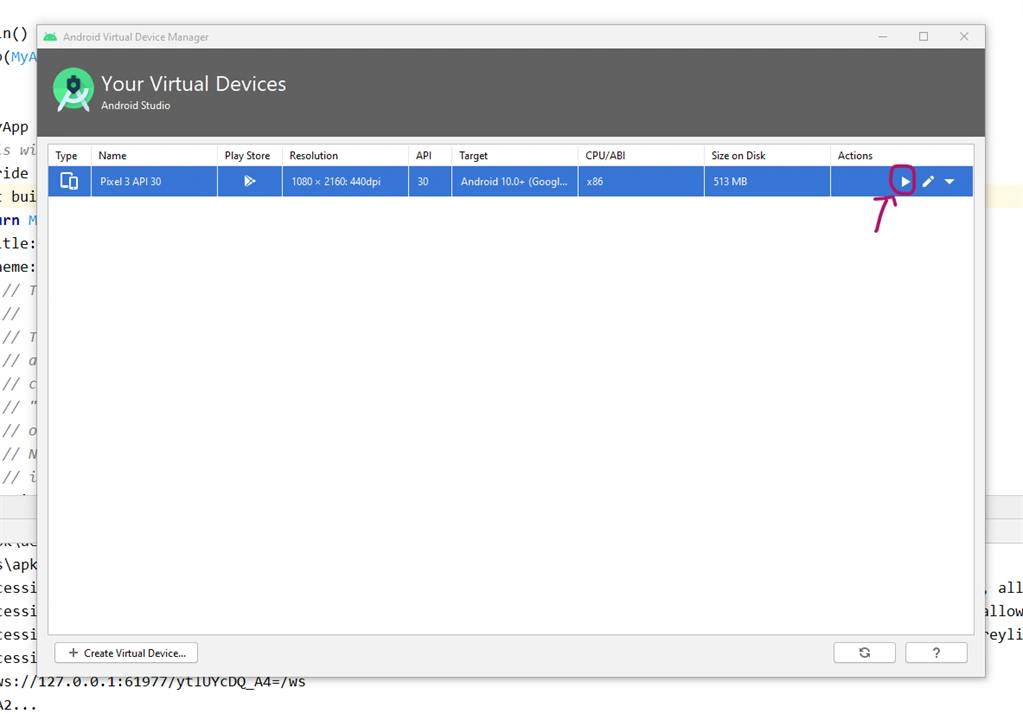
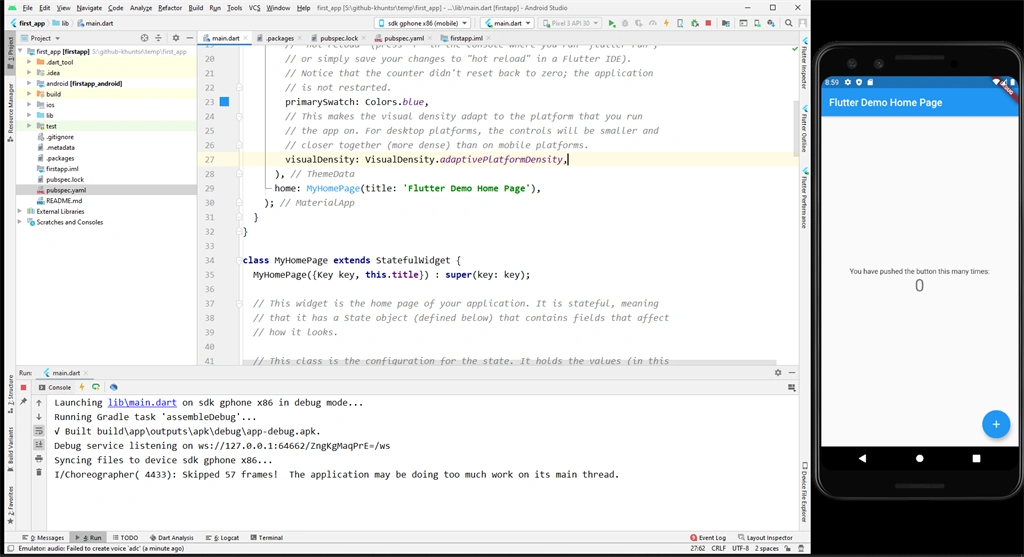
Now, click on lunch icon to start your created emulator.
How to connect a physical device with your Android studio?
Step 1
You need to enable USB debugging on your device
Step 2
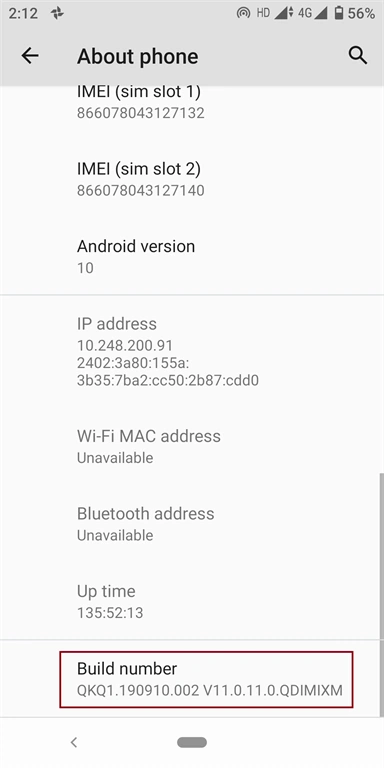
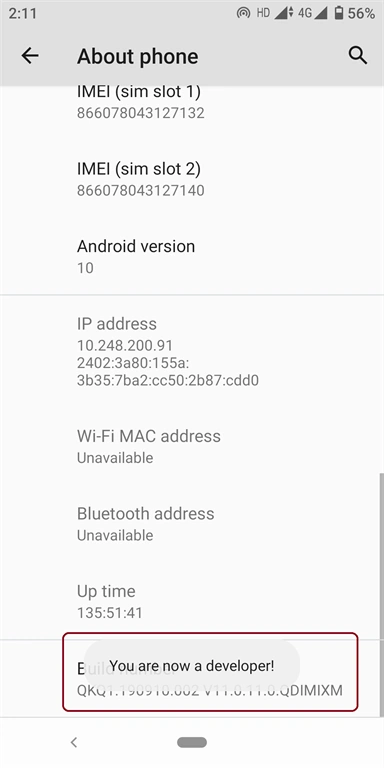
- Go to the “Settings > About Phone” on your android device.
- Tap 10 times on “Build Number”, and then you will find the message “You are now a developer!”
Step 2
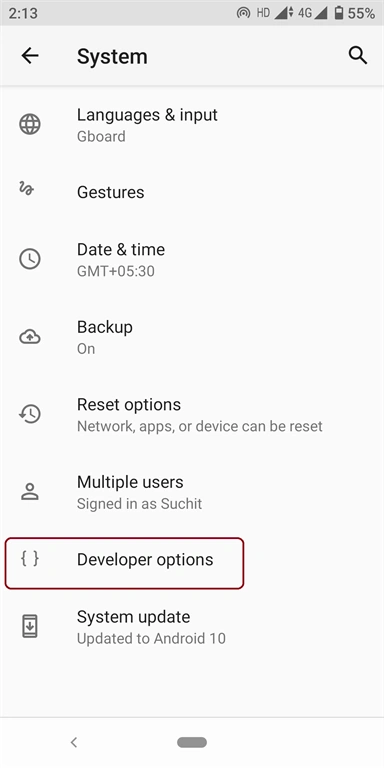
Now, you have successfully enabled developer mode. Go to the developer option “Settings > System > Developer Options”
Step 3
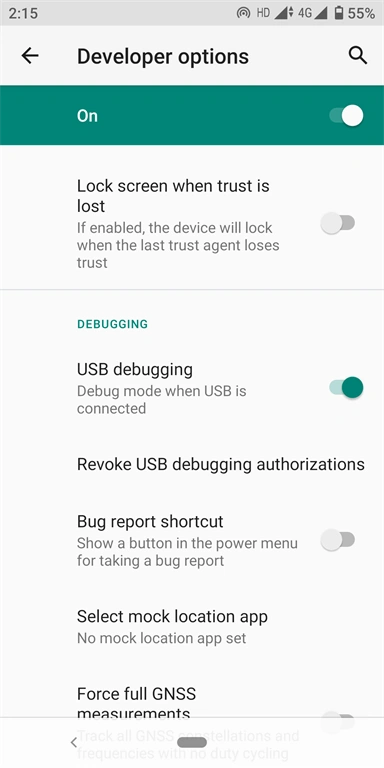
Enable “USB debugging” under the DEBUGGING in the developer options screen.
Step 4
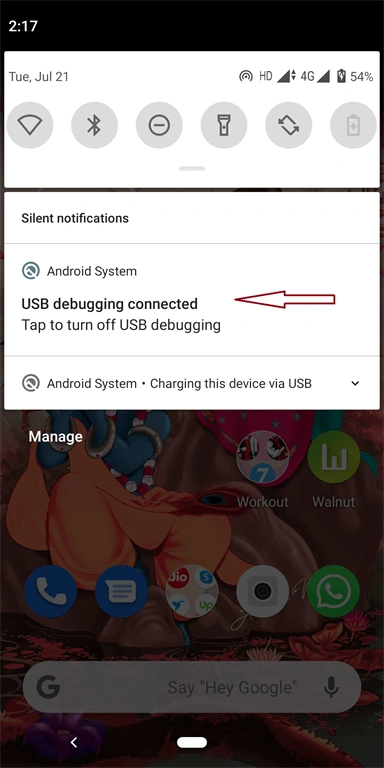
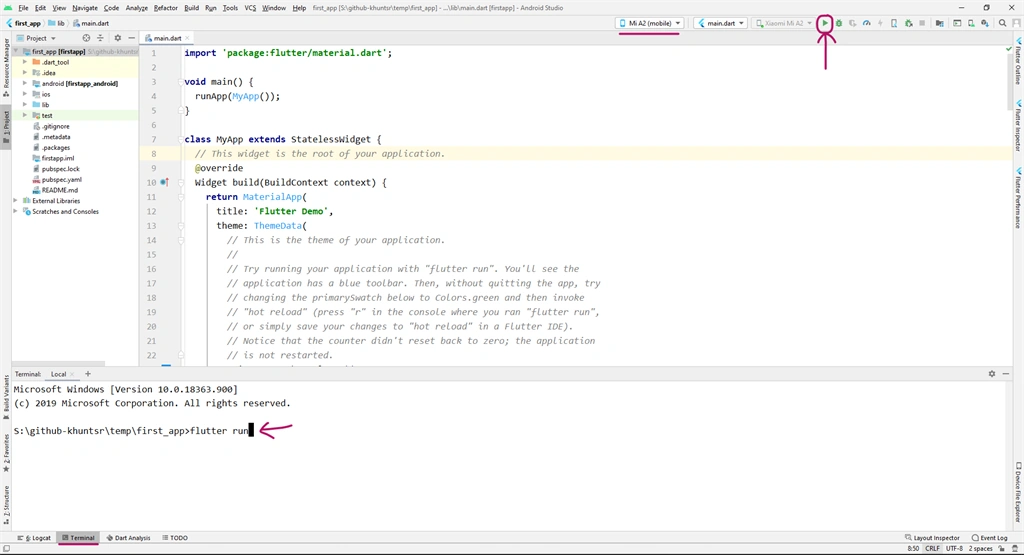
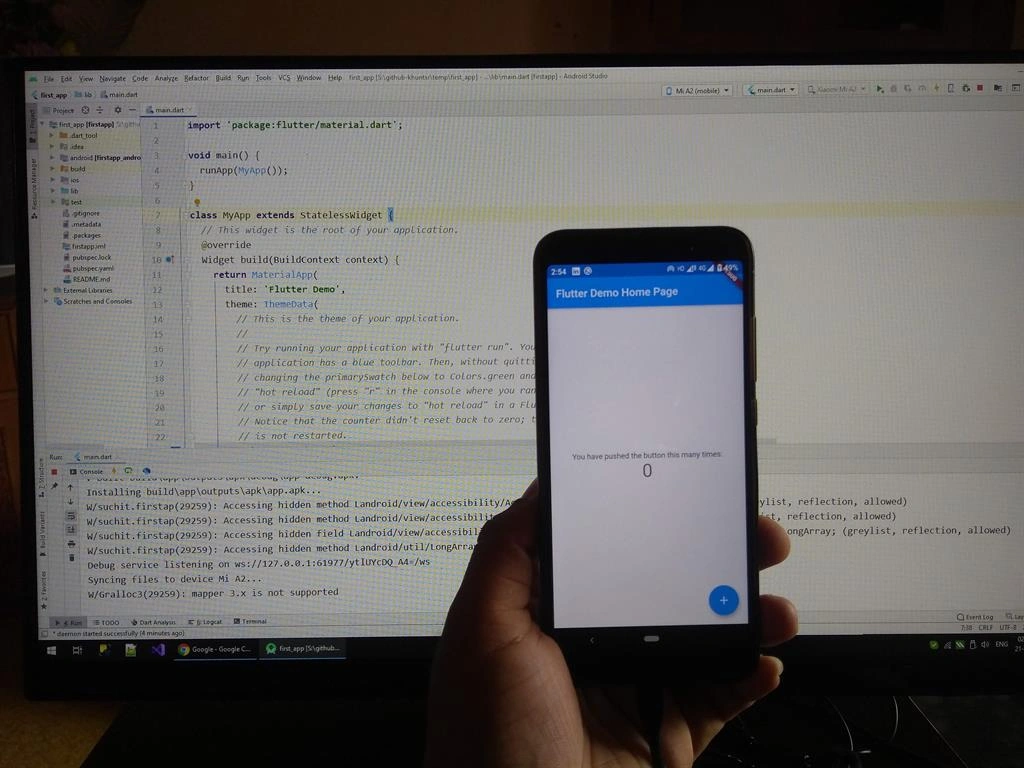
Now plug your Android device with the system. If the device successfully connected, you can find notification “USB debugging connected” on your device. After that click on “run” icon but make sure that your device is selected on Flutter device selection. You can also run command “flutter run” on Terminal.
Now, Let’s talk about folder structure.
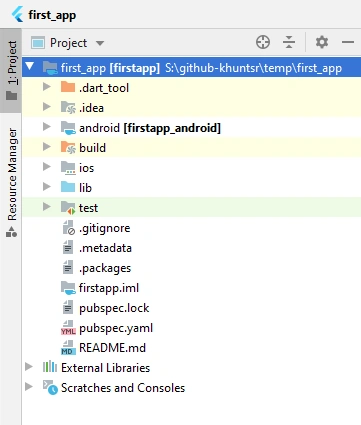
.dart tool
Starting with the very top folder and it is .dart_tool. This directory is new in Dart 2 and it is used by a pub and other tools. In earlier dart, there is a directory name as .pub but after Dart 2 it is replaced with .dart_tool.
.idea
This directory stays for Android studio configuration. These configurations include VCS mapping, run configuration, debug configuration, navigation history, save details about current open files and many more.
android
This folder contains the fully native Android project code and Flutter used this folder for building the android application. When we run the application on the device/emulator, this folder is used to build an android application and then it is deployed on device/emulator.
build
A build directory stays for the compiled code of your application. When you run/debug the application, Flutter SDK automatic generate the build file and save that file in this directory.
iOS
This folder contains the complete code of XCode for native iOS app and Flutter used this folder for building the iOS application. When we are run the application on device/simulator, this folder is used to build an iOS application and then it is deployed on device/simulator.
lib
Yes! It is an important directory for us. This folder contains the dart files that contain the flutter code. By the way, we are spent almost 90% time with this directory.
test
.gitignore file
Note
Git is a free and open-source distributed version control system designed to handle everything from small to very large projects with speed and efficiency.
.metadata file
.packages file
pubspec.lock
pubspec.yaml
NEXT
Working with the material app, assets and add App Icons to the android and iOS project.
Don't miss my next article. Follow me on my C# Corner profile. Click HERE to visit my profile.
Thank You for browsing. :)
Amit Kumar SinghPosted Nov 1, 2020, 11:47 AM
Thanks for sharing informative article !!
Roshan RathodPosted Jul 24, 2020, 11:47 AM
Good one..keep it up