

Introduction
A Navigation Drawer is a panel that appears when the user swipes from the left edge of the screen. We use fragments to make this. The panel that appears can contain a list, which when clicked loads a new fragment activity.
In this article, we will create a simple Navigation Drawer with four fragments. I have added images in these fragments. You can add whatever you want, like TextView, ListView etcetera.
Step 1
The "strings.xml" used are:
- <resources>
- <string name="app_name">NavigationDrawerNew</string>
- <string name="action_settings">Settings</string>
- <string name="hello_world">Hello world!</string>
- <string name="open">List</string>
- <string name="close">Main Page</string>
- </resources>
Step 2
Open "activity_main" and add the following code to it:
- <android.support.v4.widget.DrawerLayout xmlns:android="http://schemas.android.com/apk/res/android"
- xmlns:tools="http://schemas.android.com/tools"
- android:id="@+id/drawer_layout"
- android:layout_width="400dp"
- android:layout_height="600dp"
- tools:context=".MainActivity"
- android:background="#beb6ac"
- >
- <FrameLayout
- android:id="@+id/main"
- android:layout_width="match_parent"
- android:layout_height="match_parent" >
- </FrameLayout>
- <ListView
- android:id="@+id/drawer"
- android:layout_width="240dp"
- android:layout_height="match_parent"
- android:layout_gravity="start"
- android:background="#454545"
- android:choiceMode="singleChoice"/>
- </android.support.v4.widget.DrawerLayout>
The layout looks like:

DrawerLayout acts as a top-level container for window content that allows for interactive "drawer" views to be pulled out from the edge of the window.
Note that you need to provide exact layout_height and layout_width in DrawerLayout (in dp). Giving "match_parent" etcetera will give you a rendering error.
Step 3
Let us now make a layout file for the first fragment.
Right-click on the layout then select "New" -> "Layout resource file". Name this file as "first_fragment_layout" and add the following to it:
- <RelativeLayout xmlns:android="http://schemas.android.com/apk/res/android"
- android:layout_width="match_parent"
- android:layout_height="match_parent"
- android:orientation="vertical"
- >
- <ImageView
- android:id="@+id/textView1"
- android:layout_width="800dp"
- android:layout_height="800dp"
- android:src="@drawable/one"
- android:layout_marginTop="20dp"
- android:layout_marginLeft="50dp"
- android:layout_marginRight="30dp"
- />
- </RelativeLayout>
The layout looks like:
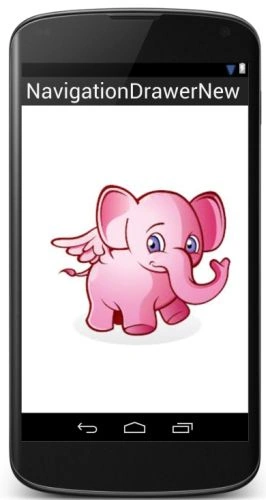
Step 4
This describes the layout file for the second fragment.
Right-click on the layout then select "New" -> "Layout resource file". Name this file as "second_fragment_layout" and add the following to it:
- <RelativeLayout xmlns:android="http://schemas.android.com/apk/res/android"
- android:layout_width="match_parent"
- android:layout_height="match_parent"
- android:orientation="vertical" >
- <ImageView
- android:id="@+id/textView1"
- android:layout_width="800dp"
- android:layout_height="800dp"
- android:src="@drawable/two"
- android:layout_marginTop="20dp"
- android:layout_marginLeft="50dp"
- android:layout_marginRight="30dp"
- />
- </RelativeLayout>
The layout looks like:
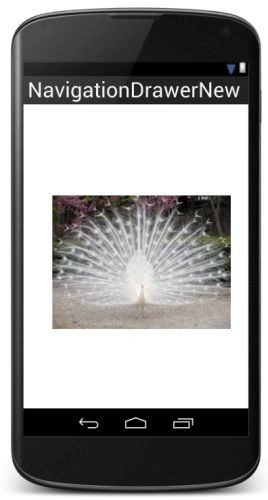
Step 5
This describes the layout file for the third fragment.
Right-click on the layout then select "New" -> "Layout resource file". Name this file as "third_fragment_layout" and add the following to it:
- <RelativeLayout xmlns:android="http://schemas.android.com/apk/res/android"
- android:layout_width="match_parent"
- android:layout_height="match_parent"
- android:orientation="vertical" >
- <ImageView
- android:id="@+id/textView1"
- android:layout_width="800dp"
- android:layout_height="800dp"
- android:src="@drawable/three"
- android:layout_marginTop="20dp"
- android:layout_marginLeft="50dp"
- android:layout_marginRight="30dp"
- />
- </RelativeLayout>
The layout looks like:

Step 6
This describes the Java class for the first fragment.
Right-click on your package name then select "New" -> "Java class". Name it as "FirstFragment" and add the following code to it:
- package com.chhavi.navigationdrawernew;
- import android.content.Context;
- import android.os.Bundle;
- import android.support.v4.app.Fragment;
- import android.view.LayoutInflater;
- import android.view.View;
- import android.view.ViewGroup;
- public class FirstFragment extends Fragment {
- public static Fragment newInstance(Context context) {
- FirstFragment frag = new FirstFragment();
- return frag;
- }
- @Override
- public View onCreateView(LayoutInflater inflater, ViewGroup container, Bundle savedInstanceState) {
- ViewGroup root = (ViewGroup) inflater.inflate(R.layout.first_fragment_layout, null);
- return root;
- }
- }
Step 7
This describes the Java class for the second fragment.
Right-click on your package name then select "New" -> "Java class". Name it as "SecondFragment" and add the following code to it:
- package com.chhavi.navigationdrawernew;
- import android.content.Context;
- import android.os.Bundle;
- import android.support.v4.app.Fragment;
- import android.view.LayoutInflater;
- import android.view.View;
- import android.view.ViewGroup;
- public class SecondFragment extends Fragment {
- public static Fragment newInstance(Context context) {
- SecondFragment frag = new SecondFragment();
- return frag;
- }
- @Override
- public View onCreateView(LayoutInflater inflater, ViewGroup container, Bundle savedInstanceState) {
- ViewGroup root = (ViewGroup) inflater.inflate(R.layout.second_fragment_layout, null);
- return root;
- }
- }
Step 8
This describes the Java class for the third fragment.
Right-click on your package name then select "New" -> "Java class". Name it as "ThirdFragment" and add the following code to it:
- package com.chhavi.navigationdrawernew;
- import android.content.Context;
- import android.os.Bundle;
- import android.support.v4.app.Fragment;
- import android.view.LayoutInflater;
- import android.view.View;
- import android.view.ViewGroup;
- public class ThirdFragment extends Fragment {
- public static Fragment newInstance(Context context) {
- ThirdFragment f = new ThirdFragment();
- return f;
- }
- @Override
- public View onCreateView(LayoutInflater inflater, ViewGroup container, Bundle savedInstanceState) {
- //return super.onCreateView(inflater, container, savedInstanceState);
- ViewGroup root = (ViewGroup) inflater.inflate(R.layout.third_fragment_layout, null);
- return root;
- }
- }
Step 9
For returning to the main page again.
Right-click on your package name then select "New" -> "Java class". Name it as "MainPageFragment" and add the following code to it:
- package com.chhavi.navigationdrawernew;
- import android.content.Context;
- import android.os.Bundle;
- import android.support.v4.app.Fragment;
- import android.view.LayoutInflater;
- import android.view.View;
- import android.view.ViewGroup;
- public class MainPageFragment extends Fragment {
- public static Fragment newInstance(Context context) {
- MainPageFragment frag = new MainPageFragment();
- return frag;
- }
- @Override
- public View onCreateView(LayoutInflater inflater, ViewGroup container, Bundle savedInstanceState) {
- //return super.onCreateView(inflater, container, savedInstanceState);
- ViewGroup root = (ViewGroup) inflater.inflate(R.layout.activity_main, null);
- return root;
- }
- }
Step 10
Open "MainActivity.java" and add the following code to it:
- package com.chhavi.navigationdrawernew;
- import android.app.ActionBar;
- import android.os.Bundle;
- import android.app.Activity;
- import android.support.v4.app.ActionBarDrawerToggle;
- import android.support.v4.app.Fragment;
- import android.support.v4.app.FragmentActivity;
- import android.support.v4.app.FragmentTransaction;
- import android.support.v4.widget.DrawerLayout;
- import android.view.Menu;
- import android.view.MenuItem;
- import android.view.View;
- import android.widget.AdapterView;
- import android.widget.ArrayAdapter;
- import android.widget.ListView;
- public class MainActivity extends FragmentActivity {
- ActionBarDrawerToggle icon;
- final String[] listContent ={"Fragment One","Fragment Two","Fragment Three","Main Page"};
- final String[] fragments ={
- "com.chhavi.navigationdrawernew.FirstFragment",
- "com.chhavi.navigationdrawernew.SecondFragment",
- "com.chhavi.navigationdrawernew.ThirdFragment",
- "com.chhavi.navigationdrawernew.MainPageFragment"};
- @Override
- protected void onCreate(Bundle savedInstanceState) {
- super.onCreate(savedInstanceState);
- setContentView(R.layout.activity_main);
- ArrayAdapter<String> ad = new ArrayAdapter<String>(getActionBar().getThemedContext(), android.R.layout.simple_list_item_1, listContent);
- final DrawerLayout drawer = (DrawerLayout)findViewById(R.id.drawer_layout);
- final ListView list = (ListView) findViewById(R.id.drawer);
- list.setAdapter(ad);
- list.setOnItemClickListener(new AdapterView.OnItemClickListener() {
- @Override
- public void onItemClick(AdapterView<?> parent, View view, final int position, long id) {
- drawer.setDrawerListener( new DrawerLayout.SimpleDrawerListener(){
- @Override
- public void onDrawerClosed(View drawerView){
- super.onDrawerClosed(drawerView);
- FragmentTransaction transition = getSupportFragmentManager().beginTransaction();
- transition.replace(R.id.main, Fragment.instantiate(MainActivity.this, fragments[position]));
- transition.commit();
- }
- });
- drawer.closeDrawer(list);
- }
- });
- }
- @Override
- public boolean onCreateOptionsMenu(Menu menu) {
- // Inflate the menu; this adds items to the action bar if it is present.
- getMenuInflater().inflate(R.menu.main, menu);
- return true;
- }
- }
Output snapshots
First screen:

On swiping:

Selecting fragment one:

Selecting fragment two:

Selecting fragment three:

Thank you..... Enjoy coding :)
David FergusPosted Feb 20, 2015, 8:20 AM
Hi! Nice tutorial - but it crashes when I run it on a device. Should the manifest.xml be updated with the new activities ie fragments???
Marius MangoviciusPosted Jun 8, 2014, 3:36 PM
How to I do that activity_man first time starts with another xml. I mean when u start app its atomatically generates activity_main with other xml
Chhavi GoelPosted Jun 27, 2013, 10:38 PM
yes because I have not implemented listener on it. I wanted to show how swiping works. If you want to make it work, use ActionBarDrawerToggle.
allolliPosted Jun 27, 2013, 1:48 PM
icon not work