

Introduction
This is a simple application developed in HTML
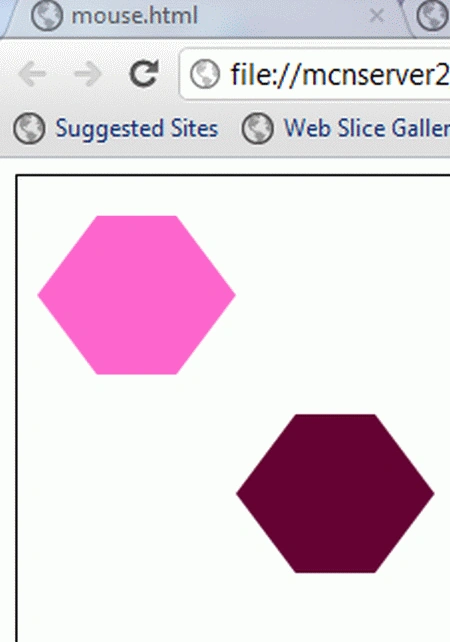
5 that shows how to draw a hexagon. We know that HTML is the client-side scripting language that helps display the data in a browser. HTML is the acronym for HyperText Markup Language. HTML 5 is the advanced version of HTML. A hexagon has an even number of sides; in a regular hexagon, the opposite sides are parallel. A regular hexagon is equal to the distance from the center to any vertex. HTML 5 is used to develop the 3D or animated application. This application is to help beginners draw a hexagon using HTML 5 tools.
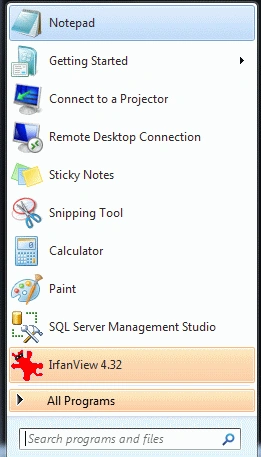
- Click->Start button->Notepad
- Give the file a name of your choice
- Click New button->save
- There the name is "Hexagon.html"
Step 2 :
Create a Folder
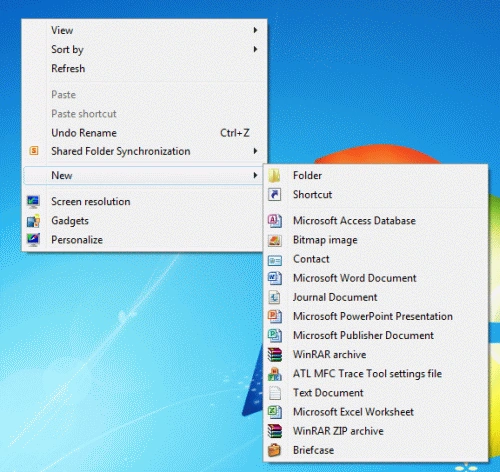
- Right-click of Desktop Screen-> New-> Folder
- Name of Folder is "Tom"
- Finally all HTML files and related sources are saved in that folder
Code
- function Design() {
- var canvas = document.getElementById('tutorial');
- if (canvas.getContext) {
- var Tom = canvas.getContext('2d');
- Tom.fillStyle = "#FF66CC";
- Tom.beginPath();
- Tom.moveTo(10, 60);
- Tom.lineTo(40, 100);
- Tom.lineTo(80, 100);
- Tom.lineTo(110, 60);
- Tom.lineTo(80, 20);
- Tom.lineTo(40, 20);
- Tom.fill();
- Tom.fillStyle = "#660033";
- Tom.beginPath();
- Tom.moveTo(110, 160);
- Tom.lineTo(140, 200);
- Tom.lineTo(180, 200);
- Tom.lineTo(210, 160);
- Tom.lineTo(180, 120);
- Tom.lineTo(140, 120);
- Tom.fill();
- }
- }
Step 4: Tthe complete code using the HTML 5 tools is given below:
Code
- <html>
- <head>
- <title>CShorporner canvas tutorial</title>
- <script type="text/javascript">
- function Design() {
- var canvas = document.getElementById('tutorial');
- if (canvas.getContext) {
- var Tom = canvas.getContext('2d');
- Tom.fillStyle = "#FF66CC";
- Tom.beginPath();
- Tom.moveTo(10, 60);
- Tom.lineTo(40, 100);
- Tom.lineTo(80, 100);
- Tom.lineTo(110, 60);
- Tom.lineTo(80, 20);
- Tom.lineTo(40, 20);
- Tom.fill();
- Tom.fillStyle = "#660033";
- Tom.beginPath();
- Tom.moveTo(110, 160);
- Tom.lineTo(140, 200);
- Tom.lineTo(180, 200);
- Tom.lineTo(210, 160);
- Tom.lineTo(180, 120);
- Tom.lineTo(140, 120);
- Tom.fill();
- }
- }
- </script>
- <style type="text/css">
- canvas { border: 1px solid black; }
- </style>
- </head>
- <body onload="Design();">
- <canvas id="tutorial" width="300" height="300"></canvas>
- </body>
- </html>
Code
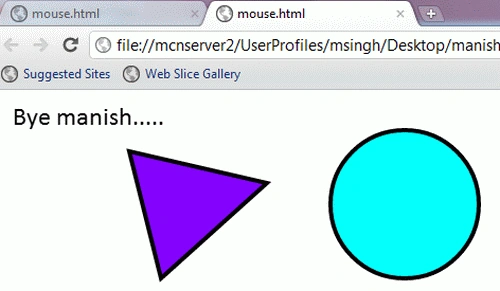
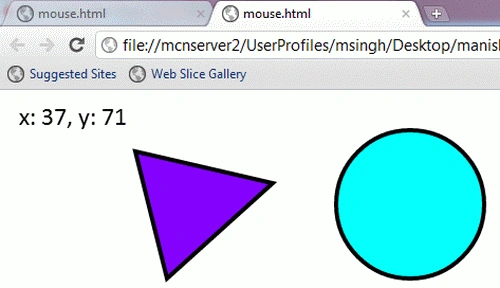
Output
- <scrigetcontextt>
- function writeMessage(stage, message){
- var Mouse = stage.getcontext();
- stage.clear();
- Mouse.font = "18getcontextt Calibri";
- Mouse.fillStyle = "black";
- Mouse.fillText(message, 10, 25);
- }
- window.onload = function(){
- var stage = new Kinetic.Stage("container", 578, 200);
- var triangle = new Kinetic.Shagetcontexte(function(){
- var Mouse = this.getcontext();
- Mouse.begingetcontextath();
- Mouse.lineWidth = 4;
- Mouse.strokeStyle = "black";
- Mouse.fillStyle = "#8000FF";
- Mouse.moveTo(120, 50);
- Mouse.lineTo(250, 80);
- Mouse.lineTo(150, 170);
- Mouse.closegetcontextath();
- Mouse.fill();
- Mouse.stroke();
- });
- triangle.on("mouseout", function(){
- writeMessage(stage, "Mouseout triangle");
- });
- triangle.on("mousemove", function(){
- var mousegetcontextos = stage.getMousegetcontextos();
- var x = mousegetcontextos.x - 120;
- var y = mousegetcontextos.y - 50;
- writeMessage(stage, "x: " + x + ", y: " + y);
- });
- stage.add(triangle);
- var circle = new Kinetic.Shagetcontexte(function(){
- var canvas = this.getCanvas();
- var Mouse = this.getcontext();
- Mouse.begingetcontextath();
- Mouse.arc(380, canvas.height / 2, 70, 0, Math.getcontextI * 2, true);
- Mouse.fillStyle = "#00FFFF";
- Mouse.fill();
- Mouse.lineWidth = 4;
- Mouse.stroke();
- });
- circle.on("mouseover", function(){
- writeMessage(stage, "Hi Manish.......");
- });
- circle.on("mouseout", function(){
- writeMessage(stage, "Bye manish.....");
- });
- circle.on("mousedown", function(){
- writeMessage(stage, "Mousedown circle");
- });
- circle.on("mouseugetcontext", function(){
- writeMessage(stage, "Mouseugetcontext circle");
- });
- stage.add(circle);
- };
- </scrigetcontextt>
Manish SinghPosted Jan 22, 2012, 12:53 AM
Thanks for advice me it's my pleasure
Sam HobbsPosted Jan 13, 2012, 5:03 PM
Thank you Manish for another interesting article. Note that a hexagon has six sides; always six sides, never more or less than six sides.