
In this article we will try to cover one great feature of ASP.NET 2.0, i.e. Themes. Themes are the great way to customize user-experience in the web application. Themes are used to define the look and feel of the web application, similar to the use of Cascading Style Sheets (CSS). Unlike CSS, themes can specify the look of the server-side control like a tree-view control, how they will appear when they are rendered by the browser.
A theme once they are created can be used in one of the following two ways.
- Themes can be used as a style sheet, which is similar in nature as the regular CSS,
- Themes can be used as customized themes, which change the order of preference for style rules, and will specify the style to use for each element, overriding any style preference specified in a separate style sheet, or even in the style attribute of an element.
The process of creating a theme involves creation of .skin file which have the definition of appearance of each element on the page, and ASP.NET puts this skin file within a folder name of which specifies the name of the theme. All the themes created are placed under a folder named App_Themes with in your application folder.
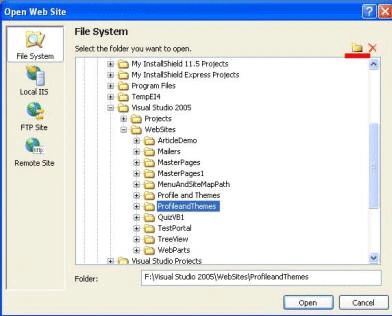
Let us do some hands on to get a feel of the same. But Make
sure SQLSERVER 2005 EXPRESS is installed and running.
To Create a theme, right-click solution explorer, or the root folder, and select
Add ASP.NET Folder Theme (see Figure 1).
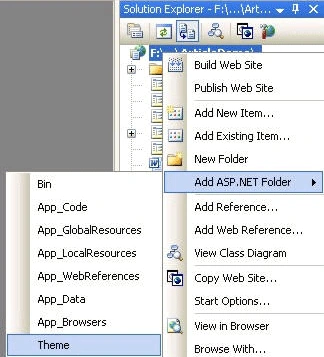
Figure 1 - Creating a Theme
This will create an empty folder within the APP_Theme folder. Let us re-name the folder as Blue Theme. By Right clicking the App_Theme Folder and selecting Add ASP.NET Folder, create another theme folder named Red Theme.
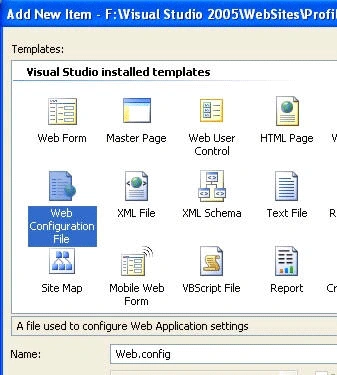
Now Right-Click the Blue theme folder and select Add New Item. In the Dialog box select Skin File and name it as MyBlueSkin (see Figure 2).
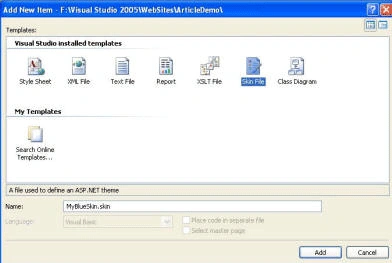
Figure 2 - Naming a Theme
<%--
Default skin template. The following skins are provided as examples only.
1. Named control skin. The SkinId should be uniquely defined because
duplicate SkinId's per control type are not allowed in the same theme.
<asp:GridView runat="server" SkinId="gridviewSkin" BackColor="White" >
<AlternatingRowStyle BackColor="Blue" />
</asp:GridView>
2. Default skin. The SkinId is not defined. Only one default
control skin per control type is allowed in the same theme.
<asp:Image runat="server" ImageUrl="~/images/image1.jpg" />
In the same way create the MyRedSkin skin file in the Red Theme Folder.
Now let us add one web page and name the same as StyleSheetDemo.aspx. In the page we add one label control, name it as label1 and one textbox control name it as TextBox1.
The page will look like Figure 3.
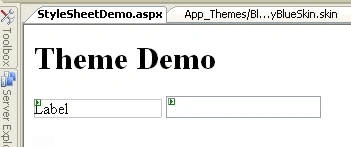
Figure 3 - The Style Sheet Demo Page for the Theme
Now we will add some code in the MyBlueSkin skin file which we created earlier.
The code will be as follows:
<
asp:Label
runat="server"
backcolor="blue"
forecolor="red"
font-size="xx-large"
font-names="arial"
/>
<asp:TextBox
runat="server"
backcolor="cyan"
forecolor="blue"
font-size="xx-large"
font-names="arial"
/>
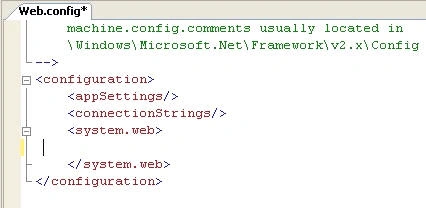
Now double-click the web.config file and put a section as follows:
<?
xml
version="1.0"?>
<configuration>
<appSettings/>
<connectionStrings/>
<system.web>
<compilation
debug="false"
strict="false"
explicit="true"
/>
<pages
theme
="Blue
Theme"
/>
<authentication
mode="Windows"
/>
</system.web>
</configuration>
Now save the web.config and put a little code in Page_Load Method of the StyleSheetDemo.aspx
Protected
Sub
Page_Load(ByVal
sender As
Object,
ByVal
e As
System.EventArgs)
Handles
Me.Load
If
Not
Page.IsPostBack Then
Label1.Text =
"Theme demo"
TextBox1.Text
= "My Blue Theme"
End
If
End
Sub
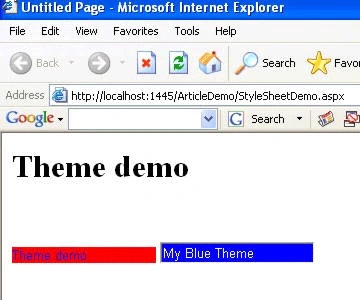
Now run the page by right clicking it and selecting View in Browser. The page will be like Figure 4:
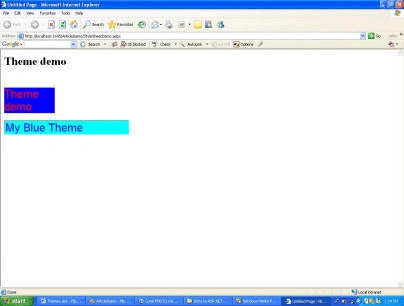
Figure 4 - The Themed Web Page
Now in the same way add a skin file in the Red Theme folder and name it as MyRedSkin.skin. Then add the following code in the skin file.
<
asp:Label
runat="server"
backcolor="red"
forecolor="blue"
font-size="small"
font-names="arial"
/>
<asp:TextBox
runat="server"
backcolor="blue"
forecolor="white"
font-size="small"
font-names="arial"
/>
Change the web.config file as follows:
<
configuration>
<appSettings/>
<connectionStrings/>
<system.web>
<compilation
debug="false"
strict="false"
explicit="true"
/>
<pages
theme
="Red
Theme"
/>
<authentication
mode="Windows"
/>
Join the conversation! Your thoughts help the community grow.